Michael James
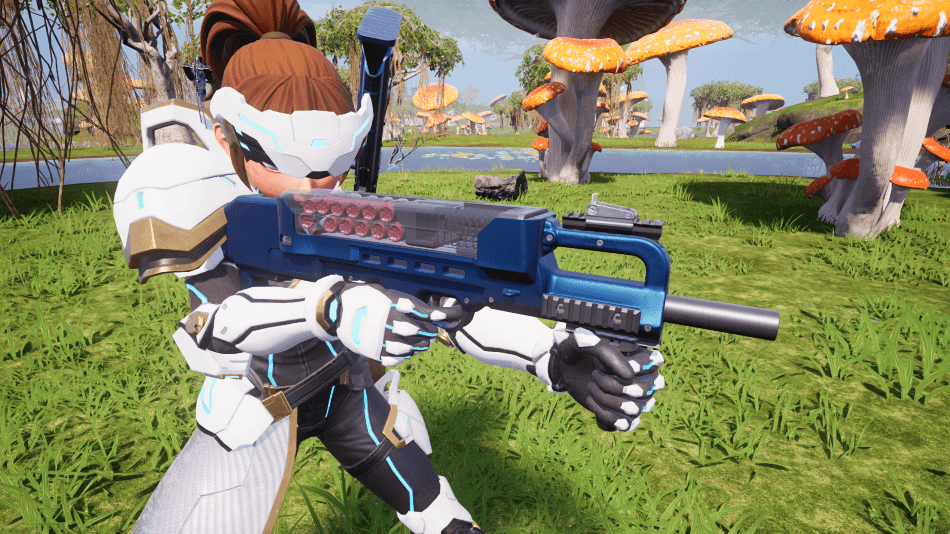
Palworld: How To Get Prototype Shotgun & Ammo
Sometimes the quickest way to end a confrontation is with a devastating blast that sends multiple slugs directly into your ...
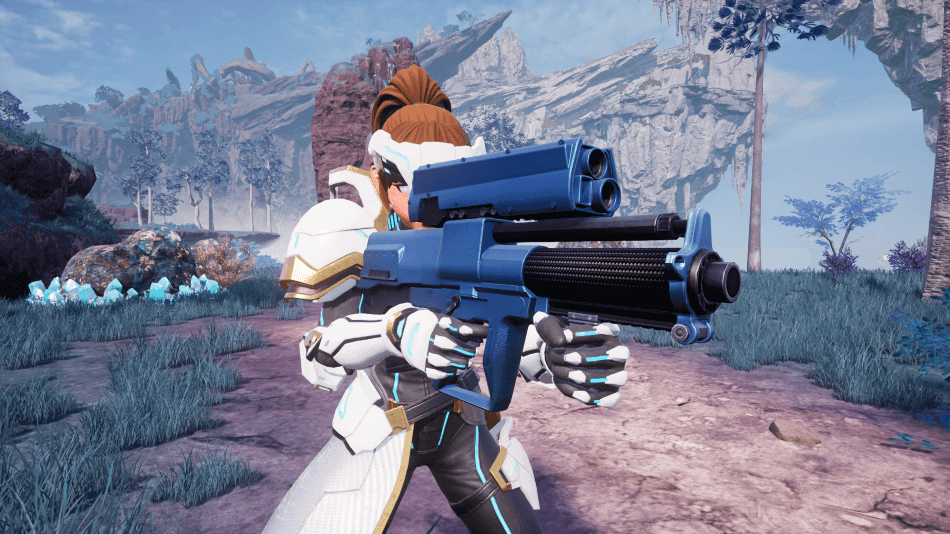
Palworld: How To Get Tactical Grenade Launcher & Ammo
Some enemies are simply easier to deal with using explosives, especially when they’re grouped together or constantly rushing your position. ...
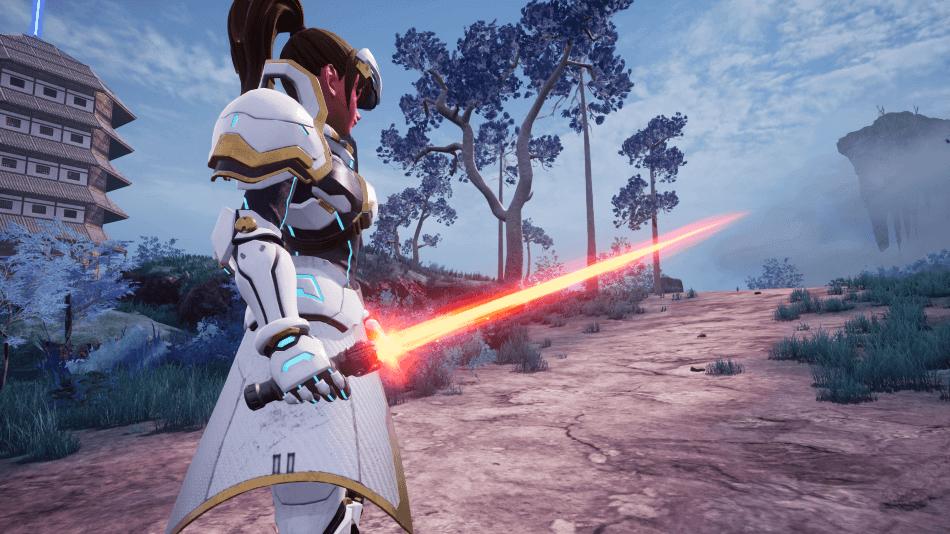
Palworld: How To Get Laser Sword
Traditional swords remain useful for close range combat, but the Laser Sword takes melee fighting to a completely different level ...
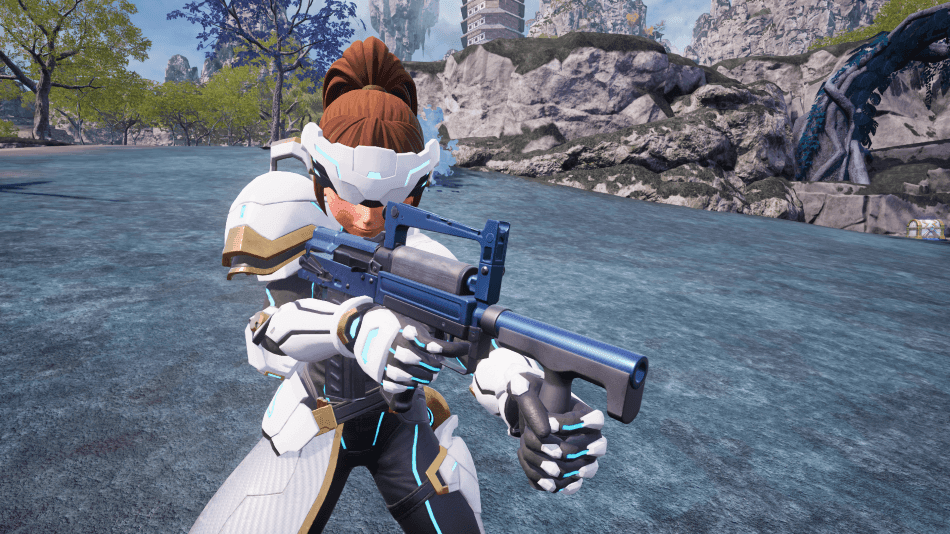
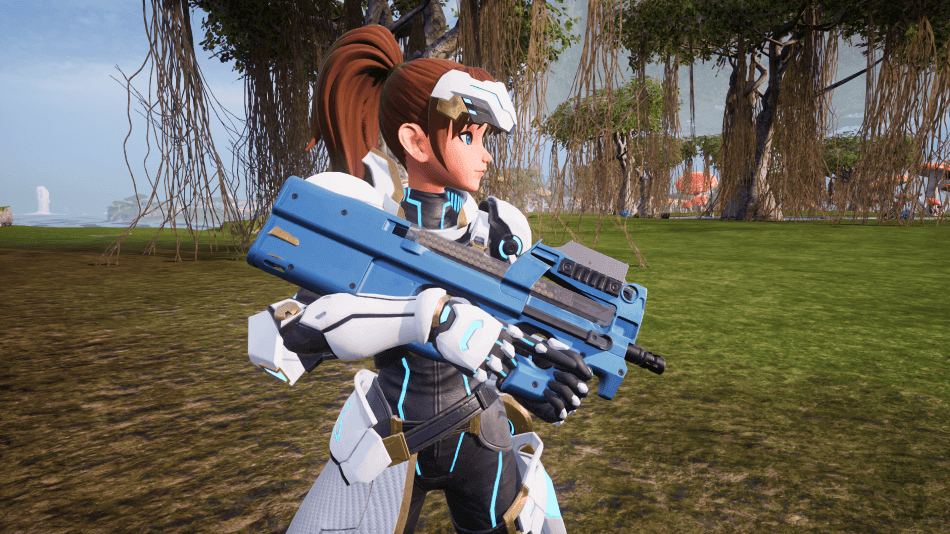
Palworld: How To Get Heavy Assault Rifle & Ammo
Some weapons specialize in a single role, but the Heavy Assault Rifle is built to perform well in almost every ...
Palworld: How To Get Combat SMG & Ammo
When a fight demands constant pressure instead of carefully aimed shots, few weapons can match the relentless performance of the ...

Palworld: How To Get Ancient Helm & Ancient Armor
As you begin taking on Palworld’s toughest enemies, having stronger equipment becomes just as important as bringing powerful weapons into ...
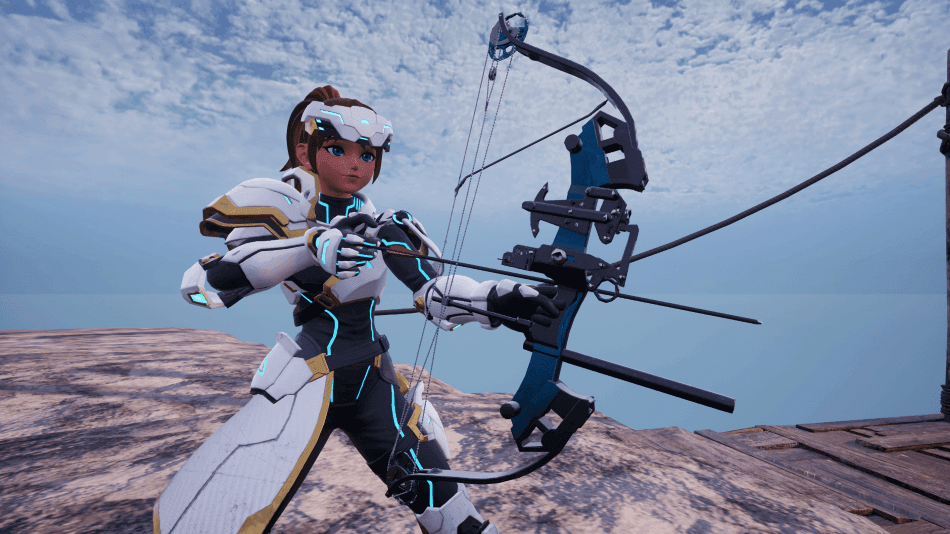
Palworld: How To Get Mechanical Bow & Ammo
Even after unlocking advanced firearms, there’s still one bow that remains capable of standing alongside Palworld’s strongest late game weapons. ...
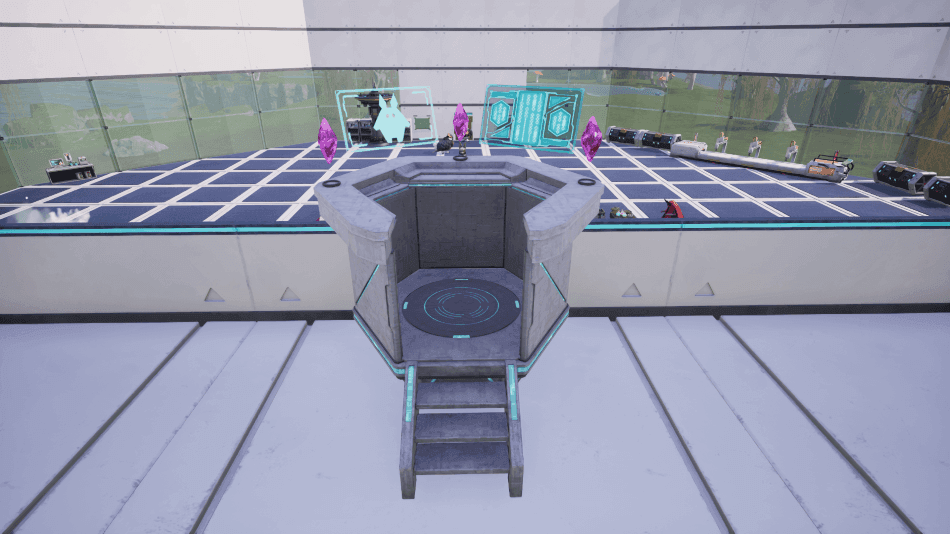
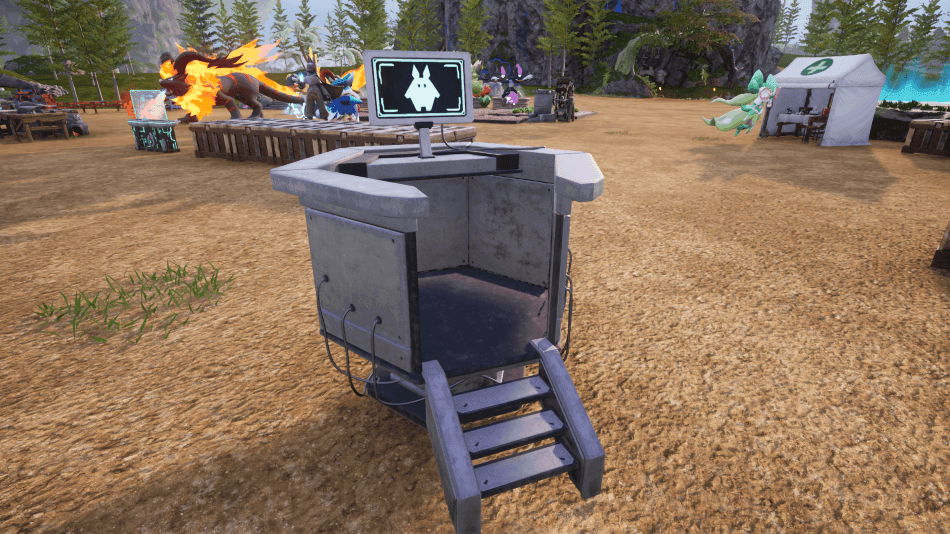
Palworld: How To Get & Use Ancient Monitoring Stand
Managing a busy endgame base becomes much more challenging once dozens of Pals are working across multiple production lines and ...
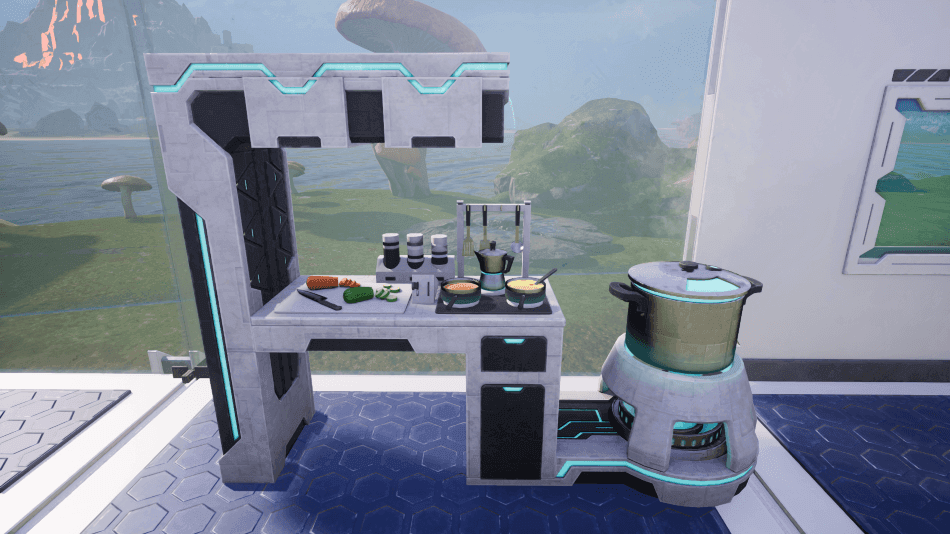
Palworld: How To Get & Use Ancient Kitchen
Preparing food becomes increasingly important during Palworld’s later stages, especially as your growing workforce and stronger Pals require a constant ...

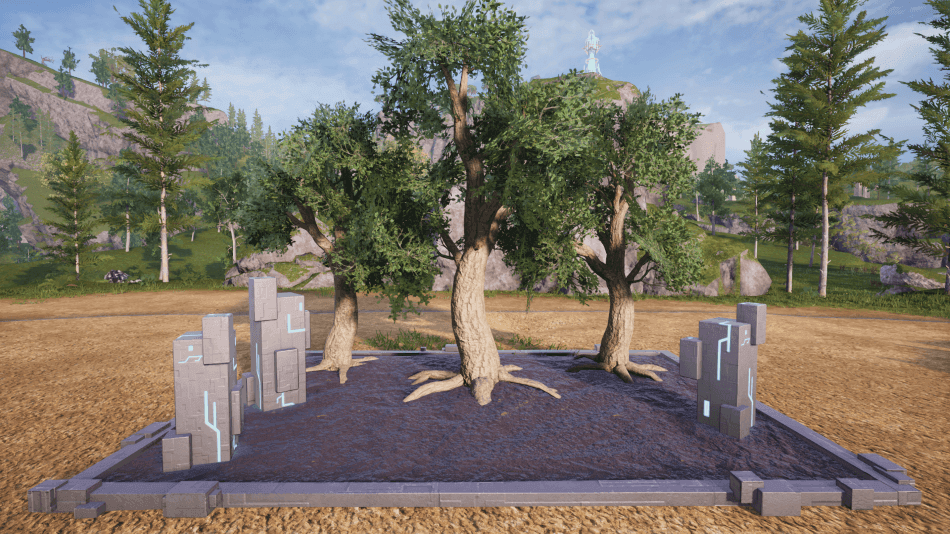
Palworld: How To Unlock & Build Ancient Structure Set
Progressing into Palworld’s endgame allows you to unlock some of the best items and structures available, including the Ancient Structure ...
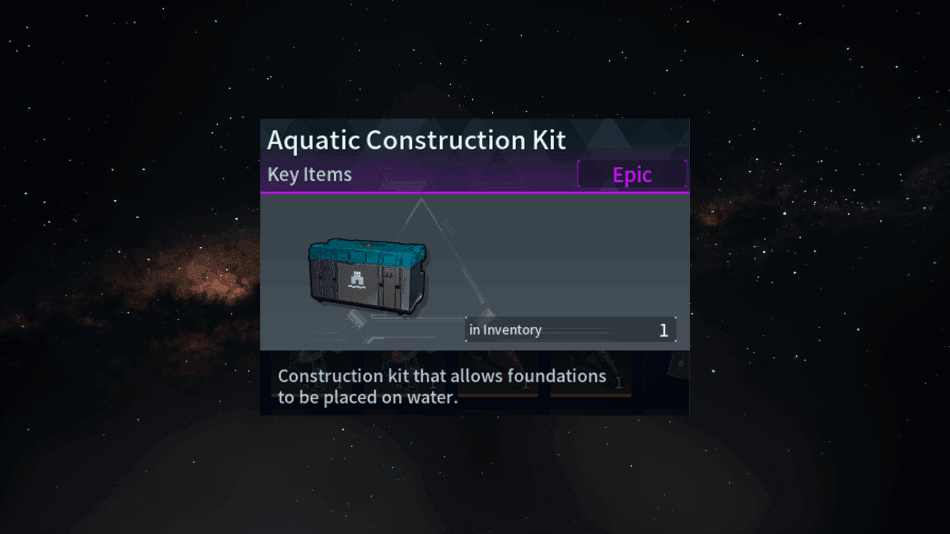
Palworld: How To Get Aquatic Construction Kit
Finding enough space to build a large base can become difficult as you continue expanding throughout Palworld, especially once most ...
Palworld: How To Build And Use Ancient Workbench
Crafting in Palworld eventually reaches a point where jumping between multiple workstations becomes both time consuming and unnecessary. The Ancient ...
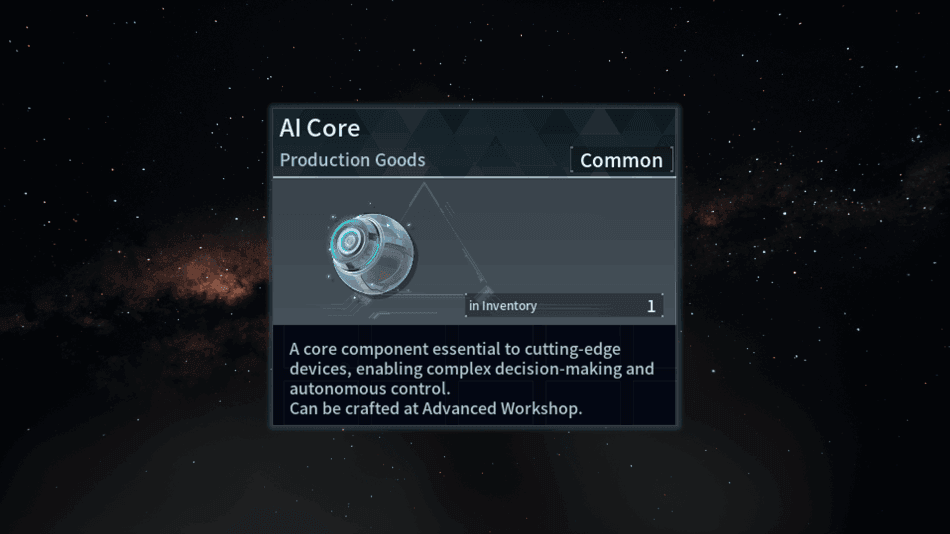
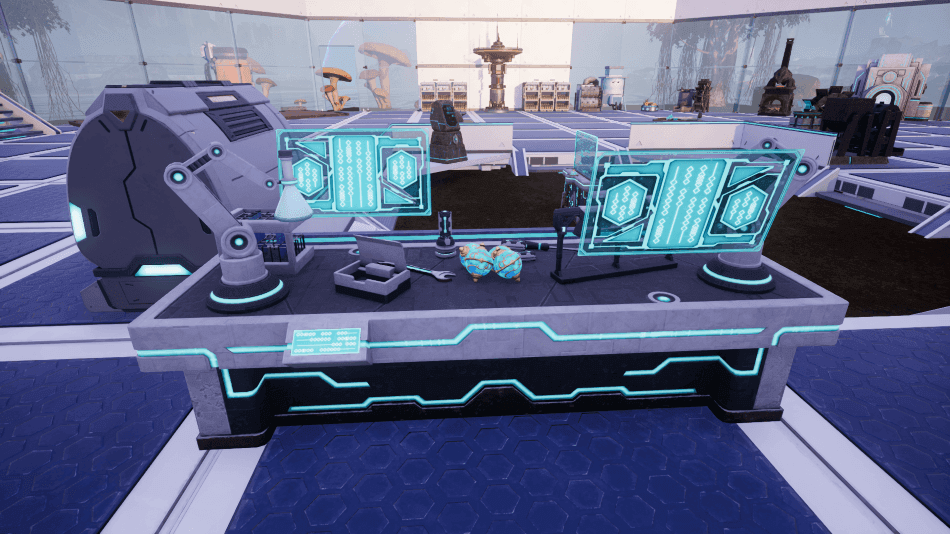
Palworld: AI Core (How to Get & Uses)
The further you progress into Palworld’s endgame, the more advanced crafting materials become necessary for unlocking the strongest equipment and ...
Palworld: Best Soralite Locations
If you have progressed into the late game stages of Palworld, Soralite is a resource you will want to start ...
Palworld: How To Get Sol Sphere
As you begin exploring Sunreach and encountering stronger Pals, lower tier Pal Spheres become much less effective and can make ...

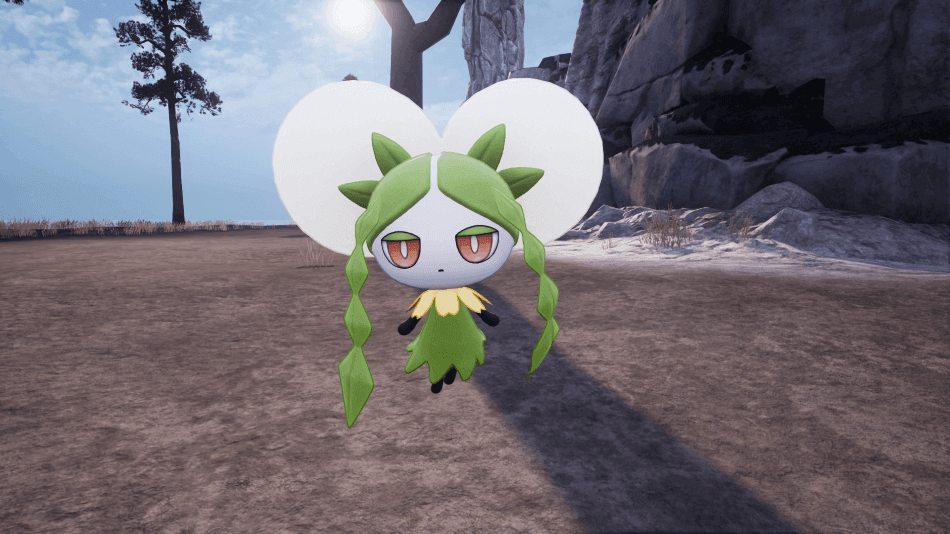
Wistella (Location, Drops, Uses, Partner Skill & Work Suitability): Palworld
Some Pals leave behind resources when they fall, but Wistella is said to leave behind something far more meaningful, with ...
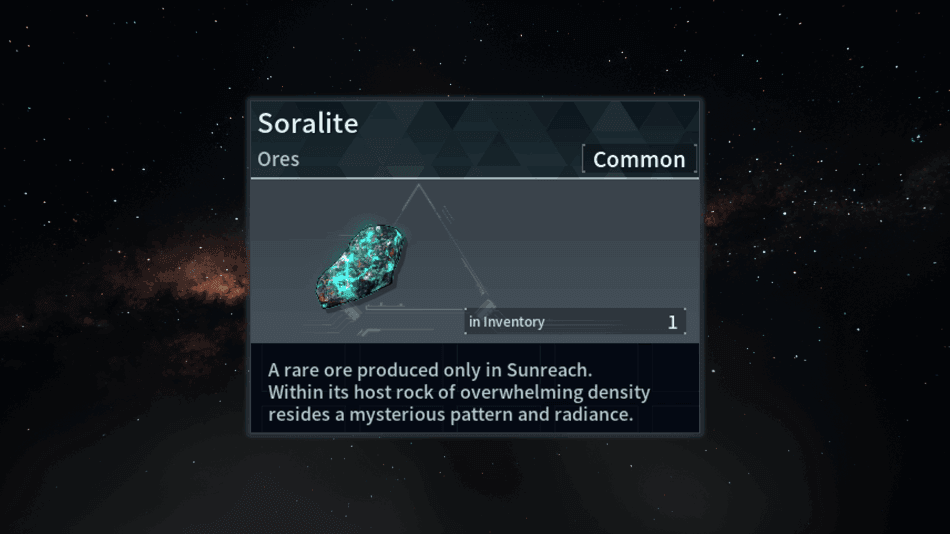
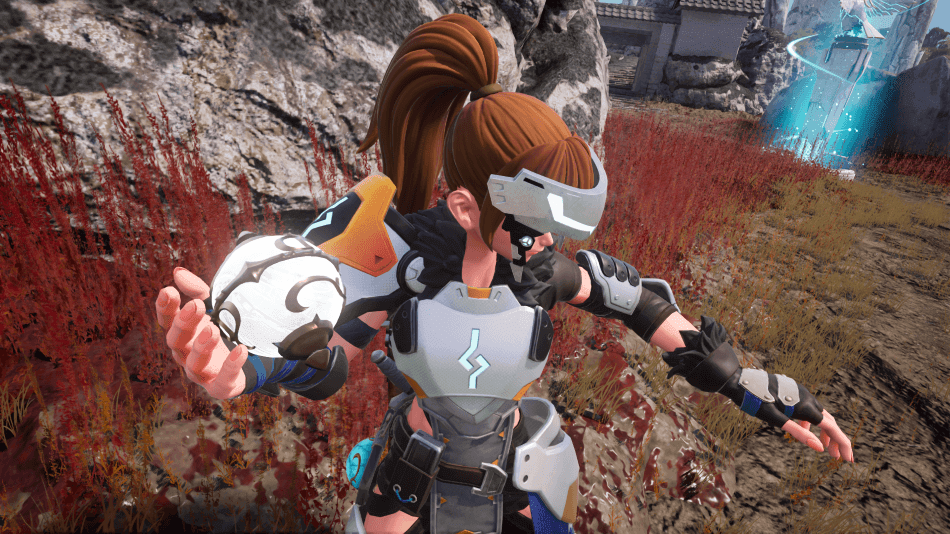
Palworld: How To Get Soralite
Different resources become available as you continue exploring, and upon reaching Sunreach, one of the rarest and most valuable ores ...
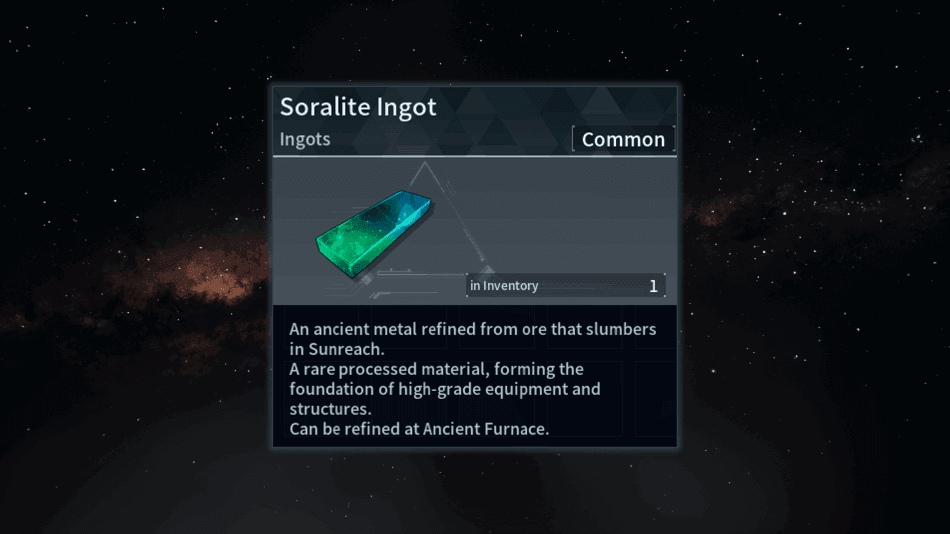
Palworld: How To Get Soralite Ingot
As you progress deeper into Palworld’s technology tree, raw materials alone are no longer enough, with many advanced recipes requiring ...

Palworld: Soralite Quarry (How To Build & Use)
Soralite is one of the most valuable late game materials in Palworld, but gathering enough of it normally means making ...

Palworld: Ancient Furnace (How To Build & Use)
As you reach Palworld’s endgame, regular furnaces begin to fall behind when it comes to producing the advanced materials required ...
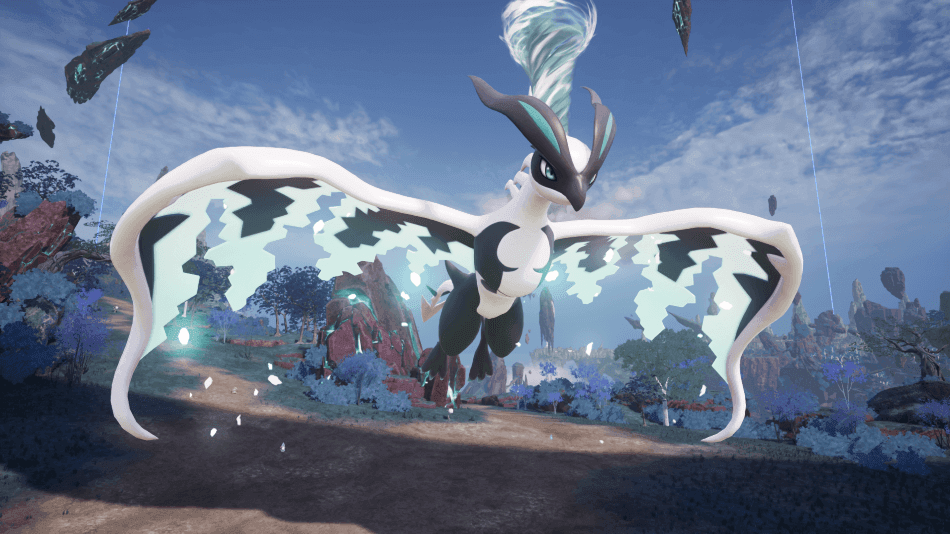
Eidrolon (Location, Drops, Uses, Partner Skill & Work Suitability): Palworld
Deep within the floating islands of Sunreach lies a newly discovered Pal that seems to have completely broken away from ...

Ophydia (Location, Drops, Uses, Partner Skill & Work Suitability): Palworld
Exploring Waterlily Gorge will eventually lead you to a powerful combination of flora and fauna hidden within the waters of ...

Palworld: Depresso Effigy (How To Get & Uses)
Status effects can become a real problem in Palworld, especially when fighting enemies that can repeatedly inflict conditions during longer ...
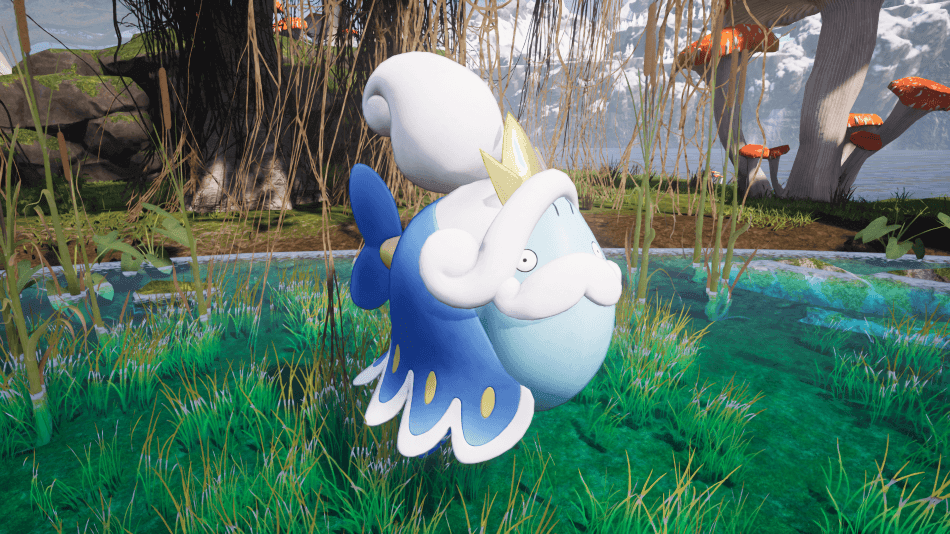
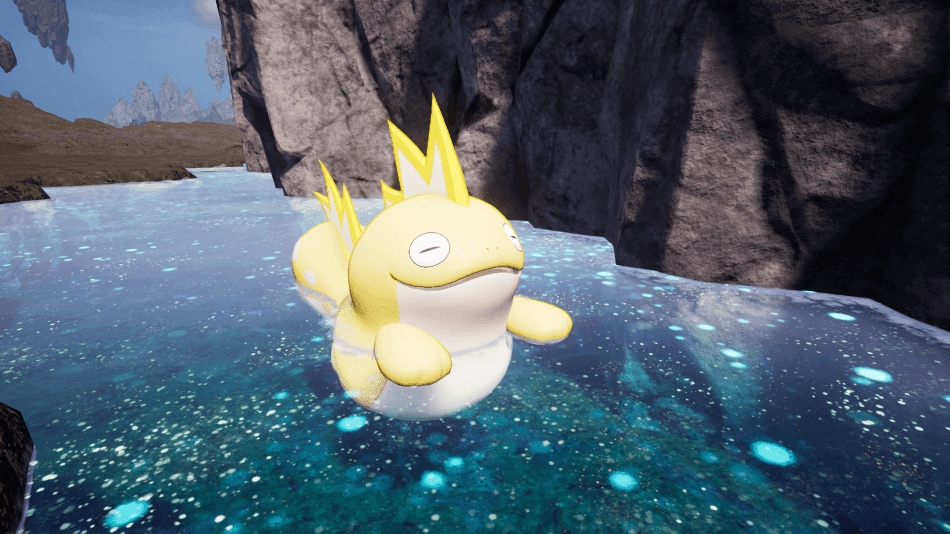
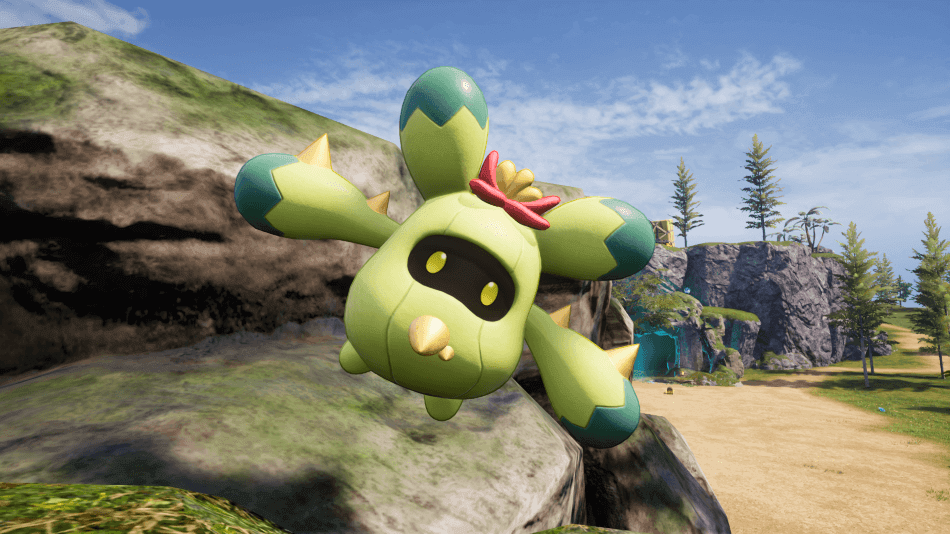
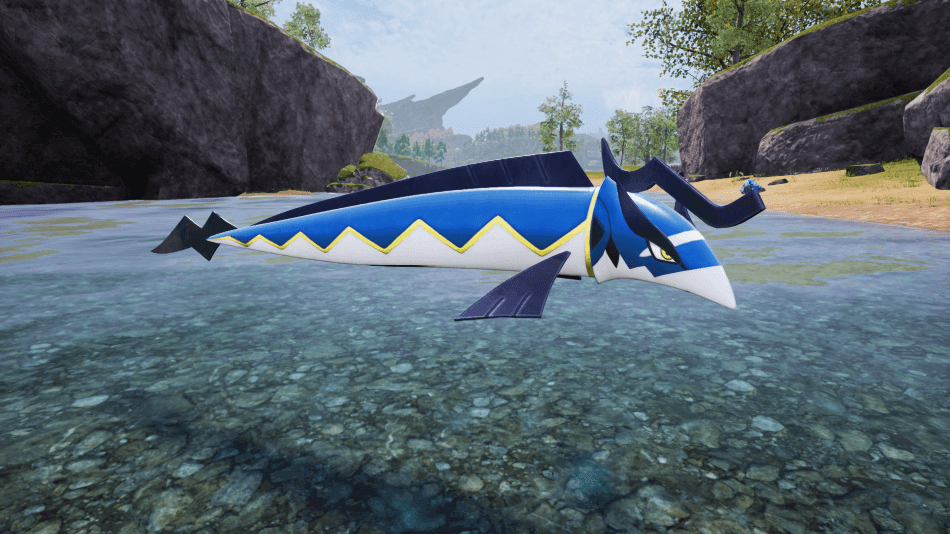
Solmora (Location, Drops, Uses, Partner Skill & Work Suitability): Palworld
Fishing can be a great way to find Pals you might not come across during normal exploration, but getting something ...
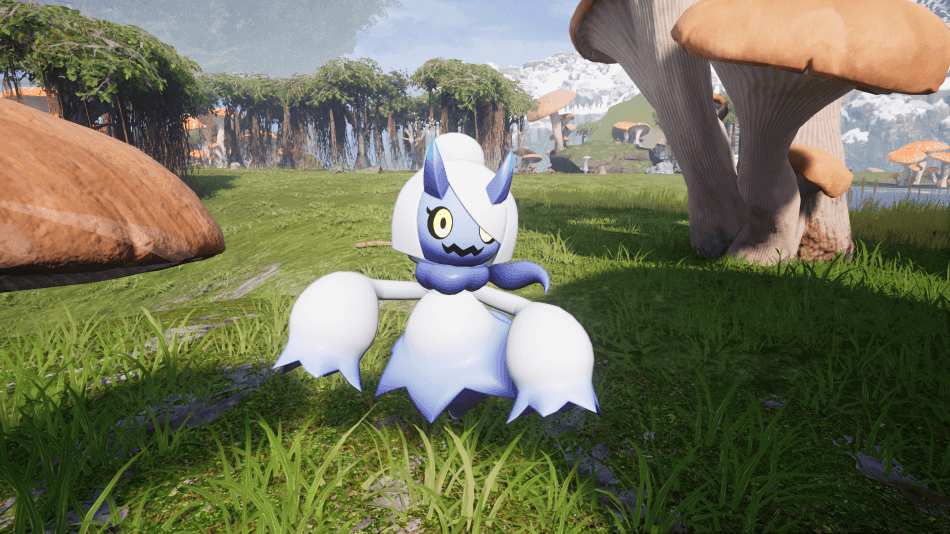
Bakemi (Location, Drops, Uses, Partner Skill & Work Suitability): Palworld
Bakemi is a Dark Pal that can be a surprisingly helpful addition to your party when you’re dealing with enemies ...
Snock (Location, Drops, Uses, Partner Skill & Work Suitability): Palworld
Snock is an Electric Pal that focuses on empowering your own attacks instead of dealing damage through a temporary combat ...
Valentail (Location, Drops, Uses, Partner Skill & Work Suitability): Palworld
Getting around Palworld isn’t always as simple as following a path, especially when you’re moving between floating islands with nothing ...
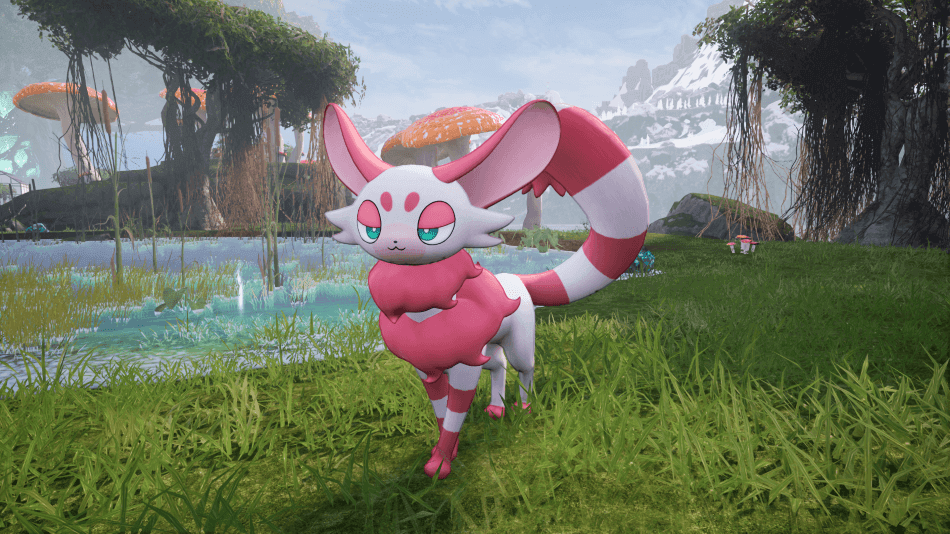
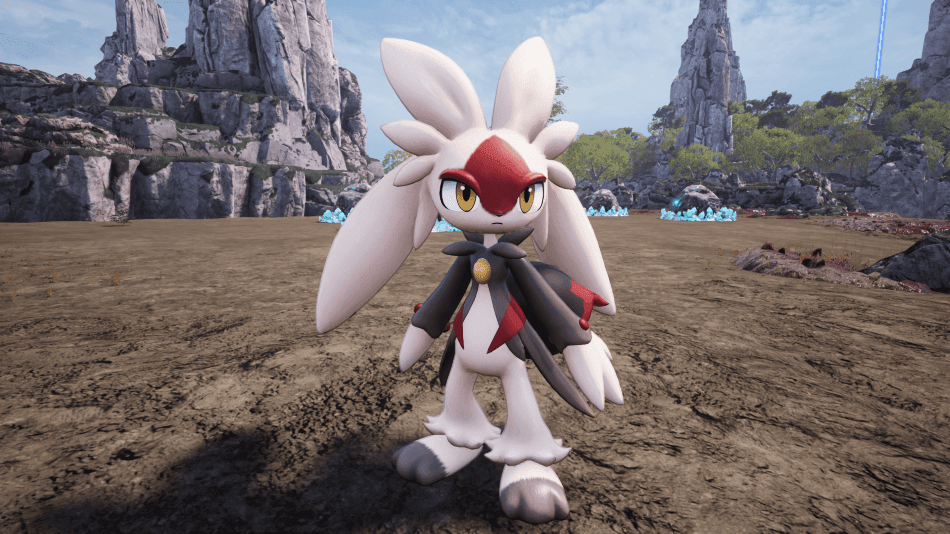
Flaracle (Location, Drops, Uses, Partner Skill & Work Suitability): Palworld
Flaracle is a Fire Pal that excels both in combat and working at your base, combining explosive offensive support with ...
Tropicaw (Location, Drops, Uses, Partner Skill & Work Suitability): Palworld
Tropicaw is a Grass Pal that focuses on survivability, making it easier to avoid damage by extending your dodge invincibility ...
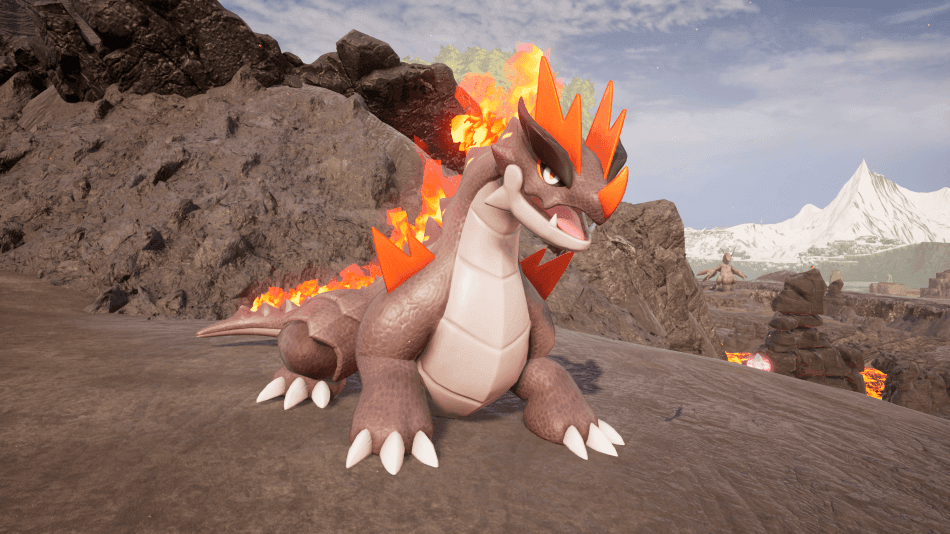
Knocklem Ignis (Location, Drops, Uses, Partner Skill & Work Suitability): Palworld
Knocklem Ignis is the Fire counterpart of Knocklem, replacing its original Ground attacks with powerful Fire techniques while becoming even ...
Tetroise Primo (Location, Drops, Uses, Partner Skill & Work Suitability): Palworld
Tetroise Primo takes a very different role from the original Tetroise, shifting its focus away from supporting mining bases and ...
Pierdon Cryst (Location, Drops, Uses, Partner Skill & Work Suitability): Palworld
Pierdon Cryst is the Ice counterpart of Pierdon, trading its original Ground element for Ice while offering a completely different ...
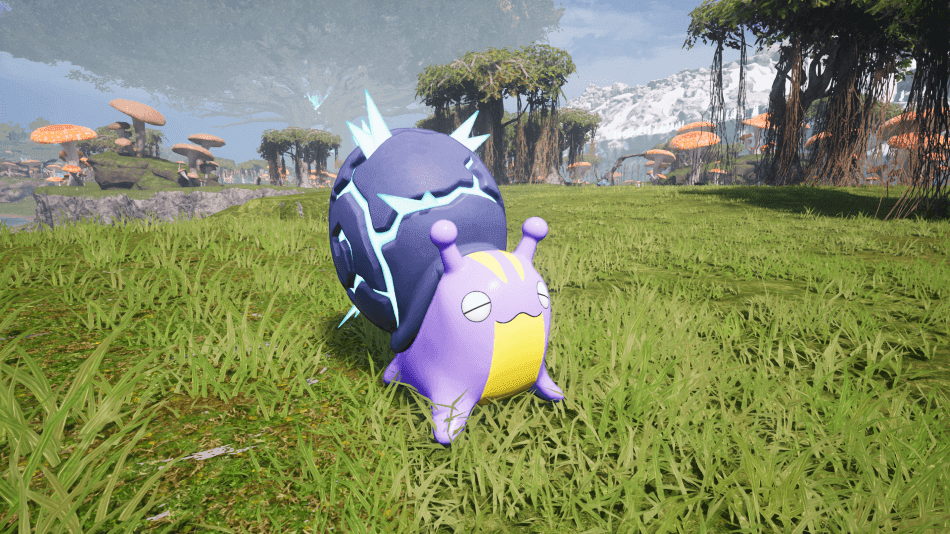
Slowatt (Location, Drops, Uses, Partner Skill & Work Suitability): Palworld
Slowatt is an Electric Pal that focuses on turning Electrify effects into additional damage, making it a useful support companion ...
Hoodle (Location, Drops, Uses, Partner Skill & Work Suitability): Palworld
Hoodle is a Dark Pal that specializes in taking advantage of enemies that haven’t noticed you yet, making it a ...
Lapiron (Location, Drops, Uses, Partner Skill & Work Suitability): Palworld
Lapiron is a Ground Pal that rewards players who stay on the move, offering a defensive Partner Skill that helps ...
Souffline (Location, Drops, Uses, Partner Skill & Work Suitability): Palworld
Souffline is a small floating Grass Pal that specializes in making Pal captures easier rather than focusing purely on combat ...
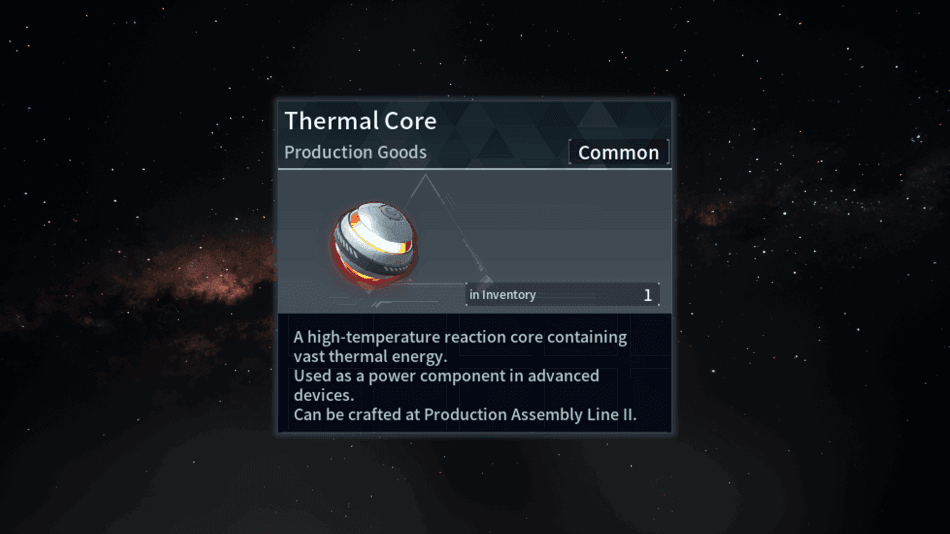
Palworld: Thermal Cores (How To Get & Uses)
Many of Palworld’s strongest weapons and late game technology rely on specialized components that can’t simply be gathered from the ...
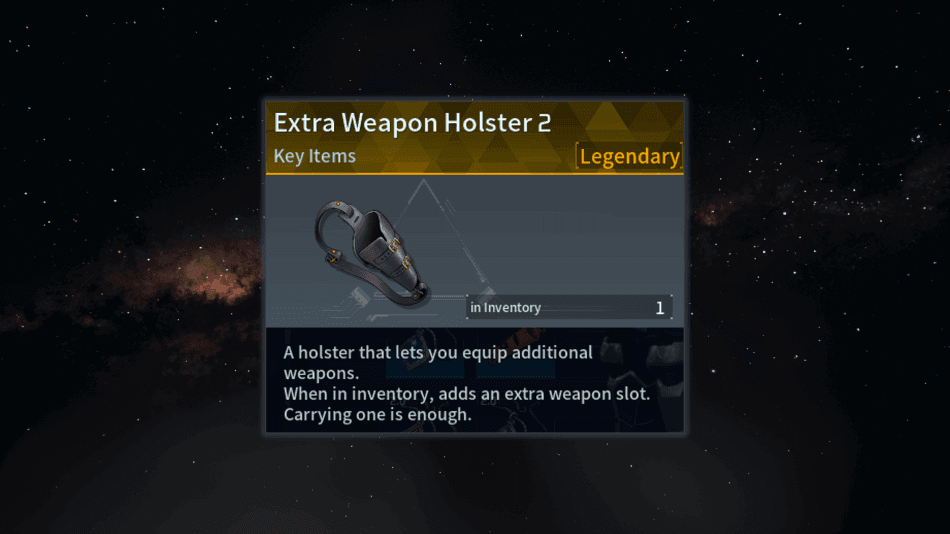
Palworld: Extra Weapon Holster 2 (How To Get & Uses)
If you’ve already crafted the Extra Weapon Holster, you might find yourself wanting just one more slot as your collection ...
Dualith Noct (Location, Drops, Uses, Partner Skill & Work Suitability): Palworld
Dualith Noct is a Ground and Dark Pal that takes a different approach from its original variant by focusing on ...
Carnibora (Location, Drops, Uses, Partner Skill & Work Suitability): Palworld
Carnibora is a Grass Pal that provides both offensive and defensive value through its unique Partner Skill, giving players another ...
Prixter Lux (Location, Drops, Uses, Partner Skill & Work Suitability): Palworld
Prixter Lux is the Electric variant of Prixter, replacing its original status effect support with a much more direct combat ...
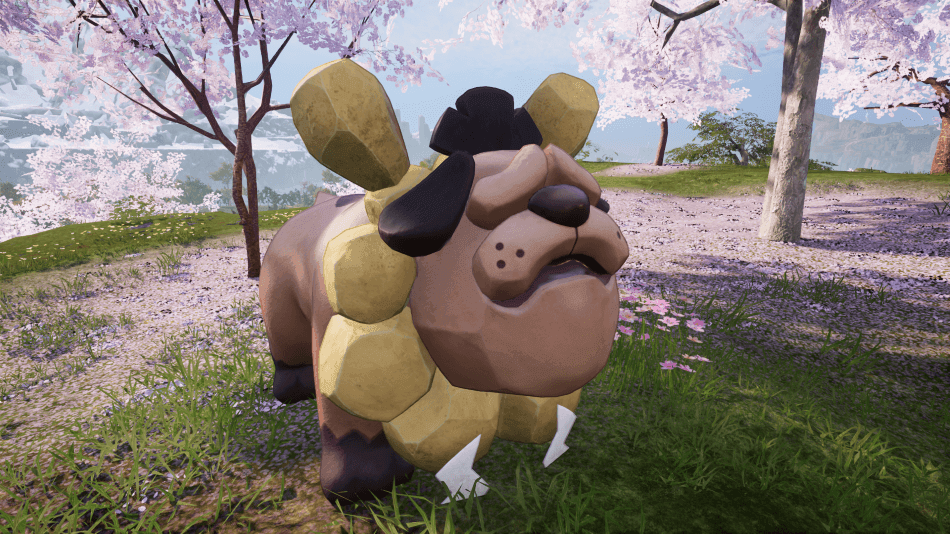
Bulldosu (Location, Drops, Uses, Partner Skill & Work Suitability): Palworld
With its stocky frame and unmistakable bulldog-like appearance, Bulldosu is a Ground Pal that’s built to stand its ground no ...
Smokie Cryst (Location, Drops, Uses, Partner Skill & Work Suitability): Palworld
Smokie Cryst is the Ice variant of Smokie, trading its original utility for a role focused around improving base efficiency. ...
Needoll Noct (Location, Drops, Uses, Partner Skill & Work Suitability): Palworld
Needoll Noct is the Dark counterpart of Needoll, combining Grass and Dark abilities into a Pal that focuses on supporting ...

Polapup Terra (Location, Drops, Uses, Partner Skill & Work Suitability): Palworld
Polapup Terra is an Ice and Ground Pal that turns snowy environments into its own playground, using its unique movement ...
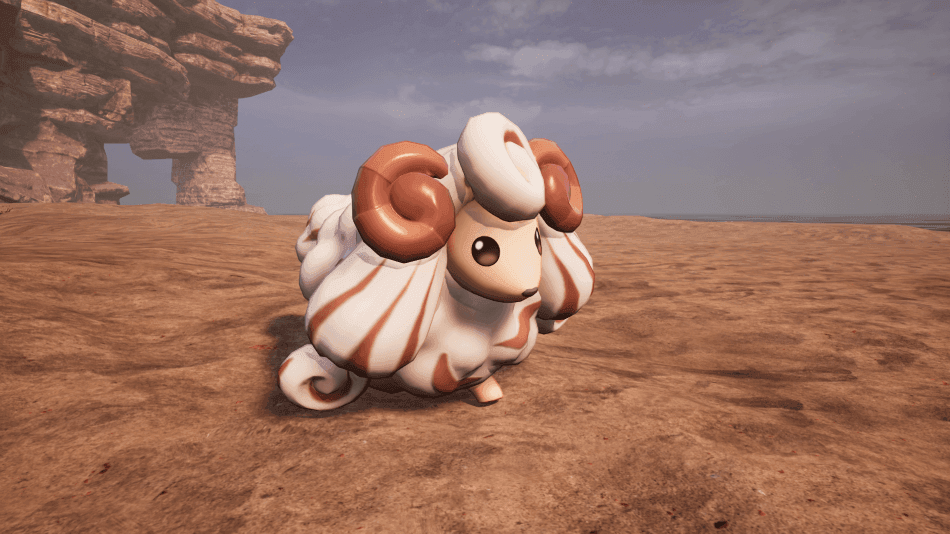
Woolipop Terra (Location, Drops, Uses, Partner Skill & Work Suitability): Palworld
Woolipop Terra is a Ground Pal that focuses almost entirely on supporting your base, making it an excellent choice for ...
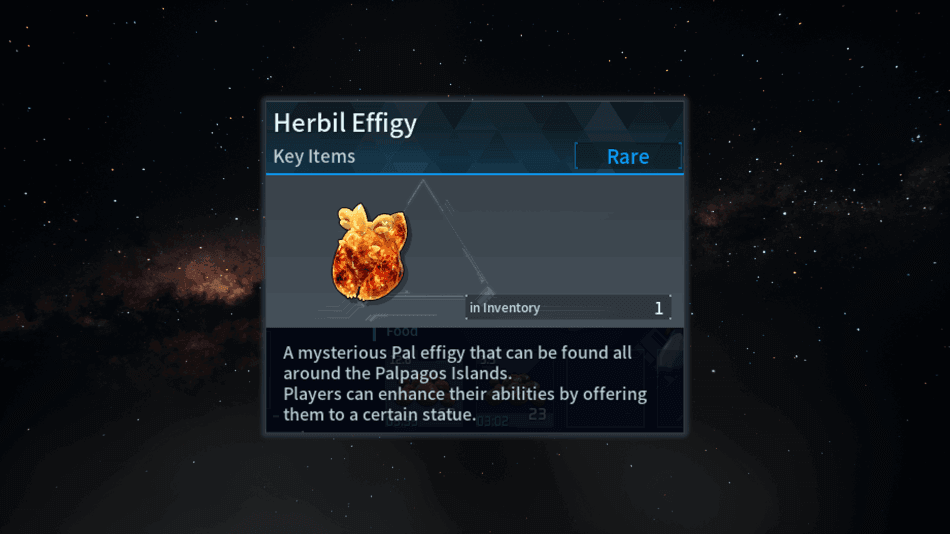
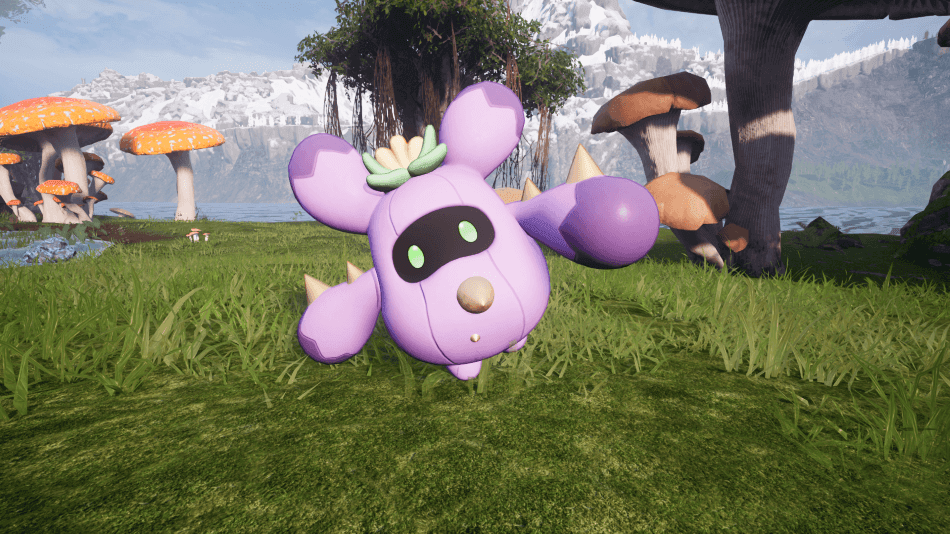
Palworld: Herbil Effigy (How To Get & Uses)
Gliding is a convenient way to move around Palpagos Island, helping you cross gaps, descend from high locations, avoid dangerous ...
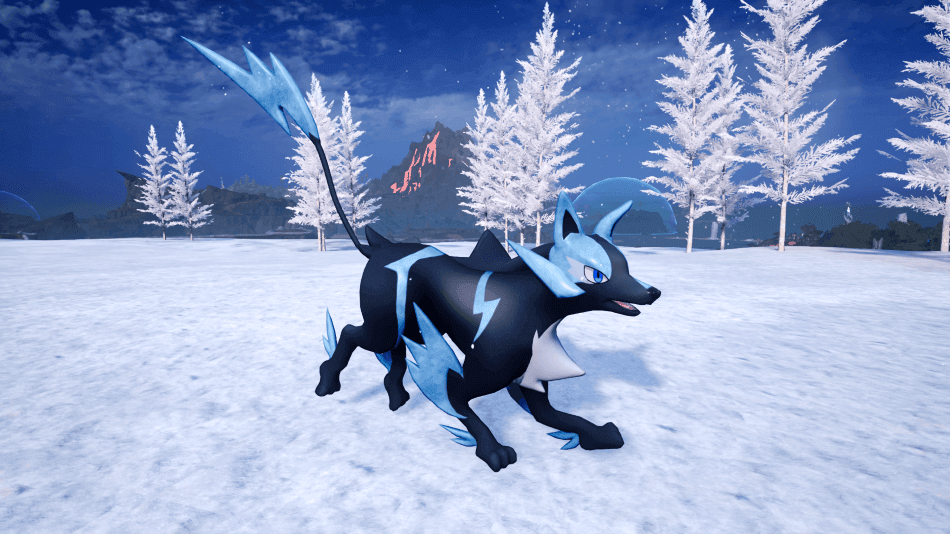
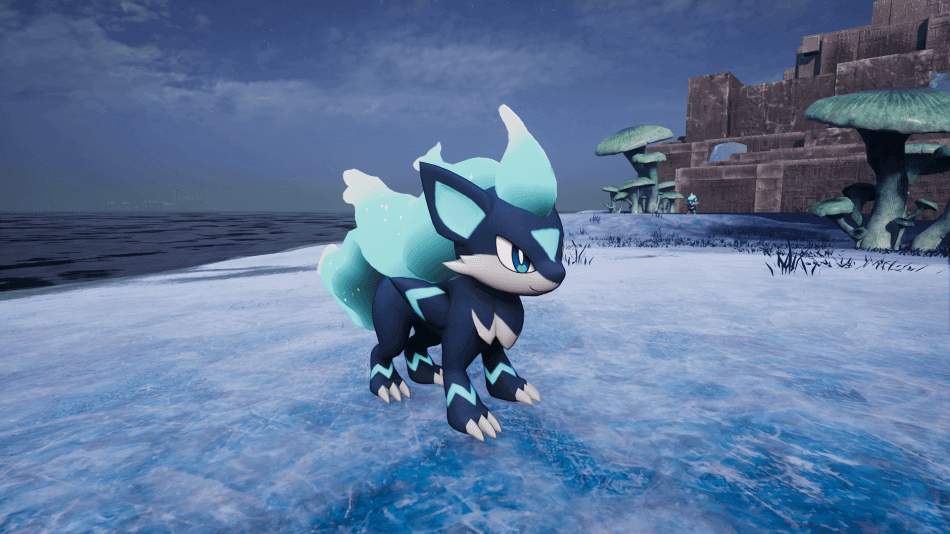
Rayhound Cryst (Location, Drops, Uses, Partner Skill & Work Suitability): Palworld
Rayhound Cryst is an Ice Pal that excels at getting around quickly while also bringing useful support to Ice focused ...
Palworld: Tanzee Effigy (How To Get & Uses)
Many of Palworld’s best shortcuts, hidden treasures, and valuable resources are tucked away on cliffs and high ledges, making climbing ...

Palworld: Rooby Effigy (How To Get & Uses)
Jumping plays a much bigger role than many players expect, helping you reach higher places, cross difficult terrain, avoid attacks, ...
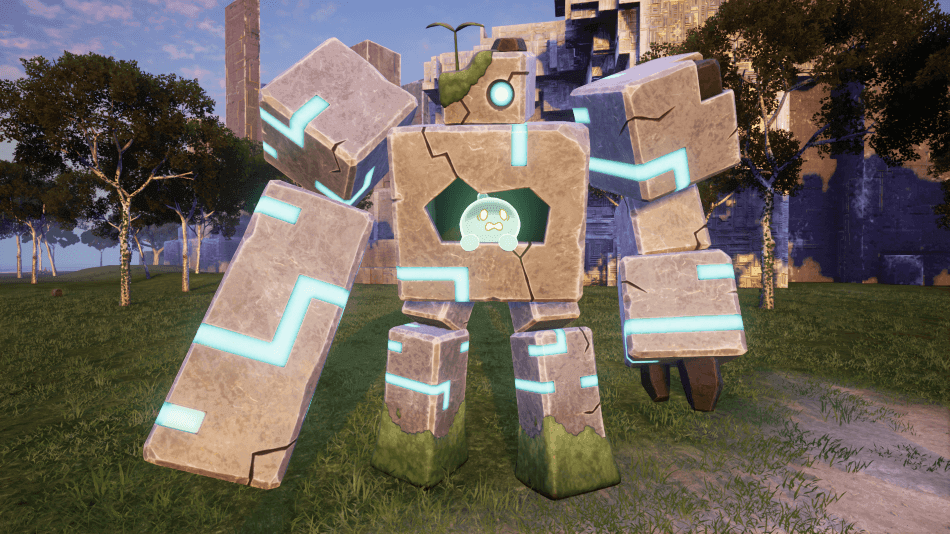
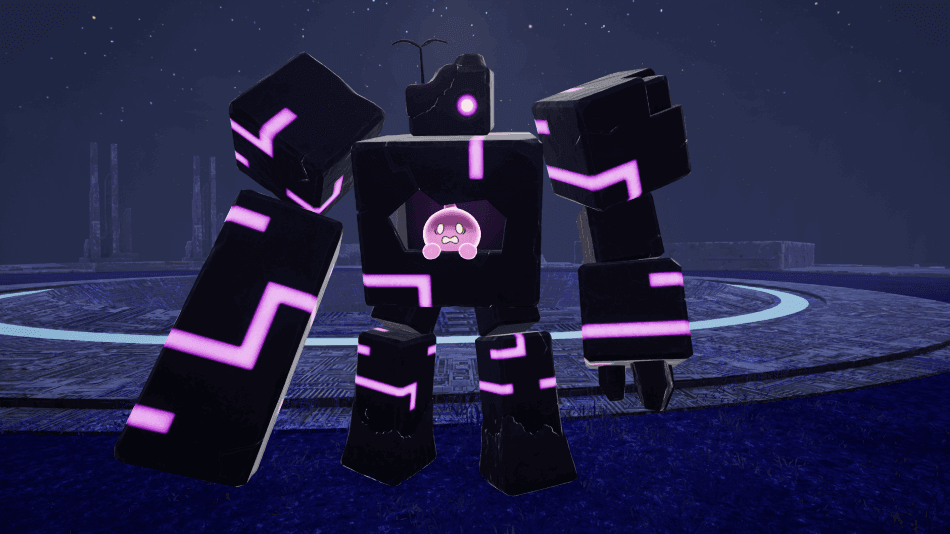
Dualith (Location, Drops, Uses, Partner Skill & Work Suitability): Palworld
Dualith is a Ground and Grass Pal with a body resembling an ancient ruin construct, featuring moss-covered parts and a ...
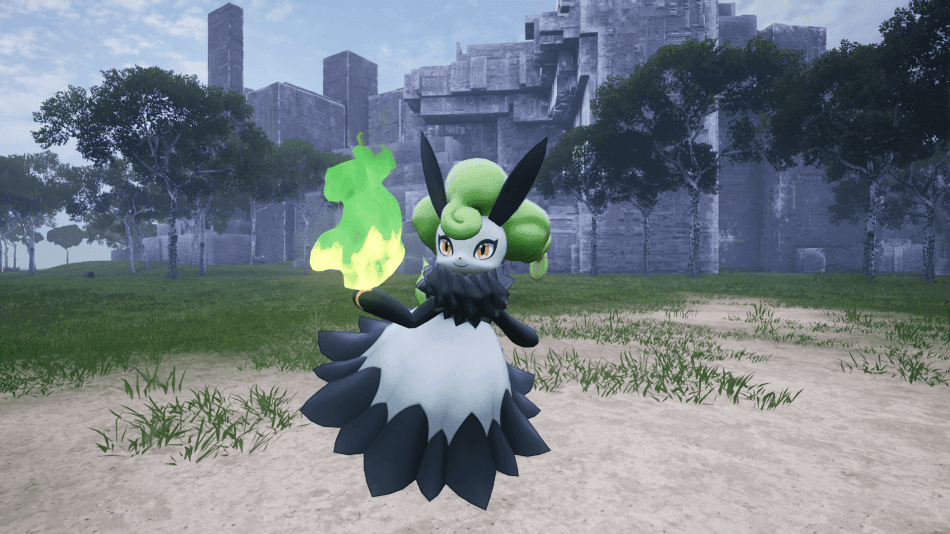
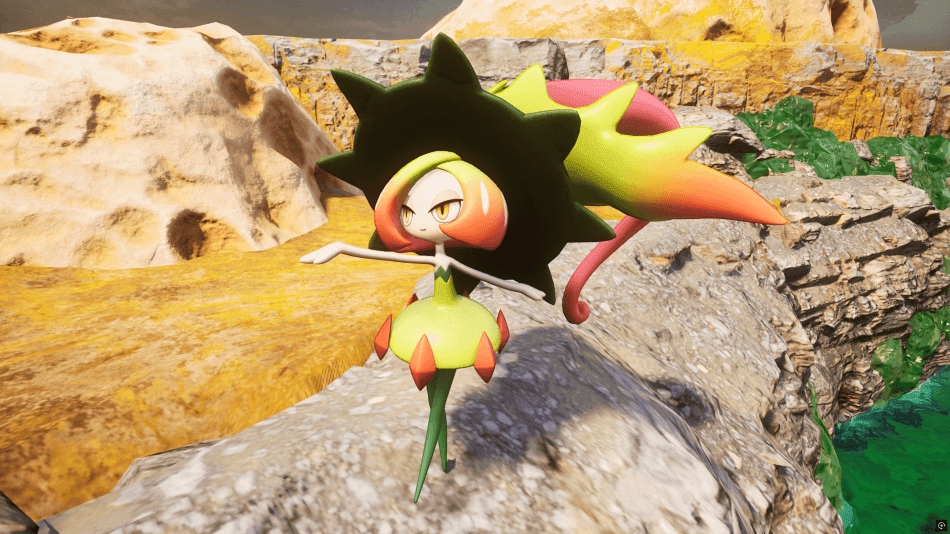
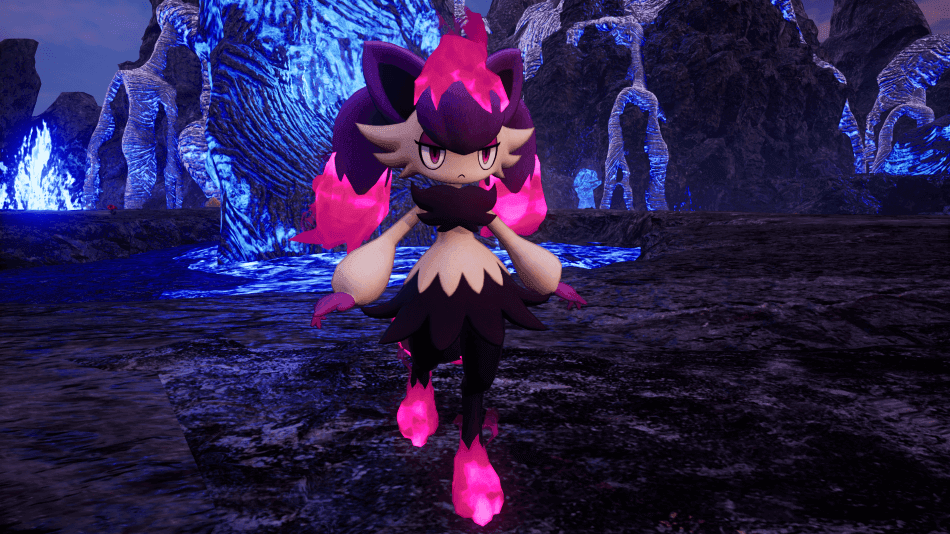
Nitemary Botan (Location, Drops, Uses, Partner Skill & Work Suitability): Palworld
Unlike the original Nitemary, Nitemary Botan trades soul collecting for a much more supportive role, making it an excellent companion ...
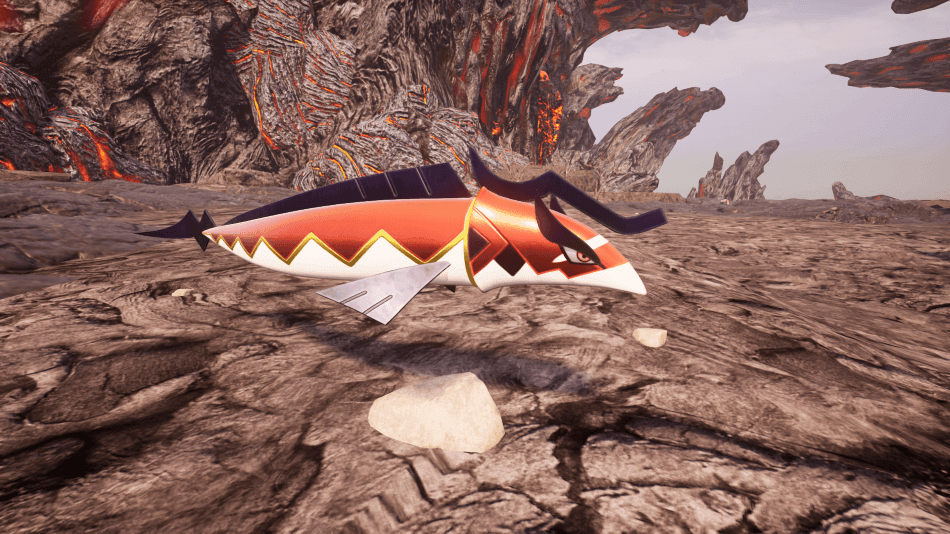
Skutlass Ignis (Location, Drops, Uses, Partner Skill & Work Suitability): Palworld
Some Pals fight beside you, while others completely change the way you approach combat, and Skutlass Ignis easily falls into ...
Needoll (Location, Drops, Uses, Partner Skill & Work Suitability): Palworld
Some Pals may look small and adorable, but that doesn’t mean they can’t make a major difference when you include ...
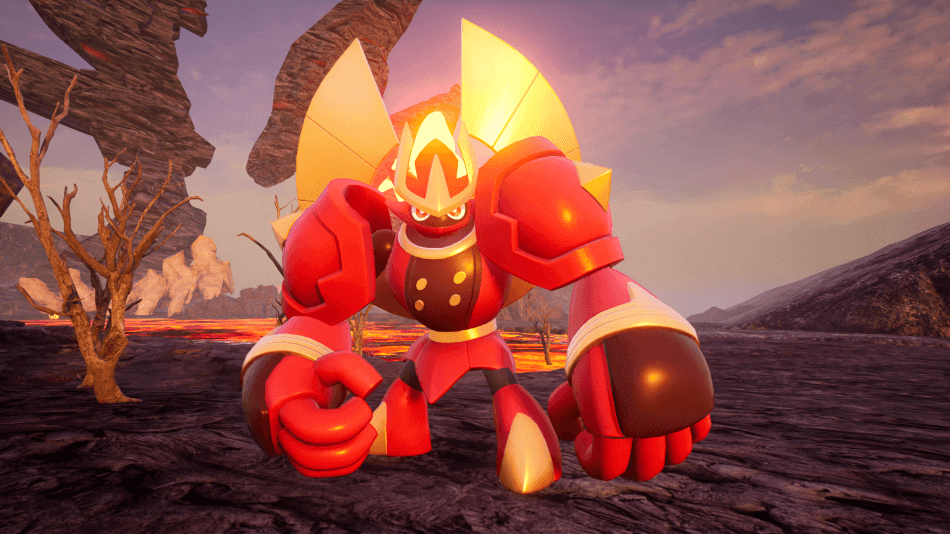
Moldron (Location, Drops, Uses, Partner Skill & Work Suitability): Palworld
With its lava-covered back and intimidating appearance, Moldron looks like a Pal built for the harsh volcanic regions of Palpagos ...

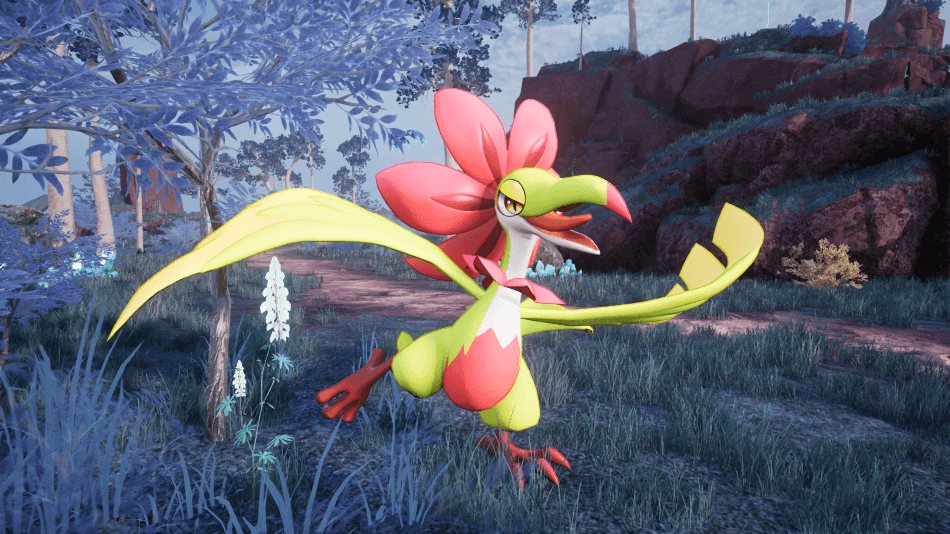
Leafan (Location, Drops, Uses, Partner Skill & Work Suitability): Palworld
Leafan is a Grass Pal that combines martial arts techniques with nature based abilities, fighting with the discipline and speed ...
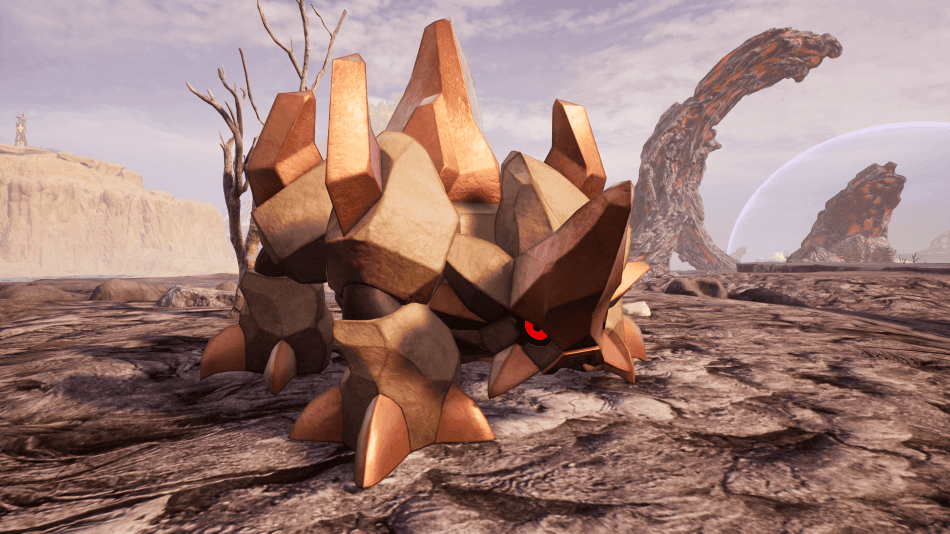
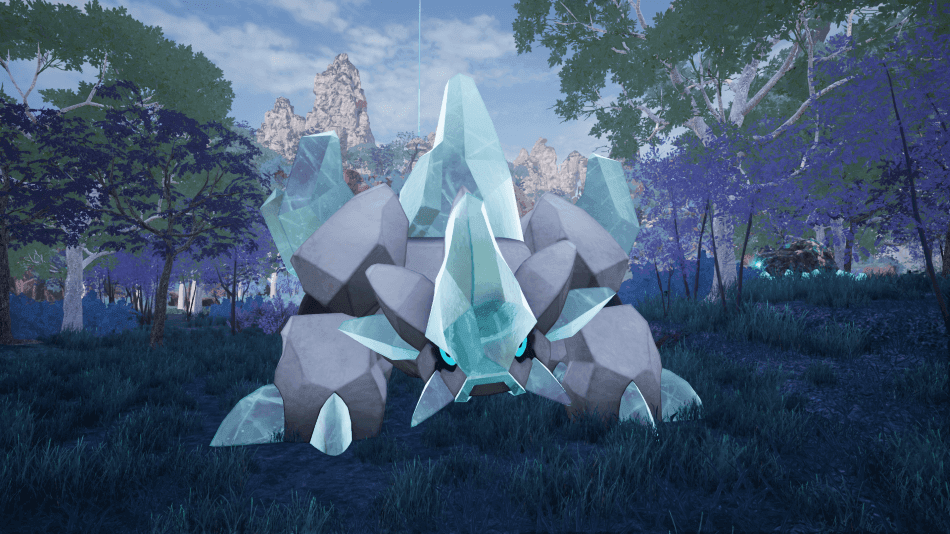
Pierdon (Location, Drops, Uses, Partner Skill & Work Suitability): Palworld
Pierdon is a rock-like Pal that blends naturally into its surroundings, using its tough body to handle the harsh environments ...
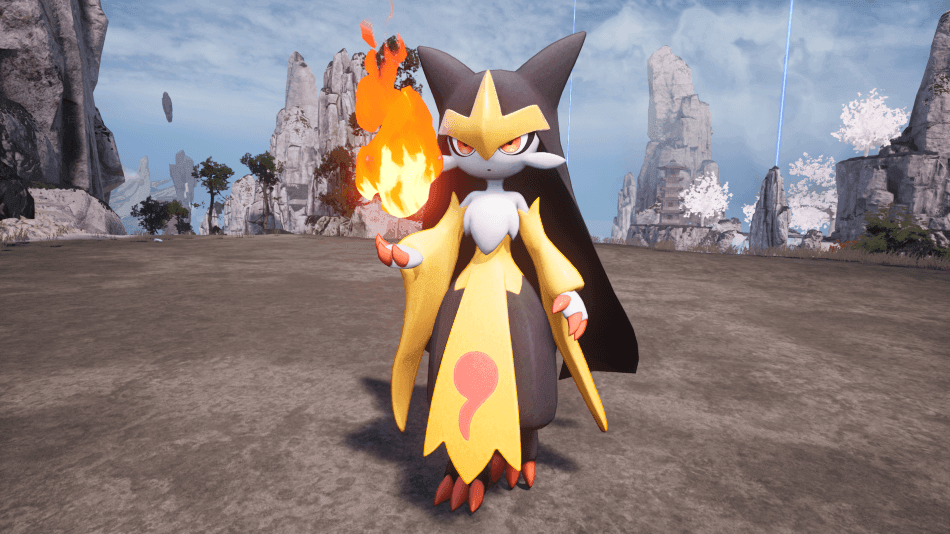
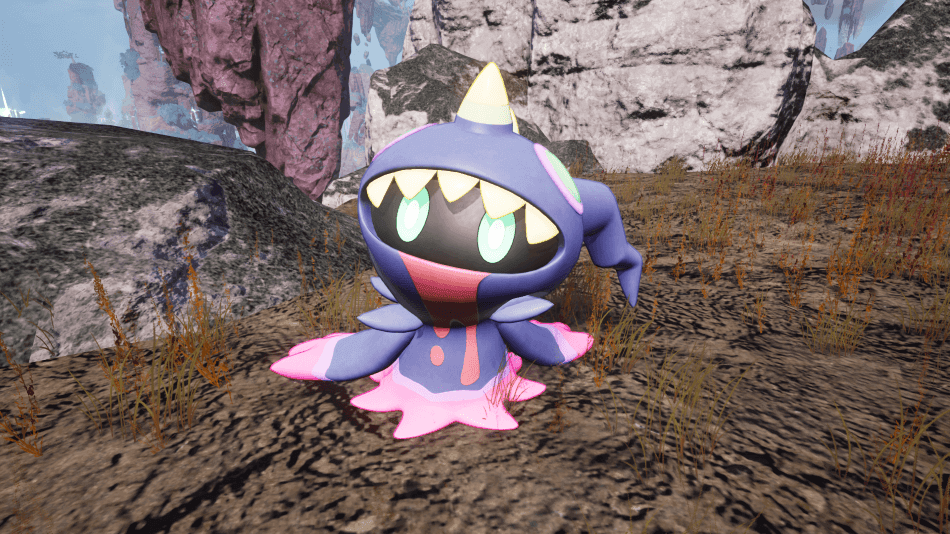
Majex (Location, Drops, Uses, Partner Skill & Work Suitability): Palworld
Majex is a Pal that combines a flashy appearance with useful combat support, helping players who enjoy building their strategies ...
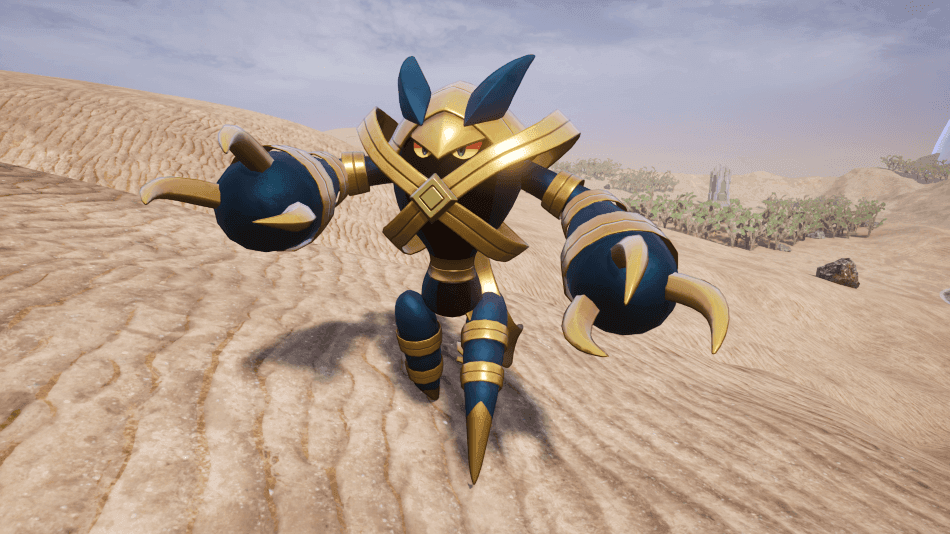
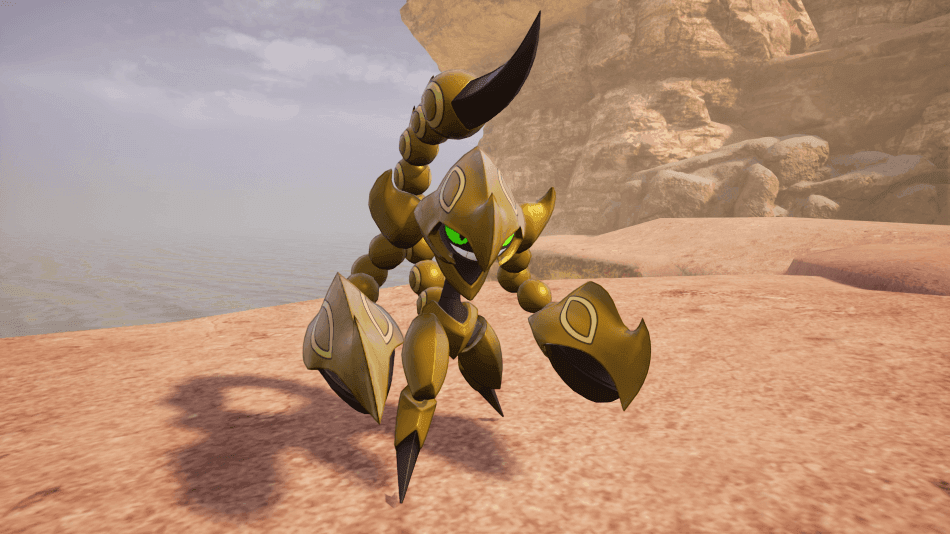
Gildra (Location, Drops, Uses, Partner Skill & Work Suitability): Palworld
With its golden wrappings, sharp claws, and ancient construct-like appearance, Gildra looks like a creature that has been pulled straight ...
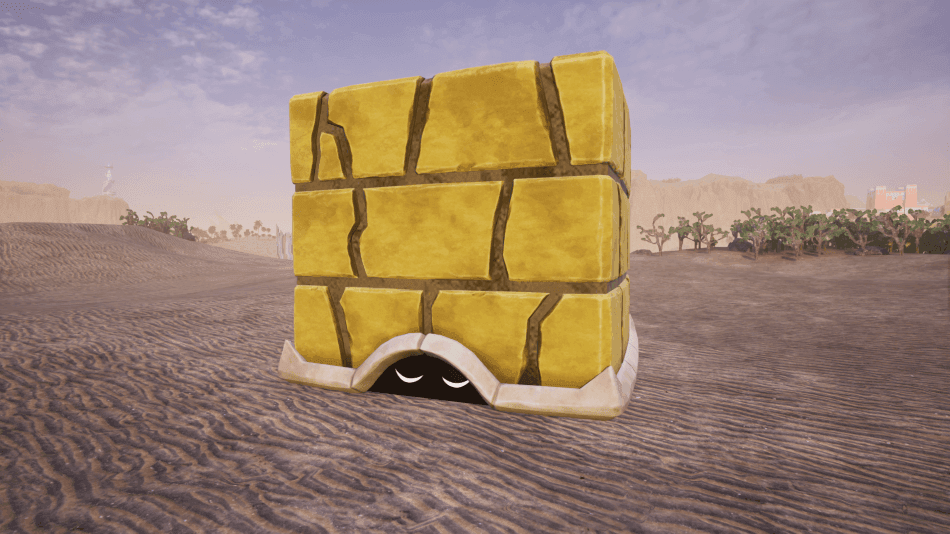
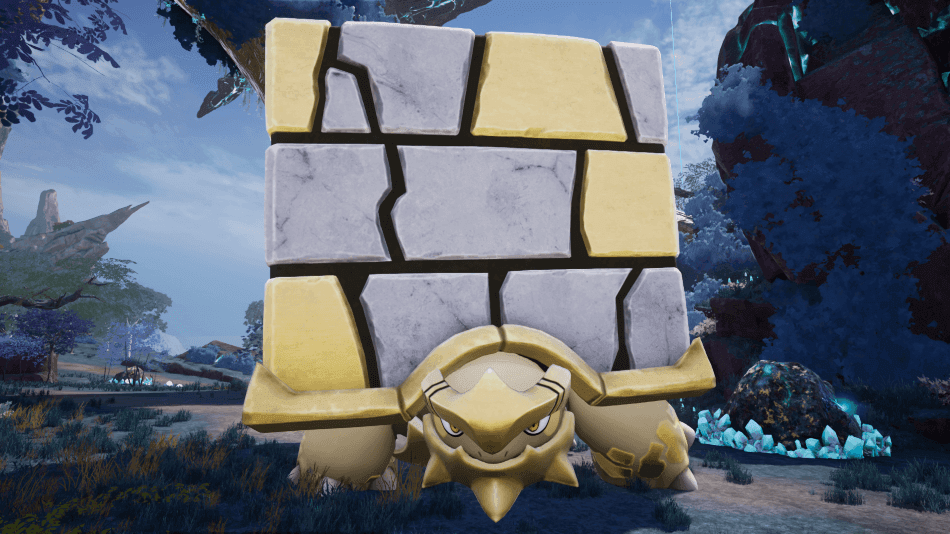
Tetroise (Location, Drops, Uses, Partner Skill & Work Suitability): Palworld
With its enormous golden cube shaped shell, Tetroise is one of the most recognizable Pals you can encounter while exploring ...
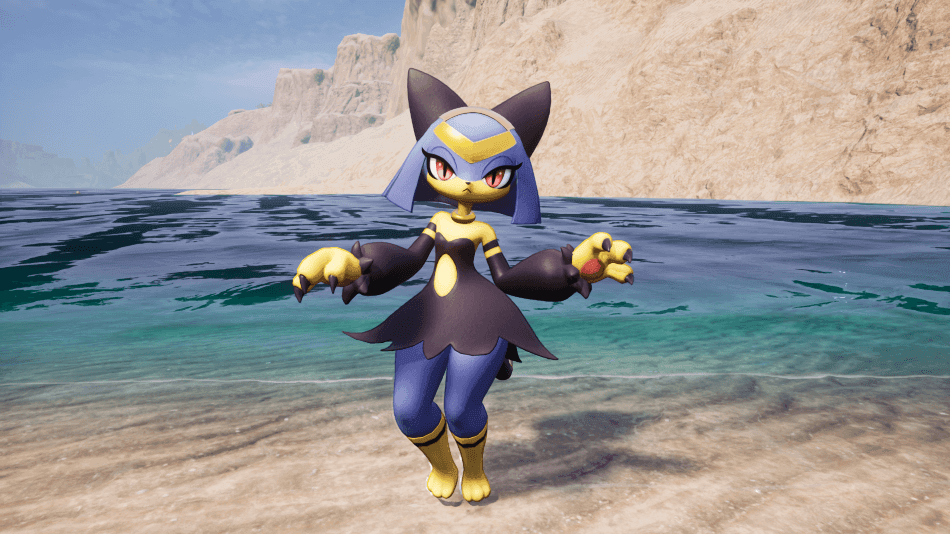
Sekhmet (Location, Drops, Uses, Partner Skill & Work Suitability): Palworld
Some Pals are valued for their combat strength, while others become indispensable by helping your entire base operate more efficiently. ...
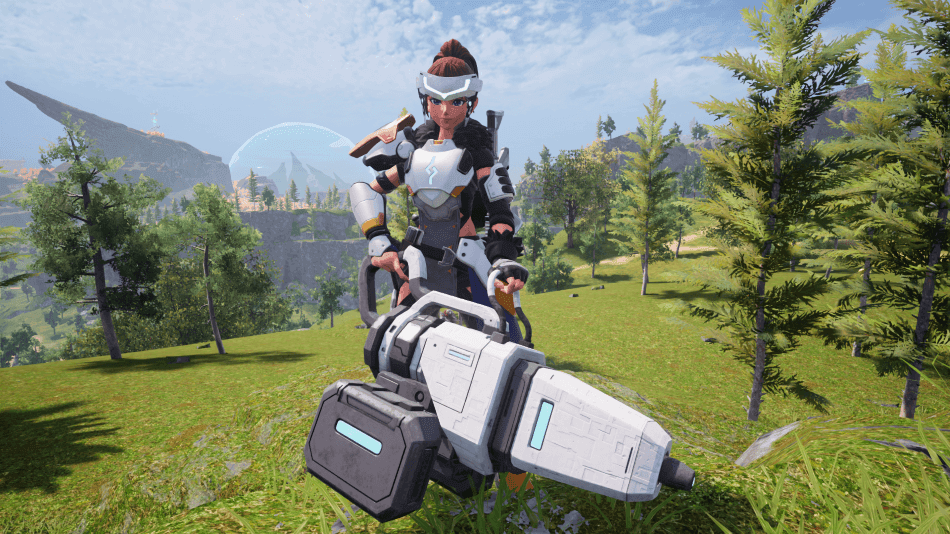
Palworld: How To Get Plasma Multicutter
As your resource demands continue growing, carrying separate tools for chopping trees and mining ore can quickly become inconvenient during ...
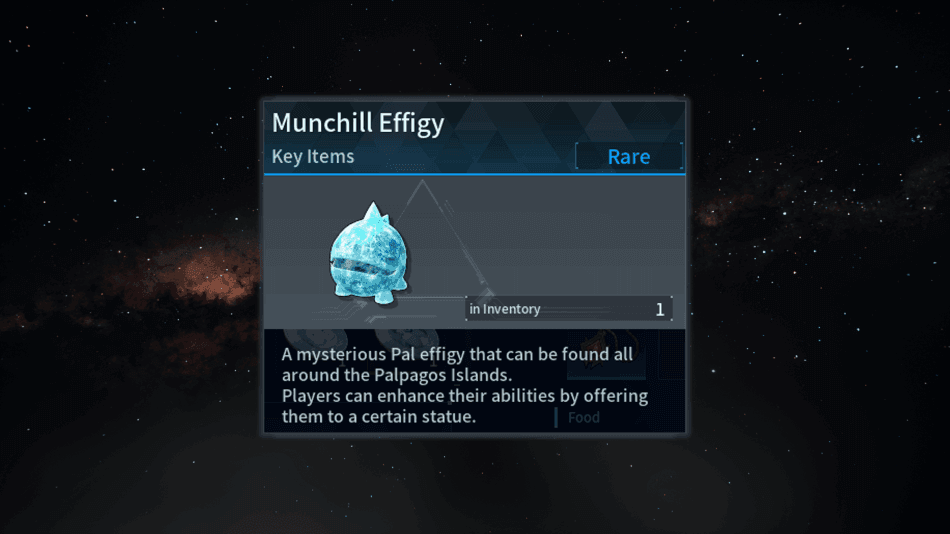
Palworld: Munchill Effigy (How To Get & Uses)
Keeping food fresh becomes increasingly important as your inventory fills with ingredients, cooked meals, and other perishable supplies gathered throughout ...
Palworld: How To Build & Use High-Pressure Crude Oil Extractor
Managing Crude Oil production becomes much easier once you unlock technology that removes the need to search for specific resource ...
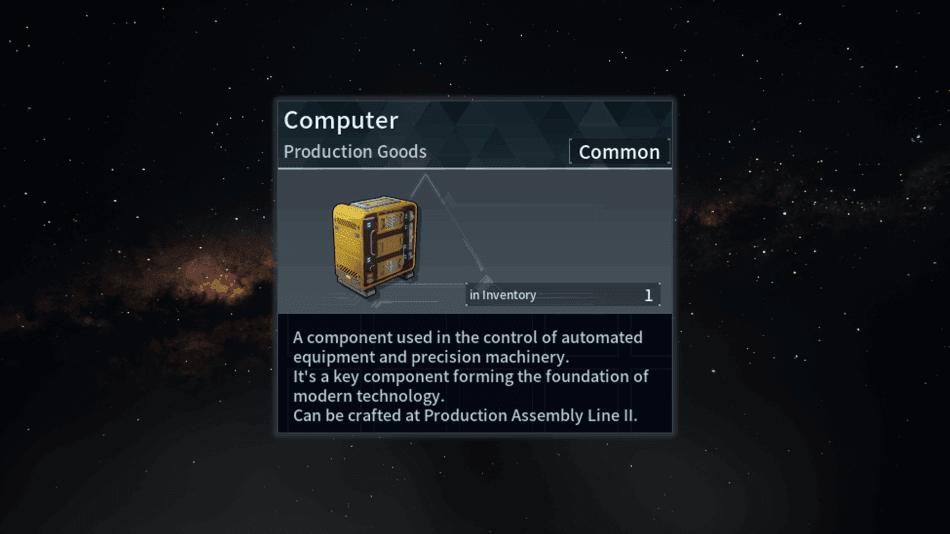
Palworld: Computer (How To Get & Uses)
Reaching the later stages of Palworld introduces crafting recipes that depend on specialized components instead of ordinary resources gathered throughout ...
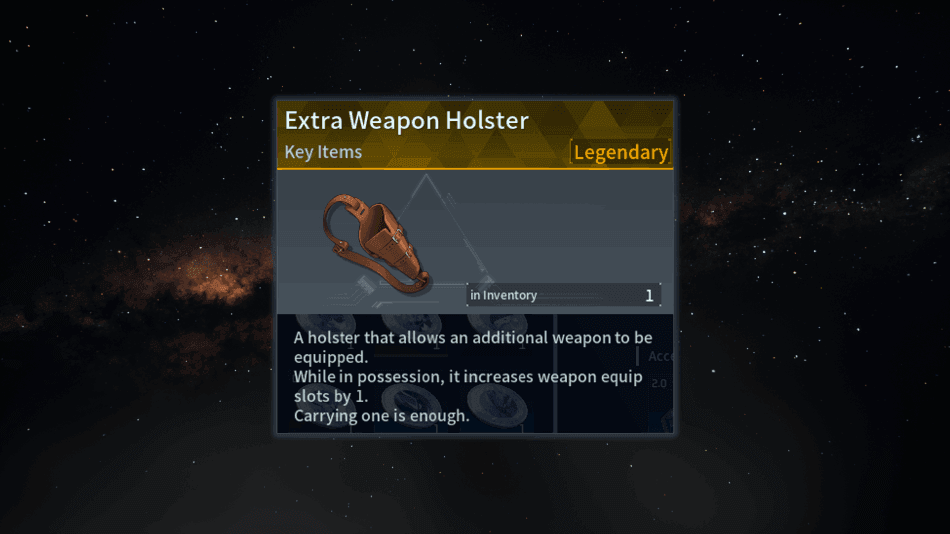
Palworld: How To Get Extra Weapon Holster
Managing your inventory during long expeditions can become frustrating when you need to constantly switch between different weapons and tools. ...
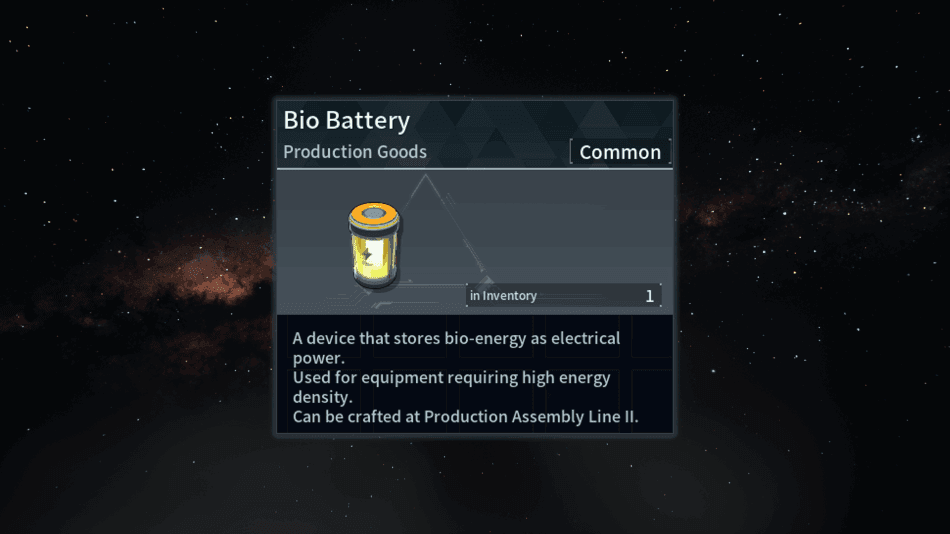
Palworld: Bio Battery (How To Get & Uses)
As your base begins relying on more advanced machines and your Pals take on more demanding tasks, you’ll eventually need ...
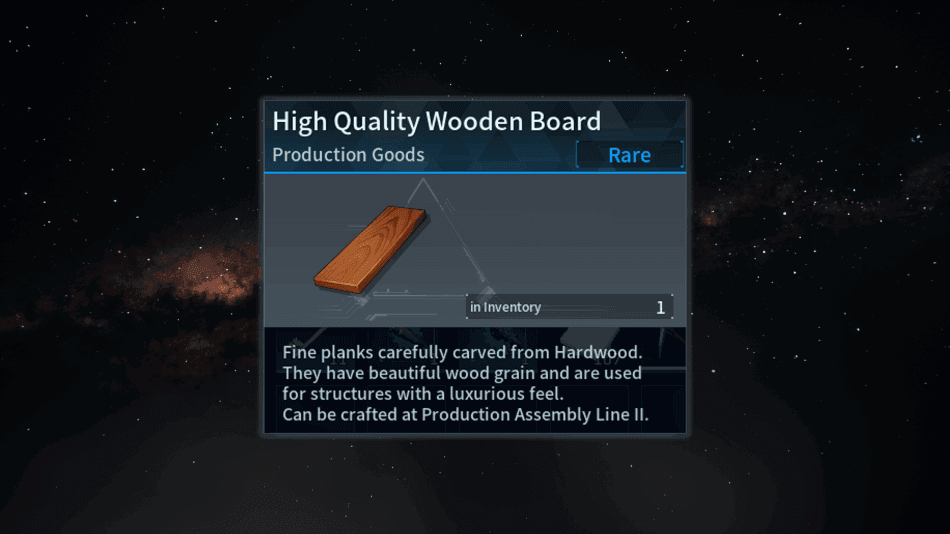
Palworld: High Quality Wooden Board (How To Get & Uses)
As more advanced recipes become available, basic building materials are gradually replaced by refined versions designed for higher tier equipment ...
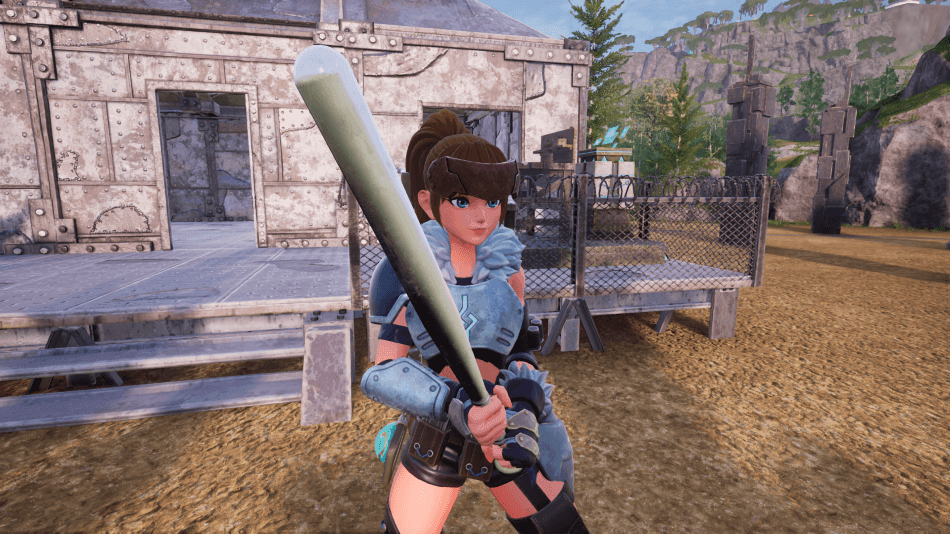
Palworld: How To Get Metal Bat
If you enjoy charging into battle and knocking enemies around with a trusty melee weapon, the Metal Bat is the ...
Palworld: Logging Site II (How To Unlock, Build & Use)
As you progress further into Palworld, gathering materials manually can become more time consuming, especially when certain resources are only ...
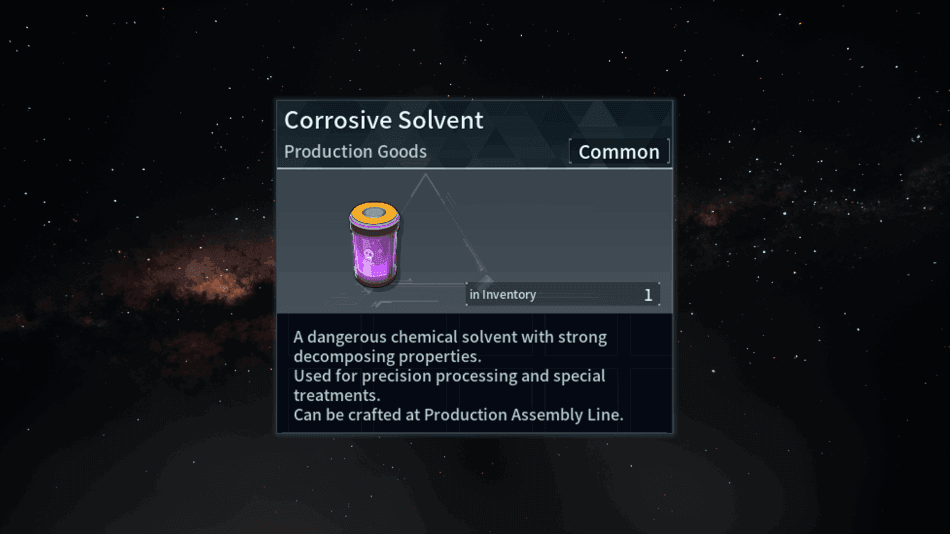
Palworld: Corrosive Solvent (How To Get & Uses)
As you continue unlocking more advanced Technology, you’ll eventually come across recipes that require specialized industrial materials instead of ordinary ...

Snugloo (Location, Drops, Uses, Partner Skill & Work Suitability): Palworld
While exploring the colder regions of Palpagos Island, you’ll eventually come across Snugloo, a small Ice Pal that’s almost entirely ...
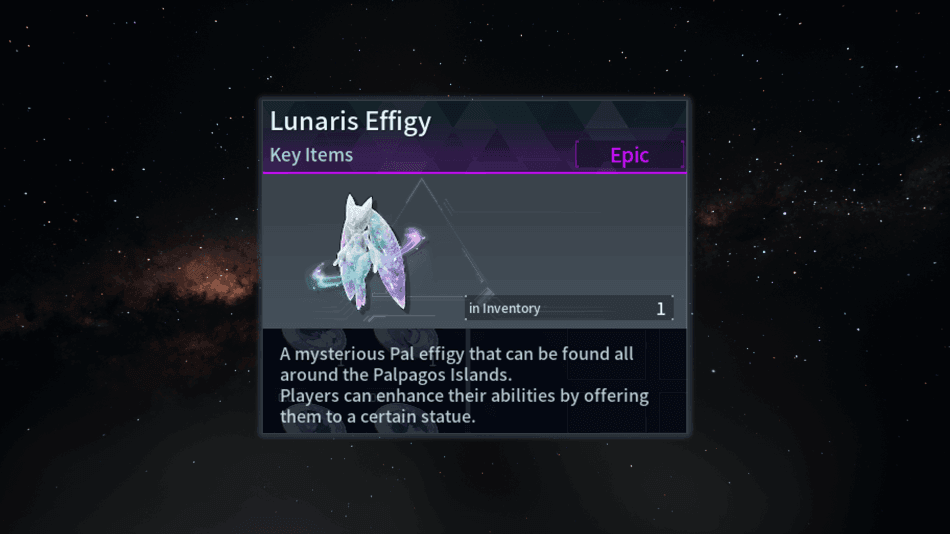
Palworld: Lunaris Effigy (How To Get & Uses)
Capturing Pals becomes increasingly challenging as you venture into stronger regions, especially when dealing with fast moving or highly evasive ...
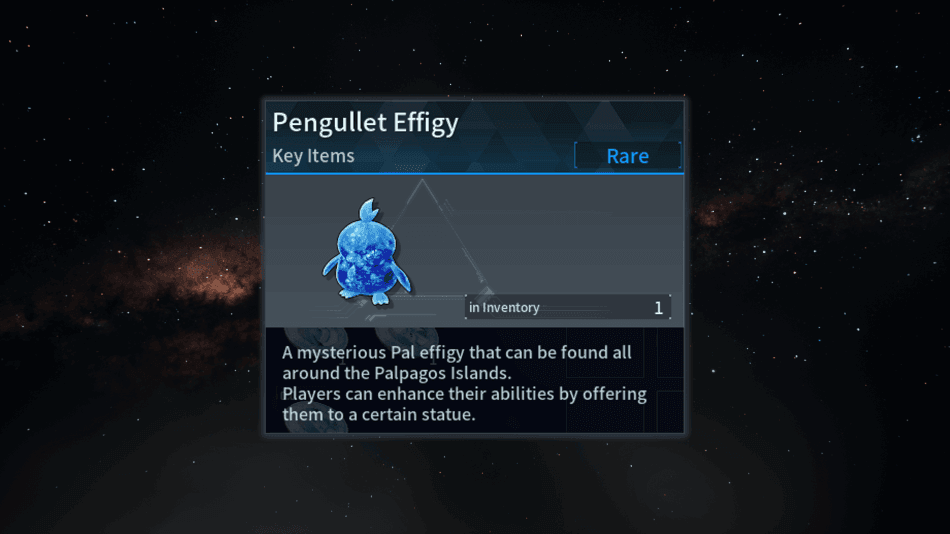
Palworld: Pengullet Effigy (How To Get & Uses)
Crossing rivers, lakes, and open stretches of water becomes much more common as your adventure in Palworld continues, making swimming ...
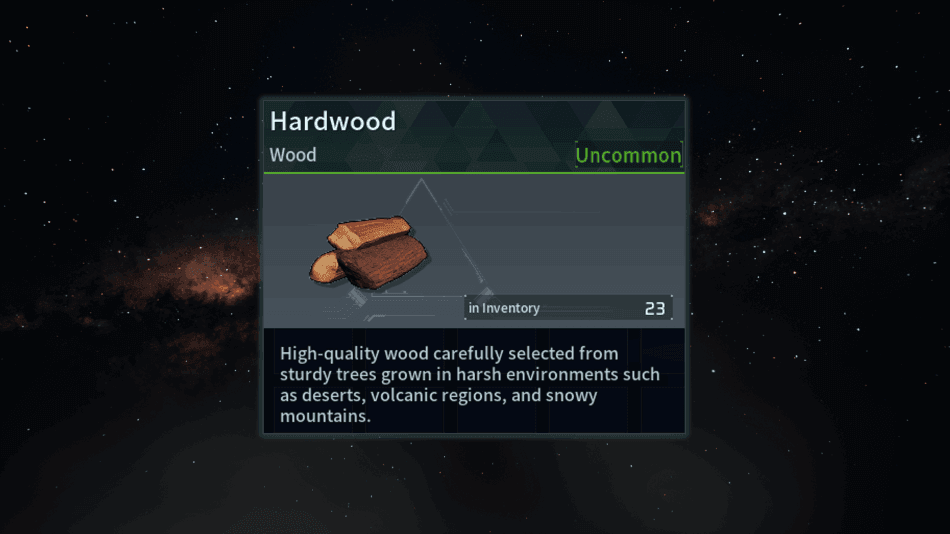
Palworld: Hard Wood (How To Get & Uses)
As you progress to higher levels in Palworld, you’ll begin unlocking more advanced crafting recipes that require more valuable materials ...
Palworld: High Quality Monitoring Stand (How To Unlock, Build & Use, Effects)
As your base expands and more Pals are assigned to specialized jobs, keeping everything organized becomes increasingly important. The High ...

Palworld: Cryogenic Coolant (How To Get & Uses)
Cryogenic Coolant is a production good that becomes increasingly important as you unlock more advanced technology and crafting recipes. Unlike ...
Skutlass (Location, Drops, Uses, Partner Skill & Work Suitability): Palworld
Most Water Pals focus on supporting your base or fighting from a distance, but Skutlass takes a completely different approach ...

Palworld: Monitoring Stand (How To Unlock, Build & Use, Effects)
Managing a growing base becomes much easier when you have more control over what your Pals do throughout the day. ...

Palworld: Clinic (How to Unlock, Build & Use, Effects)
Looking after your Pals becomes increasingly important as your base grows, especially when more workers are constantly crafting, gathering, and ...
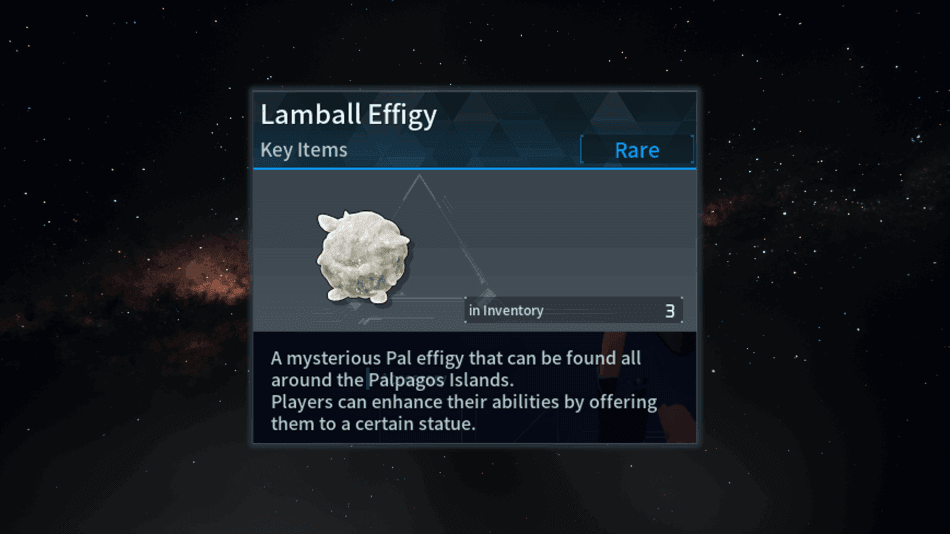
Palworld: Lamball Effigy (How to Get & Uses)
Lamball Effigy is one of several new collectible Effigies introduced in Palworld, rewarding players who enjoy exploring every corner of ...
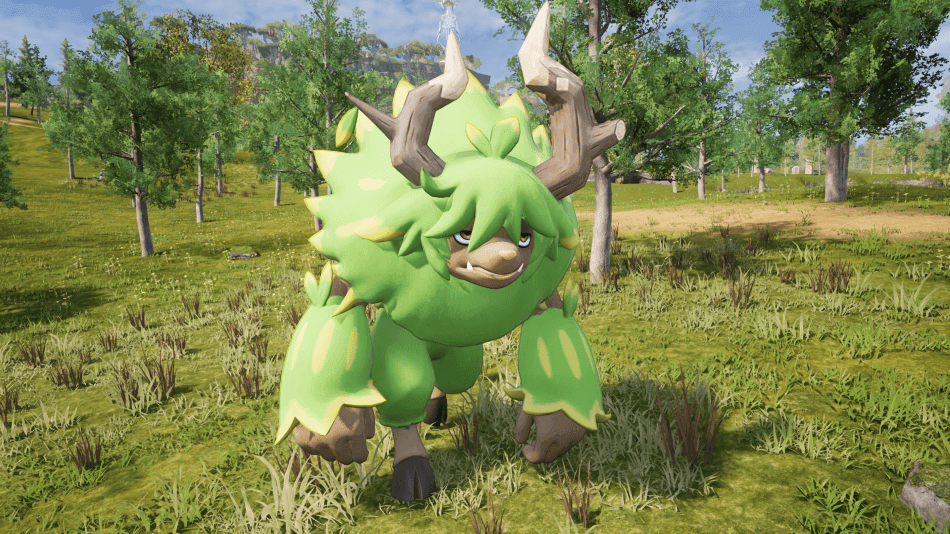
Elgrove (Location, Drops, Uses, Partner Skill & Work Suitability): Palworld
Elgrove is a powerful Grass Pal that players can encounter around the mid early game, offering strong combat abilities and ...
Puffolt (Location, Drops, Uses, Partner Skill & Work Suitability): Palworld
During the earlier parts of the game, finding reliable Electric Pals can be difficult, especially when you’re still building up ...
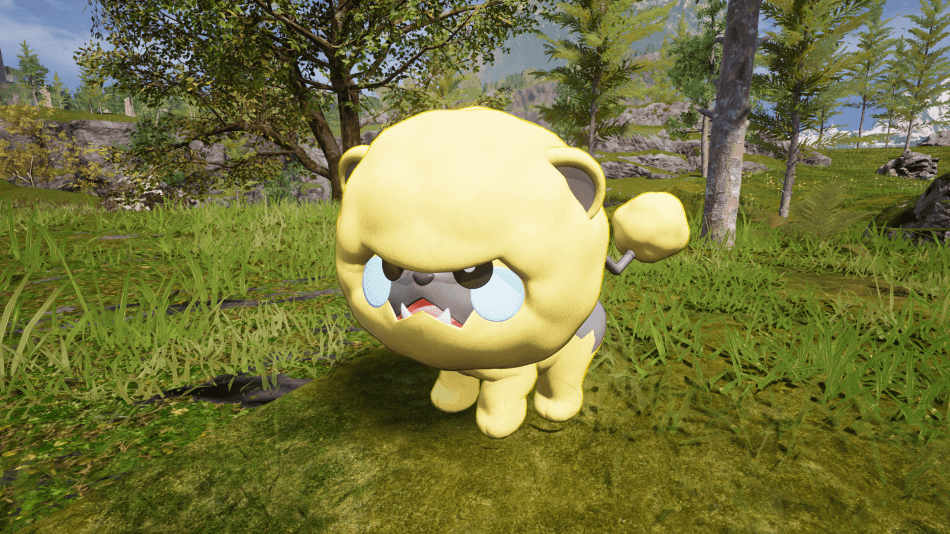
Muffly (Location, Drops, Uses, Partner Skill & Work Suitability): Palworld
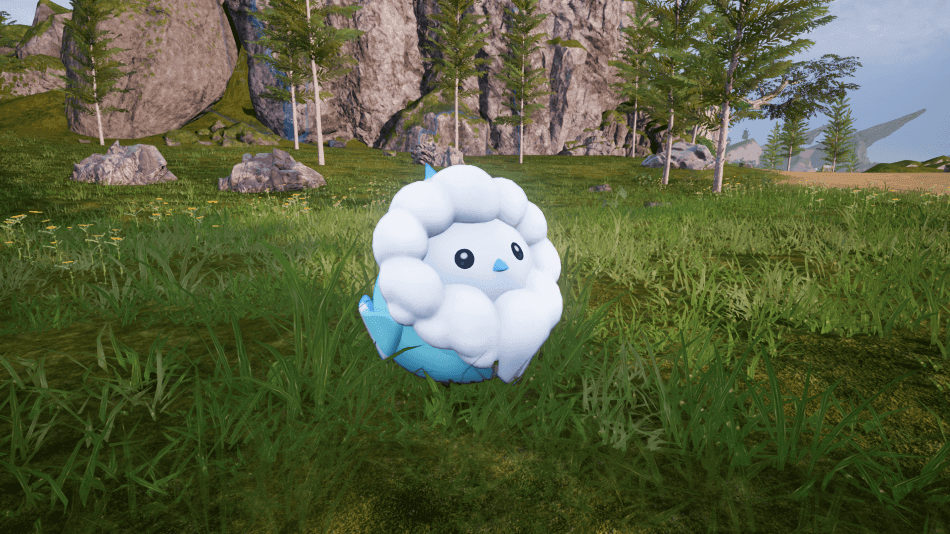
Muffly looks more like a floating ball of fluff than a capable worker, but beneath that cloud-like face is a ...
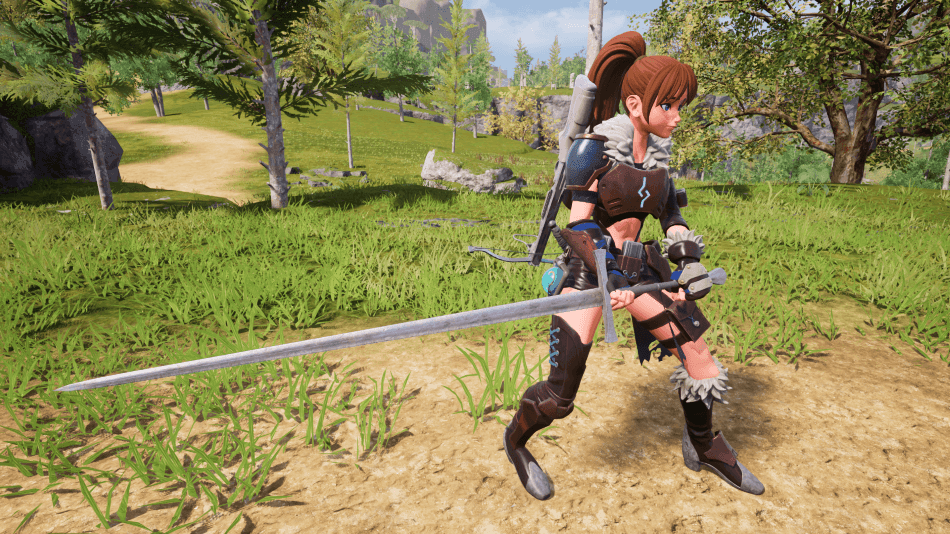
Palworld: How To Unlock & Craft Primitive Sword
Melee combat becomes much more rewarding once you unlock the Primitive Sword, giving you a reliable way to deal heavy ...
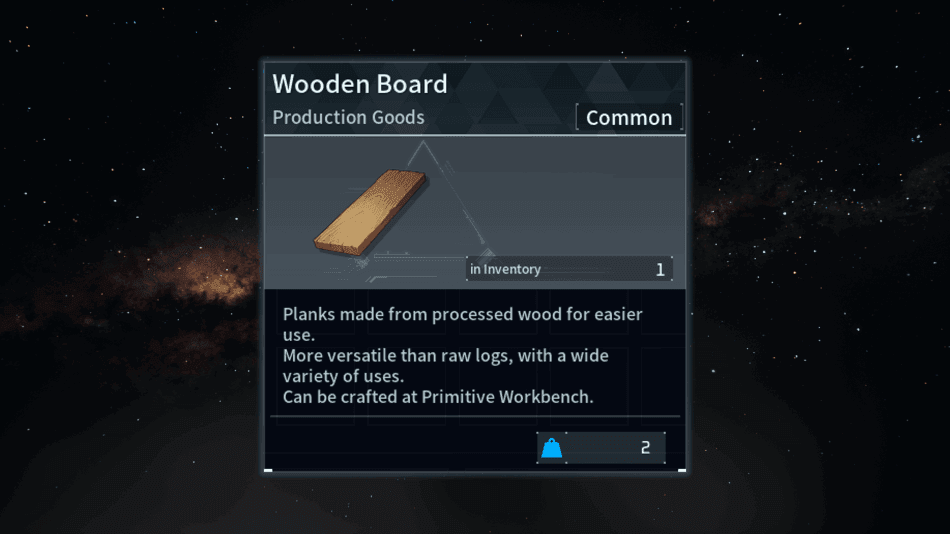
Palworld: Wooden Board (How To Get & Uses)
Wooden Board is one of the first refined materials you’ll begin using once your base grows beyond simple wooden structures ...
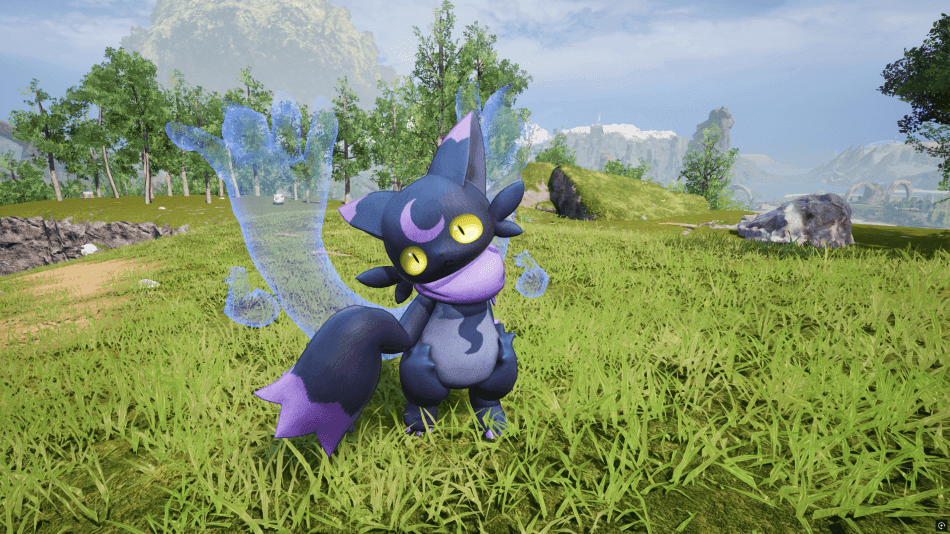
Wispaw (Location, Drops, Uses, Partner Skill & Work Suitability): Palworld
Wispaw may look like an adorable cat with oversized ghostly paws, but don’t let its appearance fool you because it’s ...
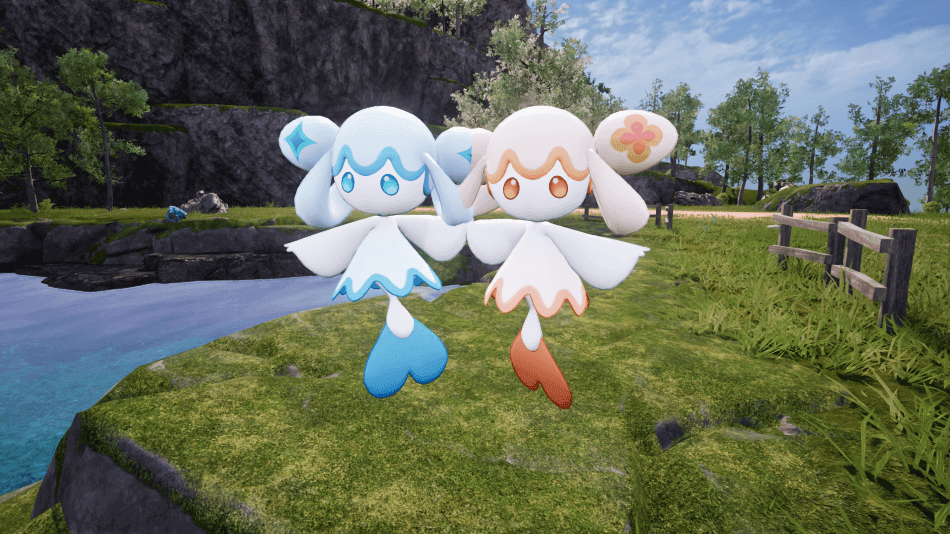
Amione (Location, Drops, Uses, Partner Skill & Work Suitability): Palworld
Amione is never seen alone, as the two tiny Pals are always floating side by side with their hands locked ...
Tanzee Ignis (Location, Drops, Uses, Partner Skill & Work Suitability): Palworld
Tanzee Ignis takes everything that made Tanzee reliable and cranks up the heat, replacing its usual tricks with fiery attacks ...

Clovee (Location, Drops, Uses, Partner Skill & Work Suitability): Palworld
Clovee is one of those Pals that quietly keeps a base running, making it a welcome companion for players who ...

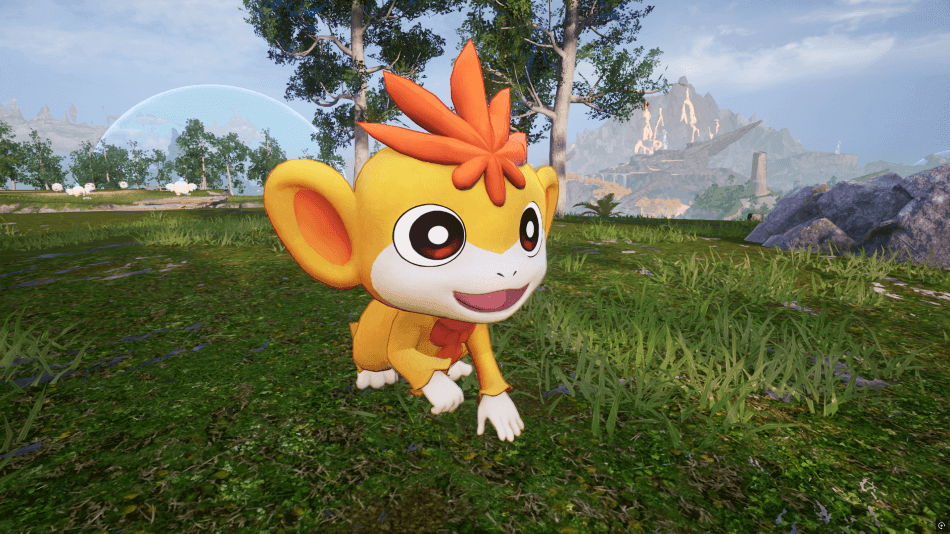
Pupperai (Location, Drops, Uses, Partner Skill & Work Suitability): Palworld
One of the earliest Pals that players can add to their collection in Palworld is Pupperia, a loyal companion that ...
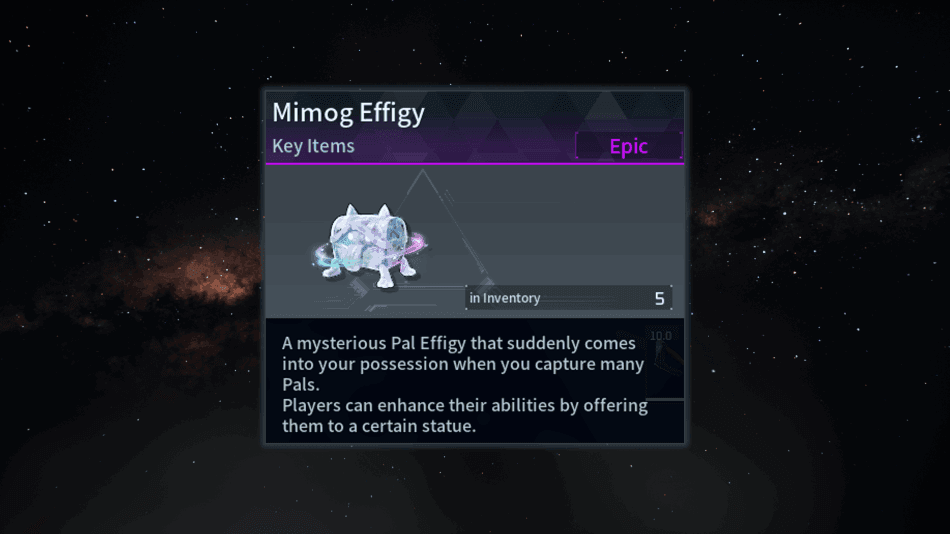
Palworld: Mimog Effigy (How To Get & Uses)
Mimog Effigy is a Key Item in Palworld that rewards players for expanding their collection instead of relying solely on ...
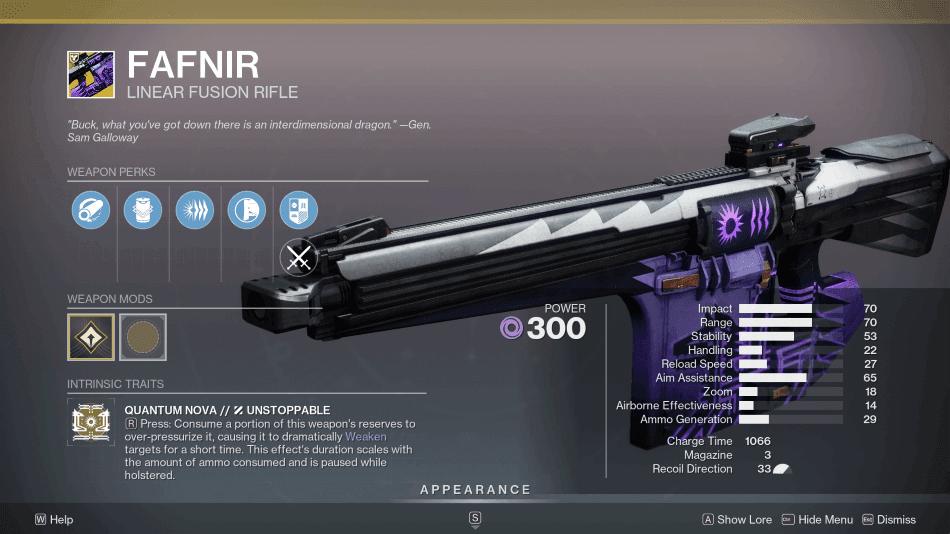
Destiny 2: How To Get Fafnir & Catalyst
Fafnir is an Exotic Linear Fusion Rifle that rewards careful preparation, letting you sacrifice ammunition to greatly weaken powerful enemies ...
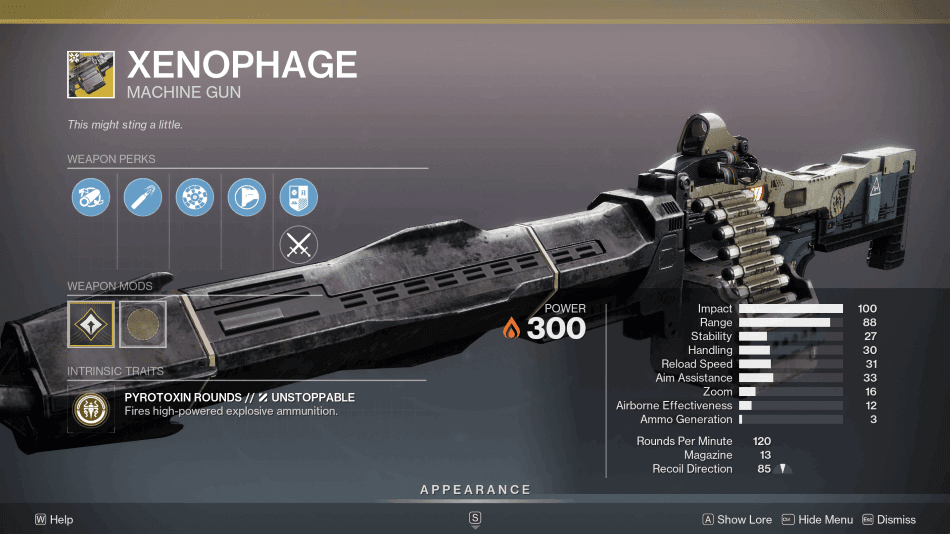
Destiny 2: How To Get Xenophage & Catalyst
Xenophage is an Exotic Machine Gun that trades rapid fire for devastating high-impact rounds capable of crushing both minor enemies ...
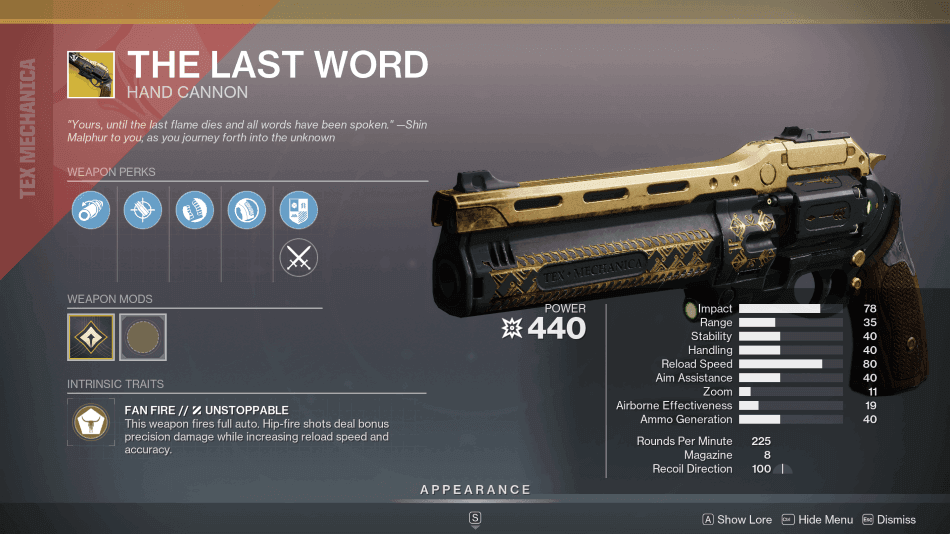
Destiny 2: How To Get The Last Word & Catalyst
The Last Word is an Exotic Hand Cannon that rewards confidence, encouraging Guardians to get up close and rely on ...
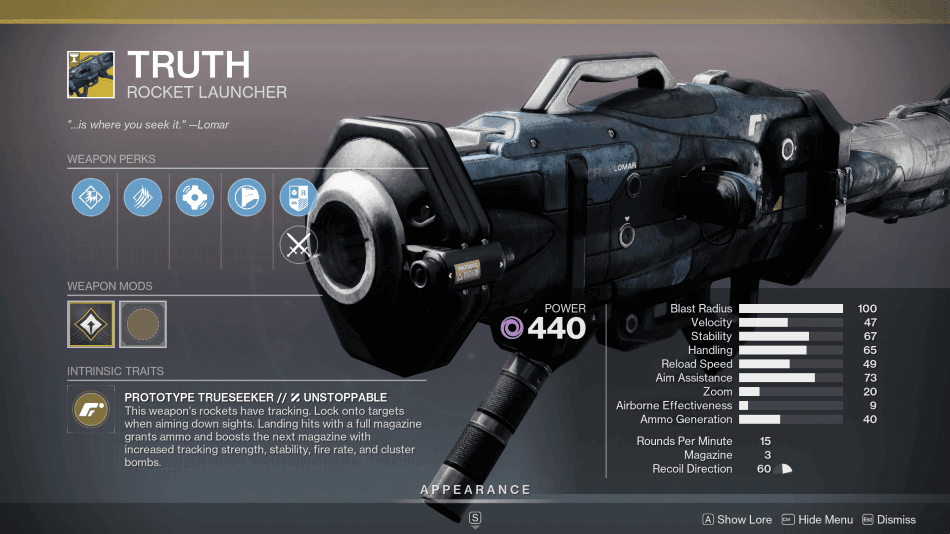
Destiny 2: How To Get Truth & Catalyst
Truth is an Exotic Rocket Launcher built around one simple idea: once it locks on, very few targets can escape ...
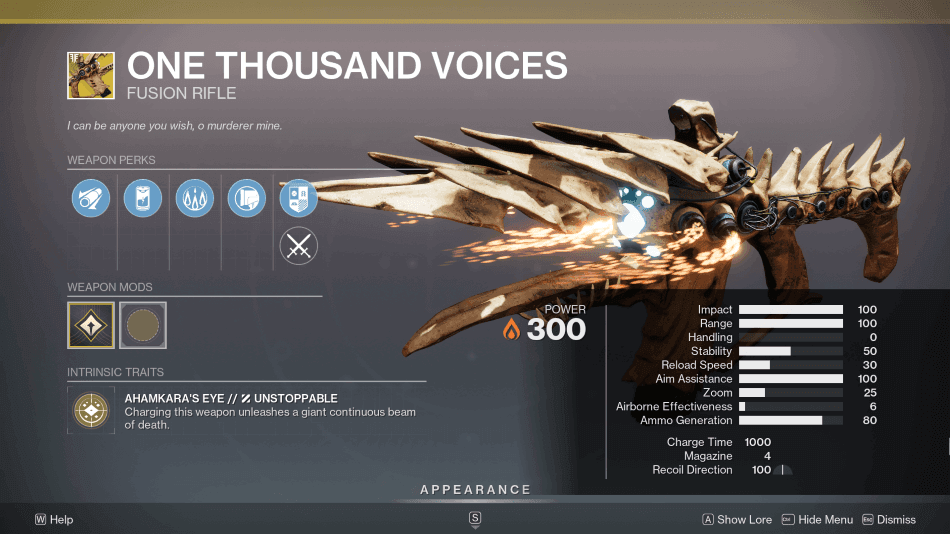
Destiny 2: How To Get One Thousand Voices & Catalyst
One Thousand Voices is one of Destiny 2’s most destructive Exotic Fusion Rifles, capable of turning a single shot into ...
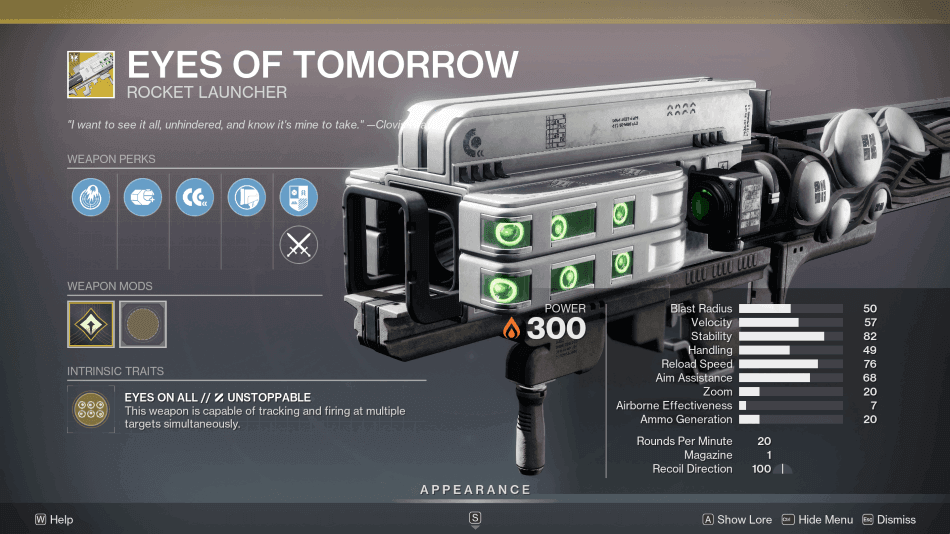
Destiny 2: How To Get Eyes of Tomorrow & Catalyst
Eyes of Tomorrow is an Exotic Rocket Launcher that overwhelms the battlefield by locking onto multiple enemies before unleashing a ...
Destiny 2: How To Get The Euphony & Catalyst
Euphony is an Exotic Linear Fusion Rifle that grows stronger as Strand abilities and Threadlings overwhelm the battlefield alongside its ...
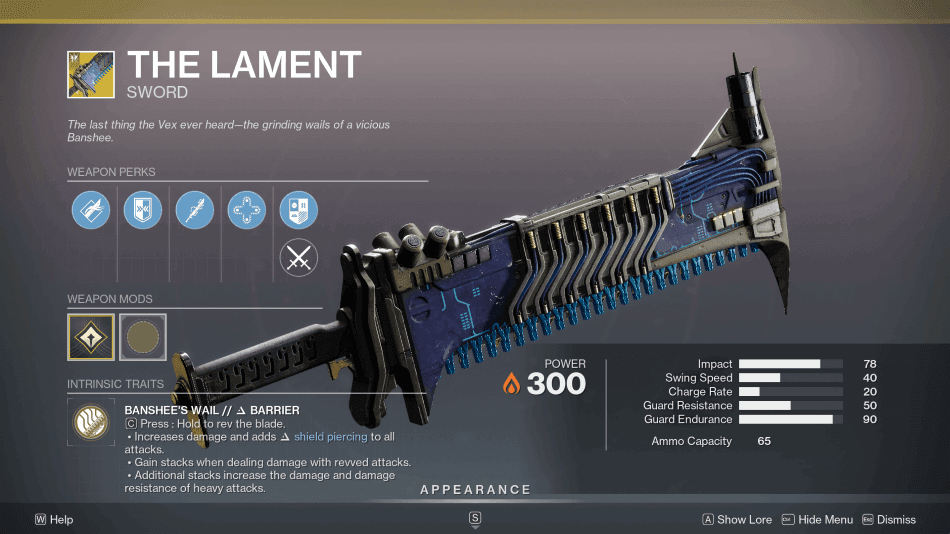
Destiny 2: How To Get The Lament & Catalyst
The Lament is an Exotic Sword that tears through enemies with relentless chainsaw-like attacks, turning every swing into a brutal ...
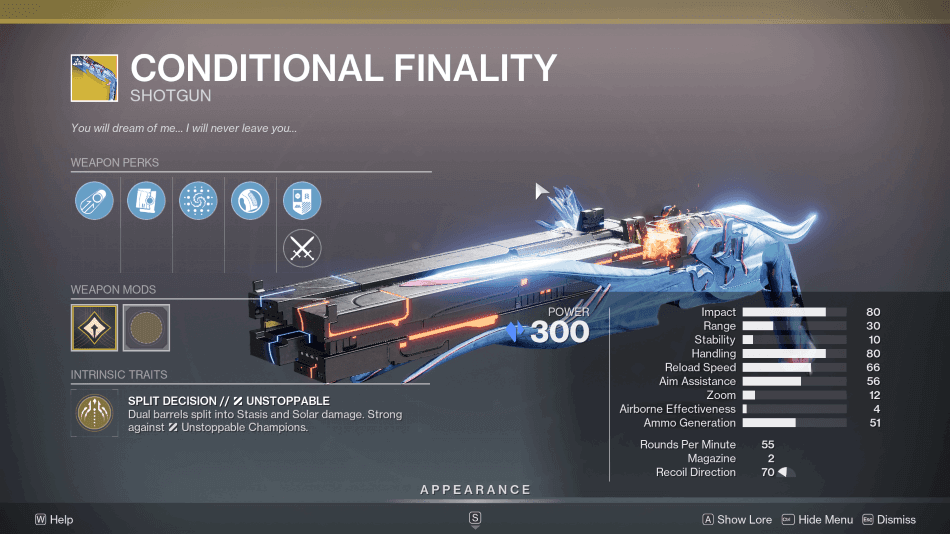
Destiny 2: How To Get Condition Finality & Catalyst
Condition Finality breaks away from traditional Shotguns by combining two opposing elements into a single weapon, giving every trigger pull ...
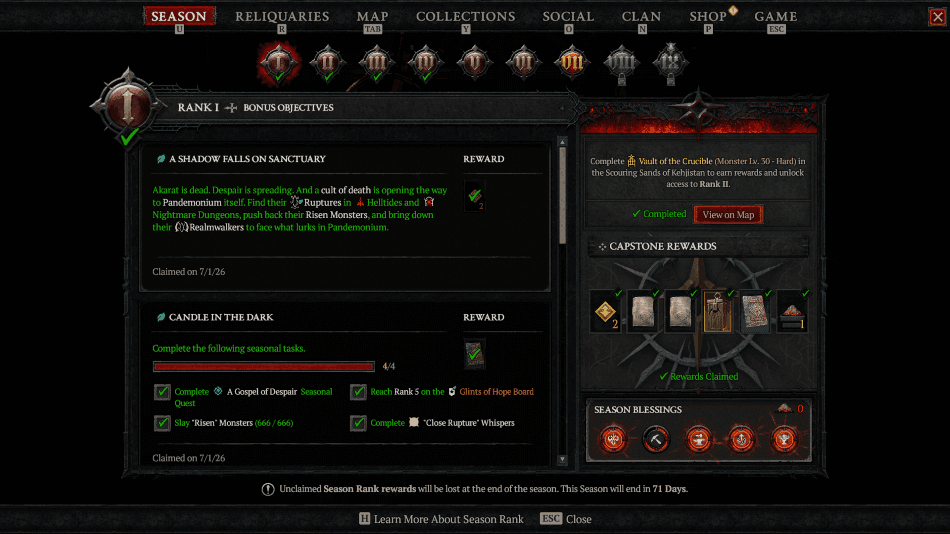
Diablo 4: Season 14 Season Rank (Objectives & Rewards)
Diablo 4 Season 14 introduces a redesigned Season Rank system that guides players through the seasonal journey while rewarding steady ...
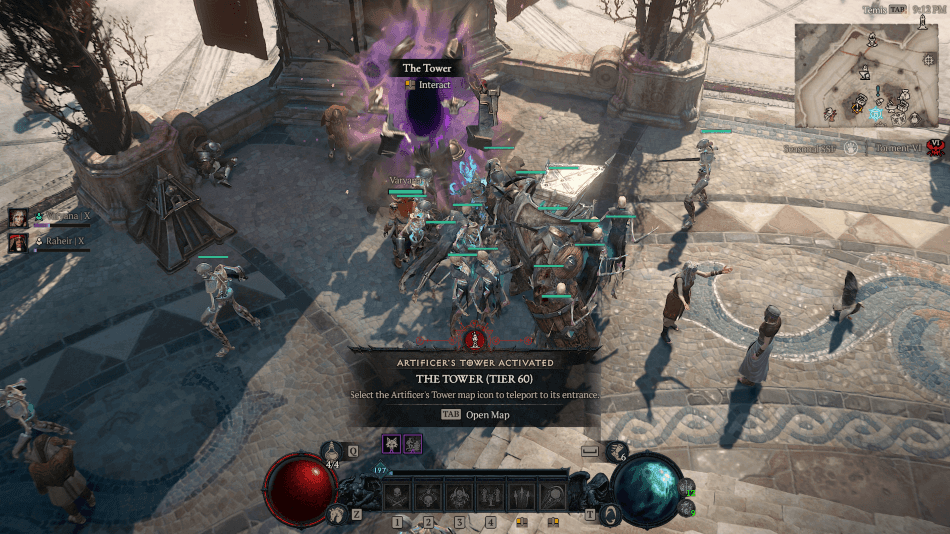
Diablo 4: The Tower Guide (Mechanics, Leaderboards & Rewards)
The Tower is an endgame activity in Diablo 4 that challenges players to push increasingly difficult encounters while competing for ...
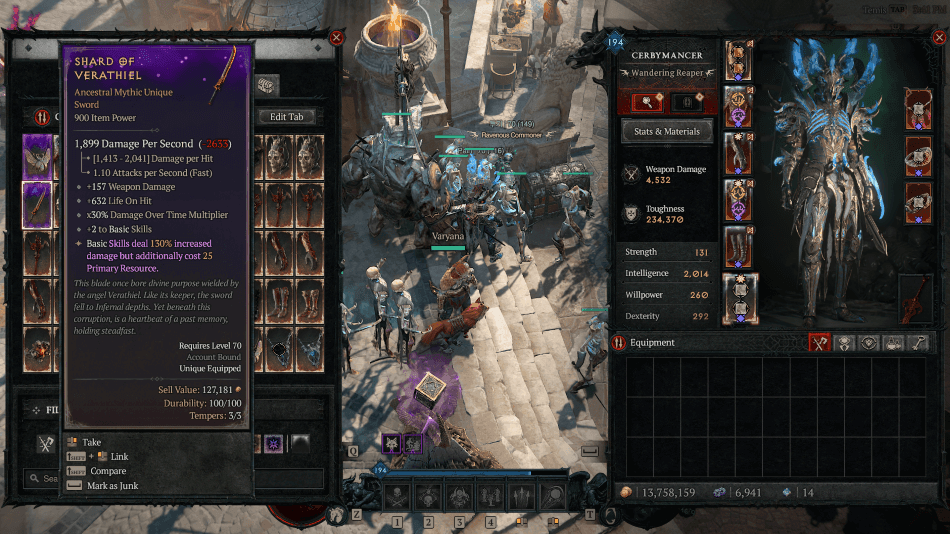
Diablo 4: Mythic 3.0 Guide (How To Craft & Get Mythic Uniques)
Mythic Uniques 3.0 is one of the biggest itemization changes introduced in Season 14: Season of Death Awakening, completely reworking ...
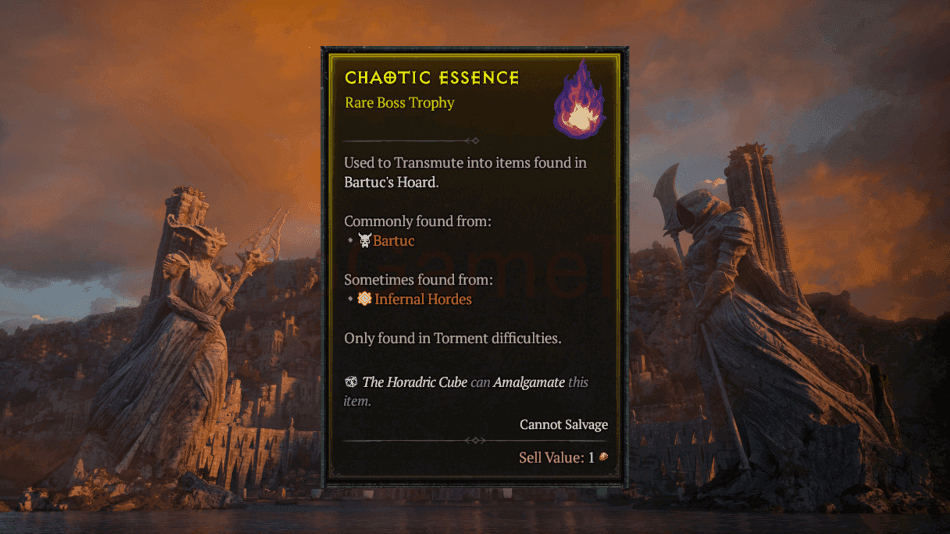
Diablo 4: Chaotic Essence (How to Get & Uses)
Chaotic Essence is a Boss Trophy introduced in Season 14: Season of Death Awakening, adding another way to obtain rewards ...
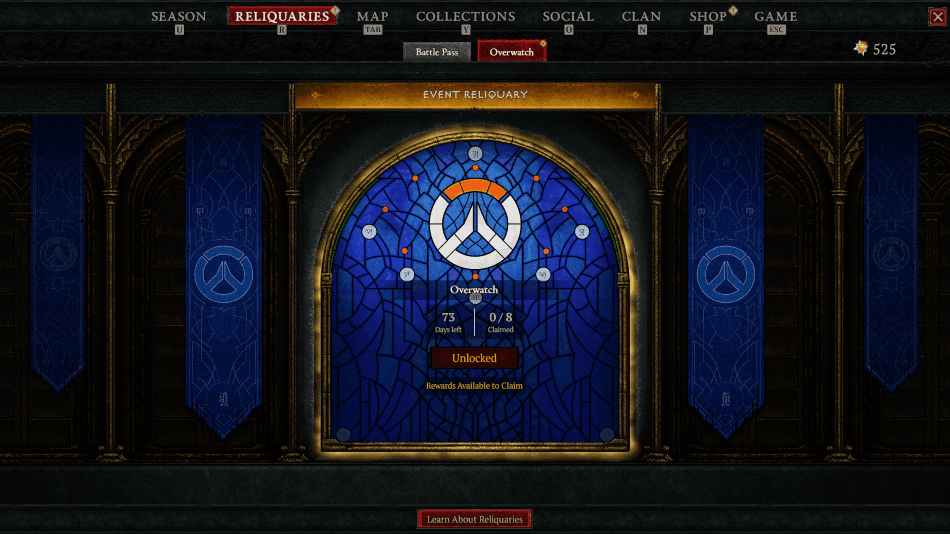
Diablo 4 x Overwatch Collab Event (Overwatch Reliquary)
A limited-time crossover brings Overwatch-themed cosmetics into Diablo 4 through a special event Reliquary running alongside the current season. During ...
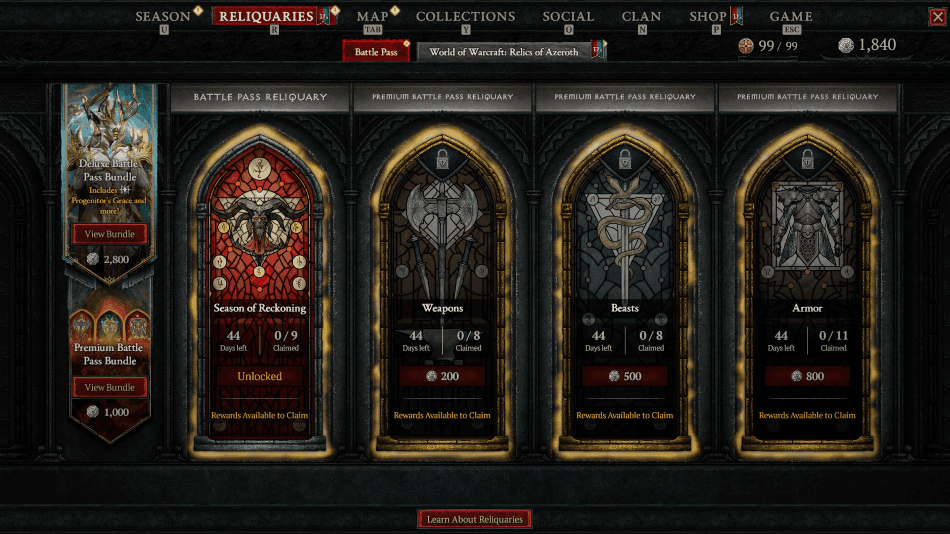
Diablo 4: Season 14 Reliquary & Battle Pass Rewards (Season of Death Awakening)
Season of Death Awakening introduces a fresh collection of Reliquary rewards in Diablo 4, featuring new armor appearances, weapon cosmetics, ...
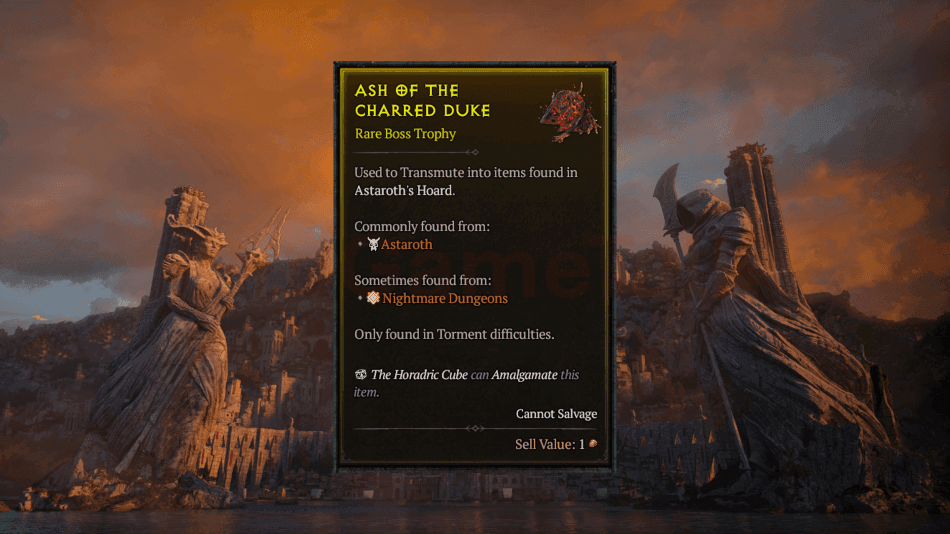
Diablo 4: Ash of the Charred Duke (How to Get & Uses)
Ash of the Charred Duke is a Boss Trophy that was introduced in Season 14: Season of Death Awakening, serving ...
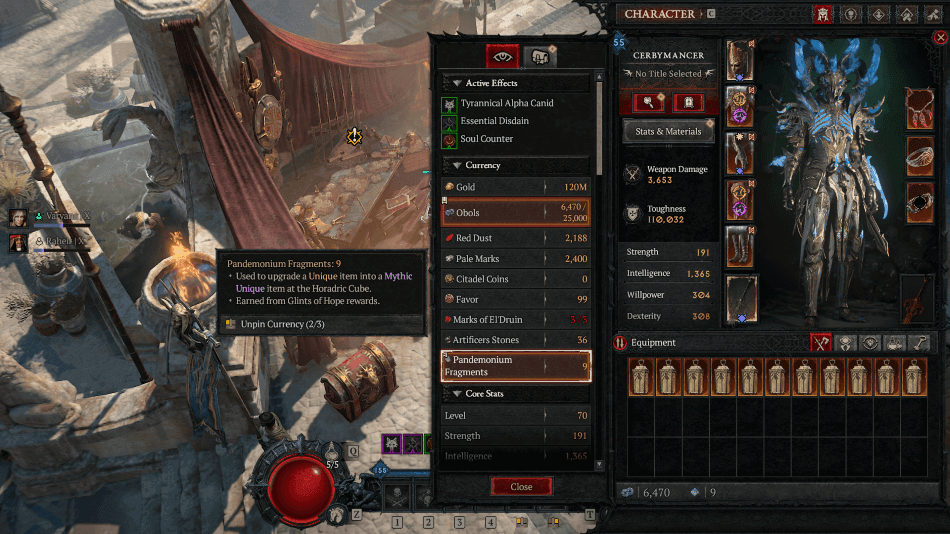
Diablo 4: Pandemonium Fragments (How To Get & Uses)
Pandemonium Fragments are a new endgame currency introduced in Season of Death Awakening, serving as one of the rarest crafting ...
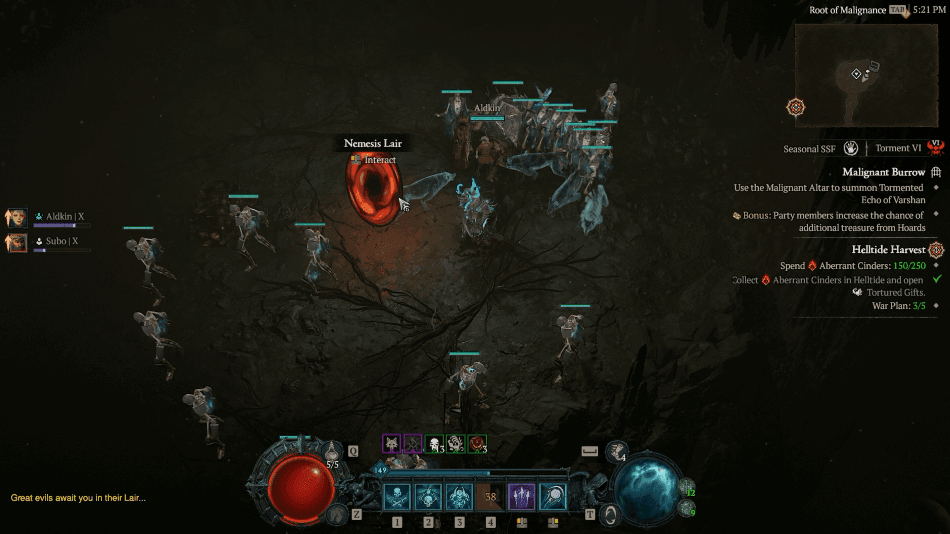
Diablo 4: Nemesis Lair (How to Unlock, Upgrades & Rewards)
The Nemesis Lair is one of the new endgame features introduced in Season of Death Awakening, expanding Lair Boss farming ...
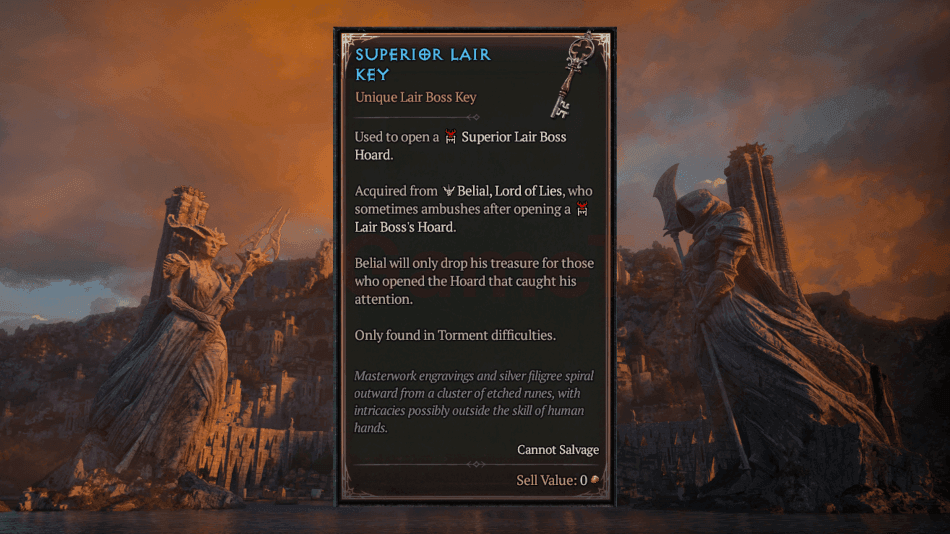
Diablo 4: How To Get Superior Lair Keys
Superior Lair Keys are a new endgame item introduced in Season of Death Awakening, granting access to some of Diablo ...
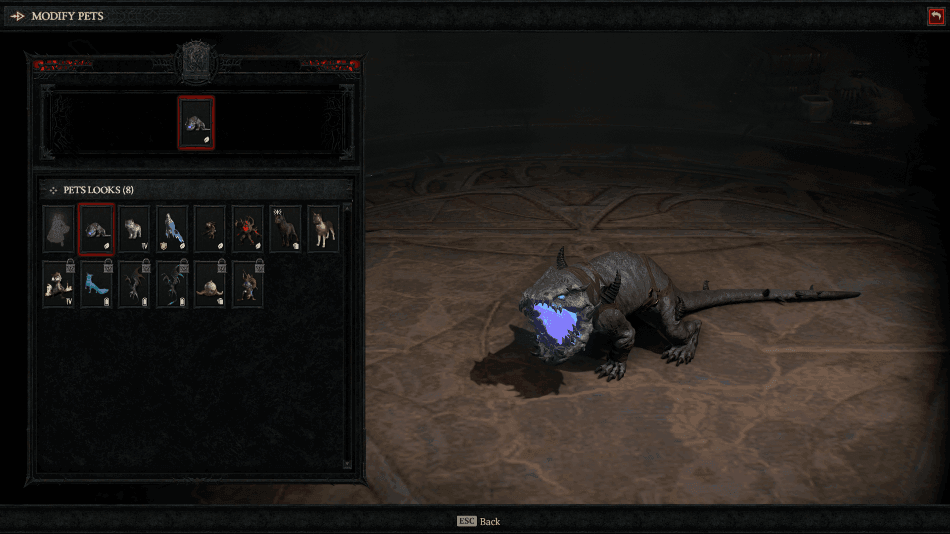
Diablo 4: How To Get the Greystone Pet (Season of Death Awakening)
As the influence of Pandemonium spreads across Sanctuary, even familiar creatures have become twisted into savage versions of their former ...

Diablo 4: Corrupted Reaper (Location, Summoning, Defeating & Drops)
The Corrupted Reaper serves as Season of Death Awakening’s exclusive Seasonal Lair Boss, waiting within Pandemonium for those strong enough ...
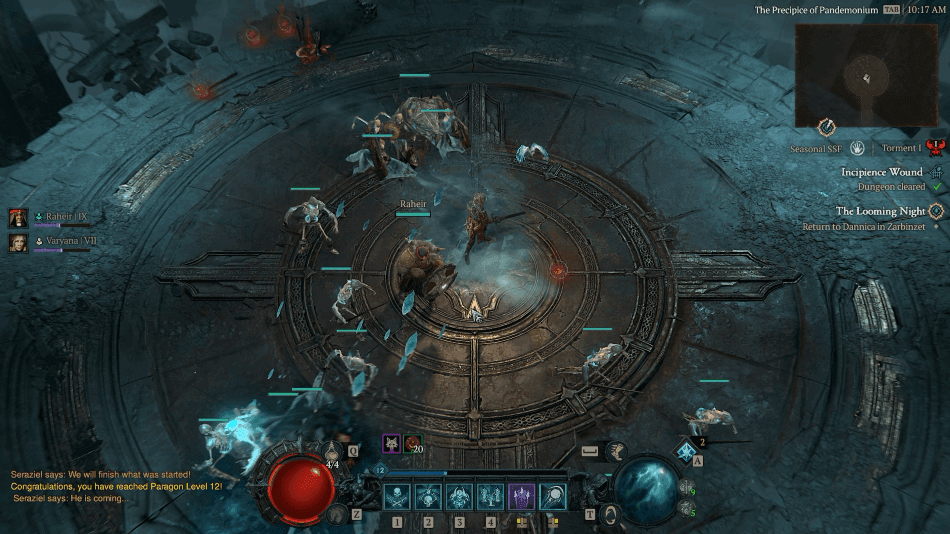
Diablo 4: The Looming Night Quest Walkthrough
After defeating Seraziel, the Corrupted Reaper, your next step is to return to Sanctuary and report what happened to Dannica. ...
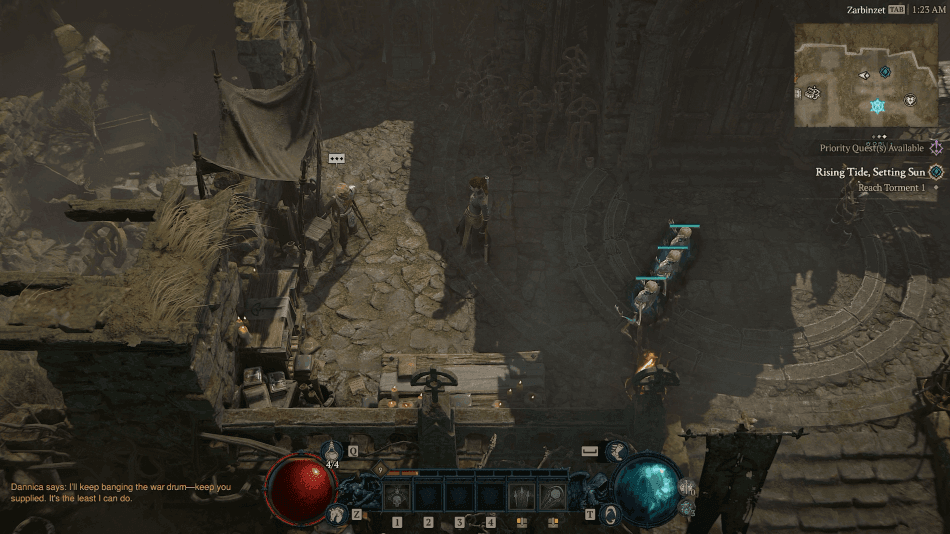
Diablo 4: Rising Tide, Setting Sun Quest Walkthrough
After investigating the Ruptures and the Ullo Sar’s growing influence, the trail temporarily runs cold while you prepare for the ...

Diablo 4: Solo Self Found Mode Guide (How It Works & Leaderboards)
Solo Self Found (SSF) is a seasonal character mode designed entirely around isolated progression, where players experience Sanctuary without trading ...
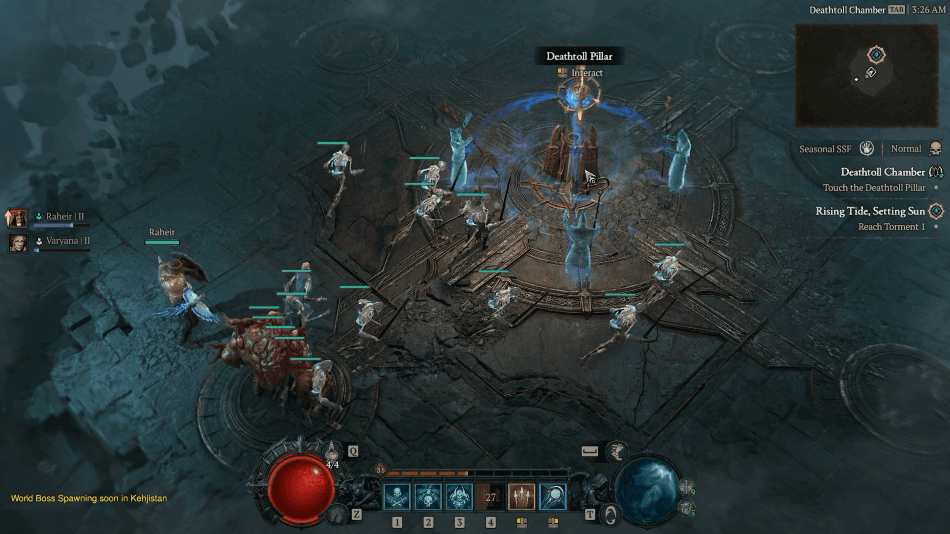
Diablo 4: Deathtoll Chambers (How To Enter & Rewards)
The Ullo Sar’s rituals have not only fractured Ruptures across Sanctuary but have also forced a deeper connection to Pandemonium. ...
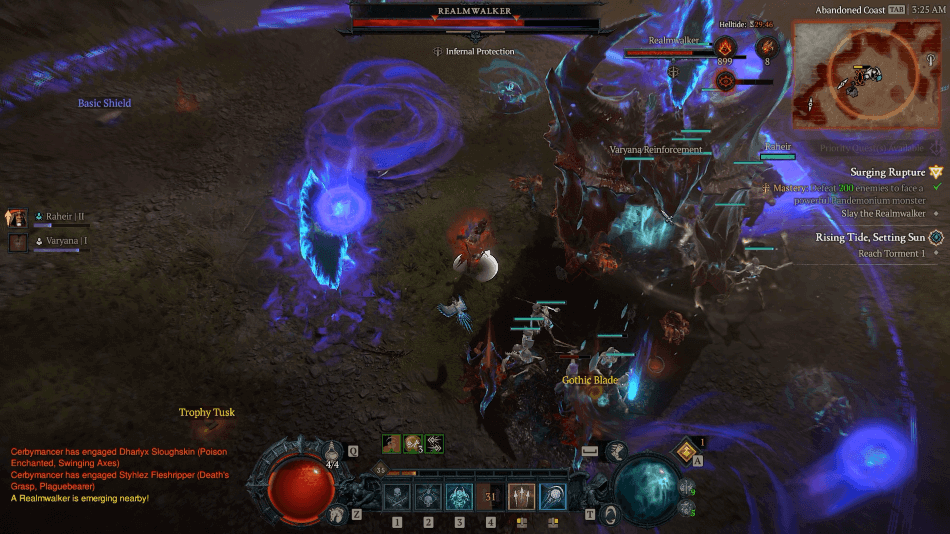
Diablo 4: Realmwalkers (How To Challenge, Fight & Rewards)
Realmwalkers return in the Season of Death Awakening, once again serving as powerful enemies connected to the growing threat spreading ...
Diablo 4: Ruptures Guide (Normal, Surging & Colossal)
The Ullo Sar’s dark rituals have begun tearing open the boundary between Sanctuary and Pandemonium, creating dangerous breaches known as ...
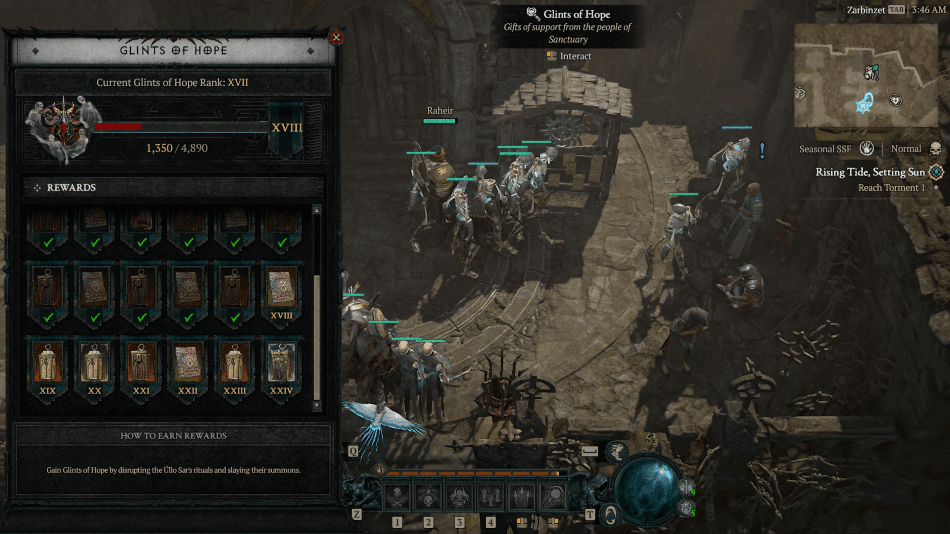
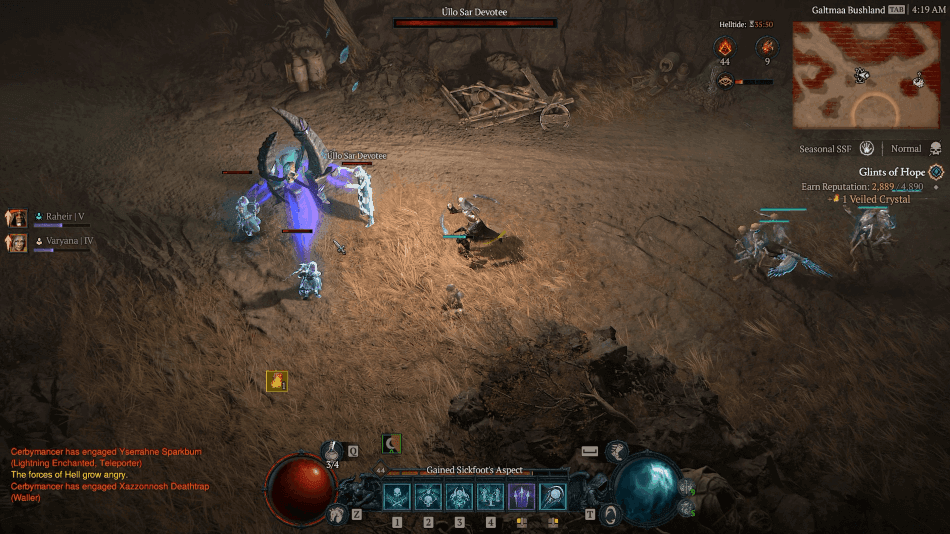
Diablo 4: Glints of Hope Reputation (Location, How to Get & Rewards)
With the Season of Death Awakening now live, a new Reputation Board is available, and this one is probably one ...
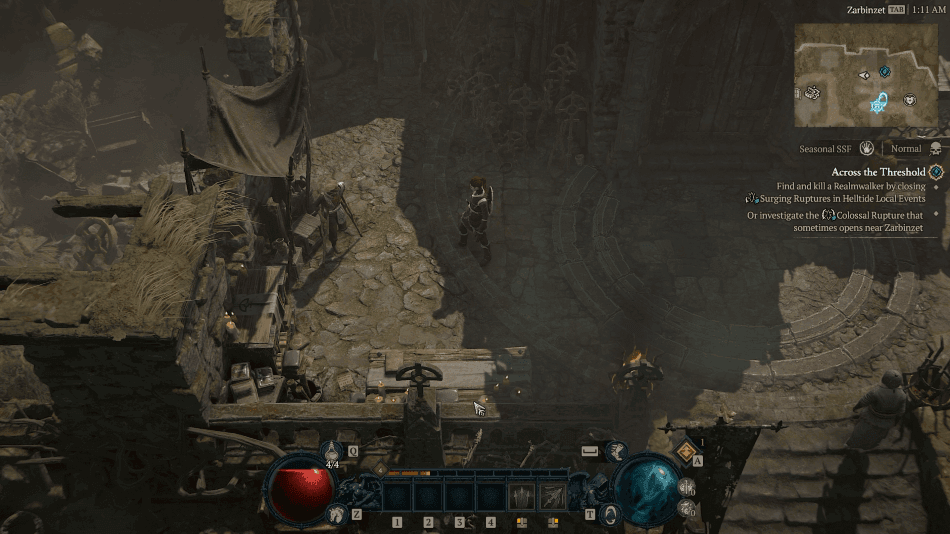
Diablo 4: Across the Threshold Quest Walkthrough (Season 14)
Following the discovery of the Ullo Sar’s plans, you now need to investigate further by checking out the Ruptures that ...
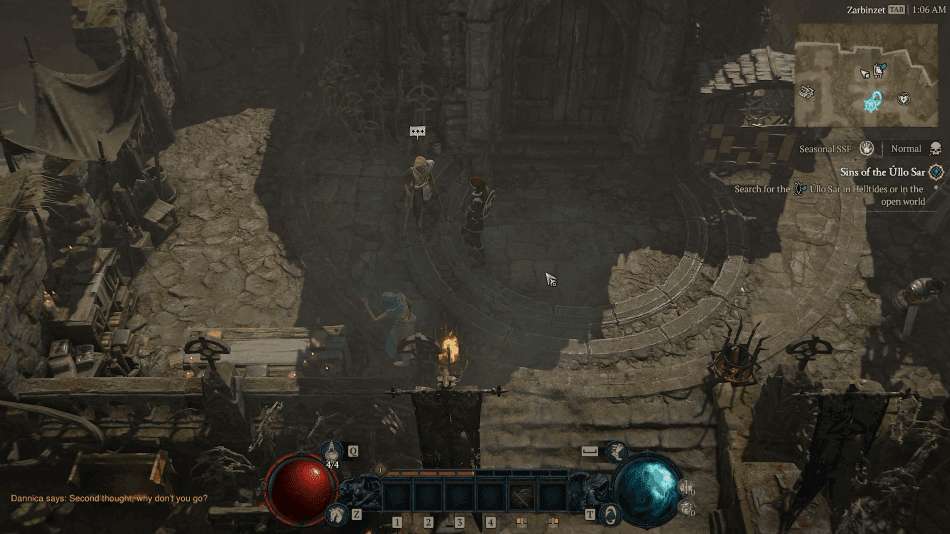
Diablo 4: Sins of the Ullo Sar Quest Walkthrough
After receiving a letter sent by Tyrael, you previously made your way to Zarbinzet and met a person named Dannica, ...
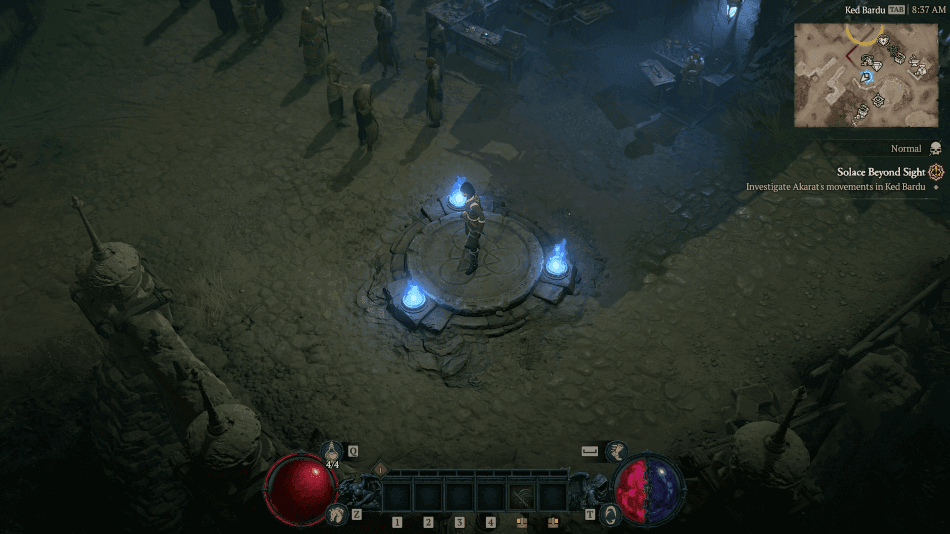
Diablo 4: A Gospel of Despair Quest Walkthrough
Something strange has happened, and it seems that Sanctuary has been connected to Pandemonium, but while things are still unclear, ...
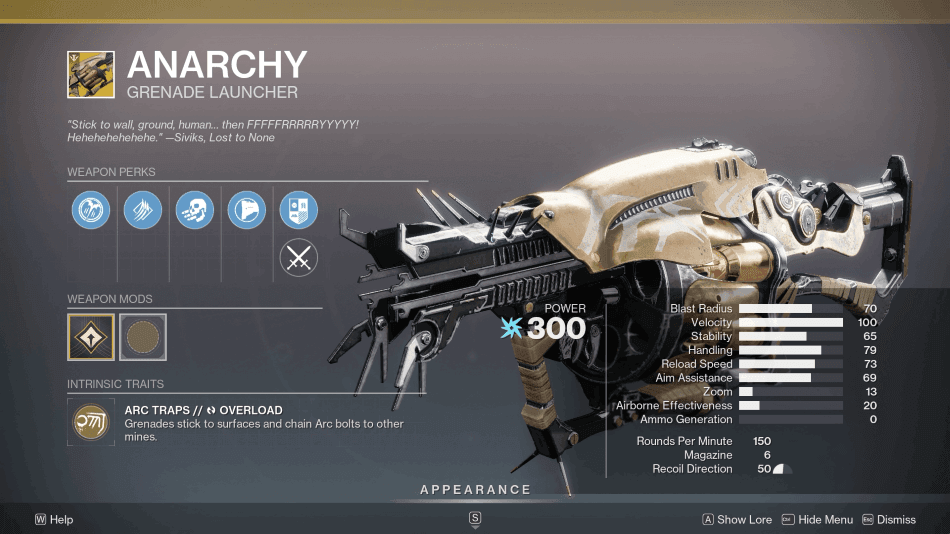
Destiny 2: How To Get Anarchy & Catalyst (Exotic Grenade Launcher)
Few Exotic weapons in Destiny 2 have earned a reputation quite like Anarchy, a Grenade Launcher capable of turning entire ...
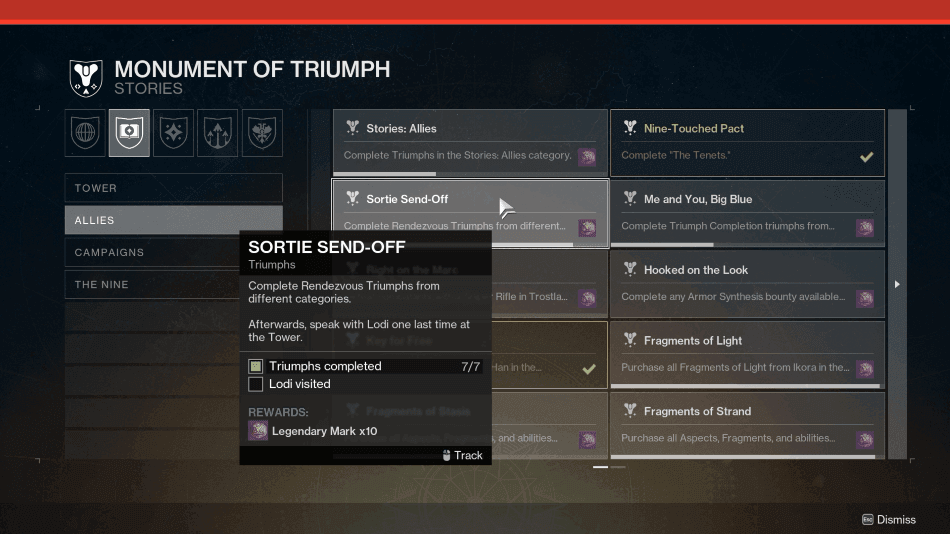
Destiny 2: Sortie Send-Off Triumph (How to Complete & Rewards)
Some Triumphs in the Monument of Triumph are less about combat and more about retracing your steps across key destinations ...
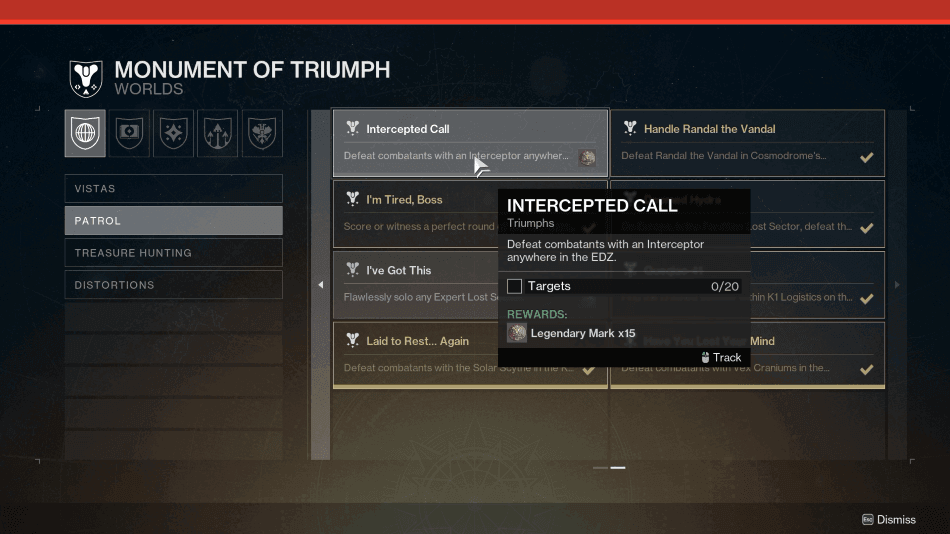
Destiny 2: Intercepted Call Triumph (How to Complete & Rewards)
Some Triumphs in the Monument of Triumph don’t ask you to fight harder, but instead to take control of the ...
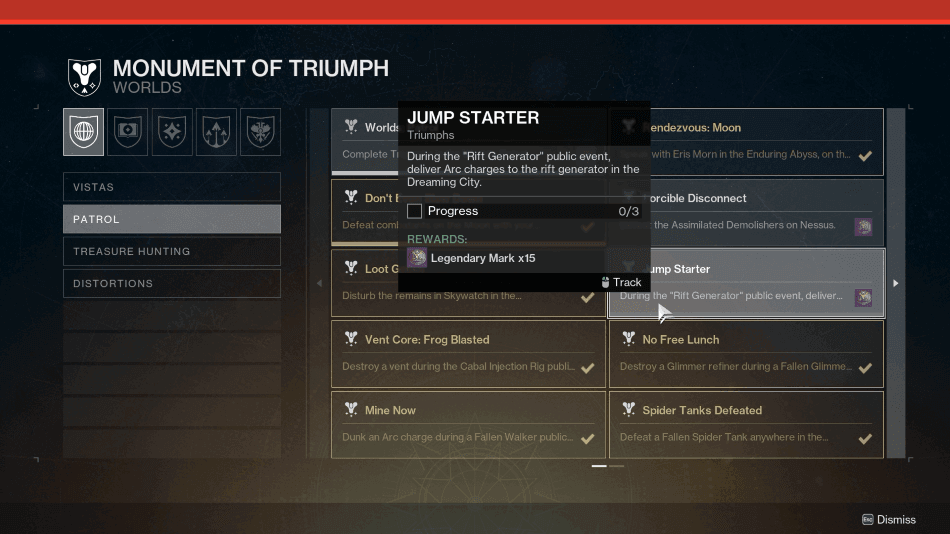
Destiny 2: Jump Starter Triumph (How to Complete & Rewards)
The Dreaming City is home to several unique Public Events, each featuring mechanics that require more than simply defeating waves ...
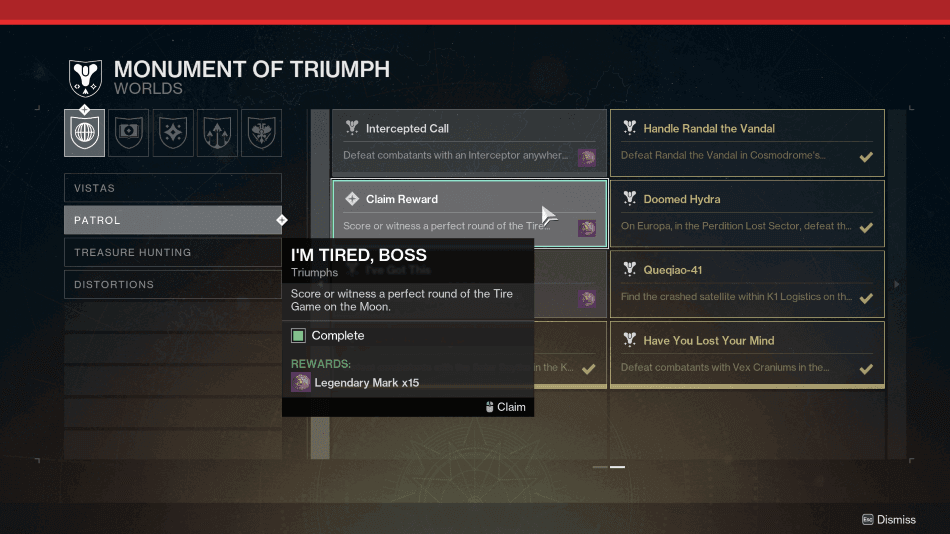
Destiny 2: I’m Tired, Boss Triumph (How to Complete & Rewards)
The Moon hides more than Lost Sectors and hidden secrets, as Sanctuary is also home to one of Destiny 2’s ...
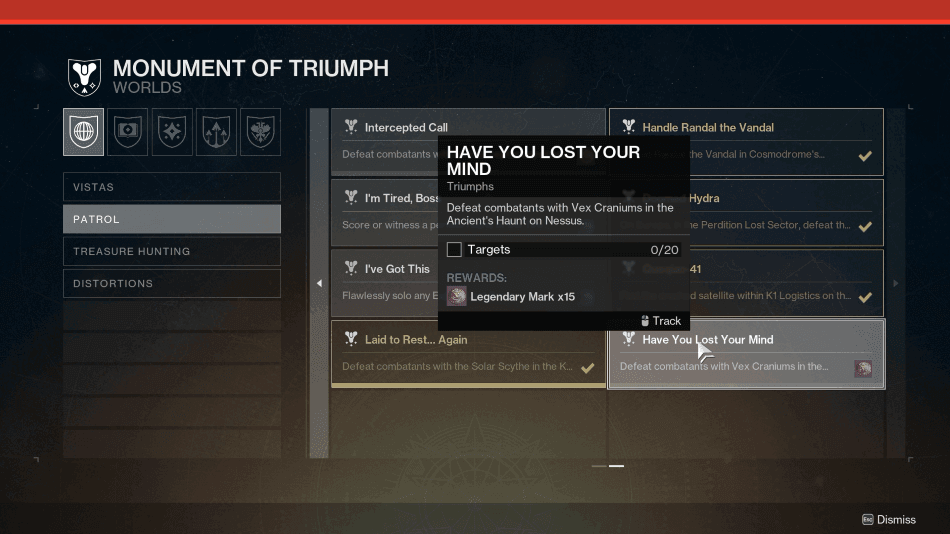
Destiny 2: Have You Lost Your Mind (How to Complete & Rewards) Triumph
The Vex are known for creating technology far beyond what most Guardians can fully understand, but occasionally you get the ...
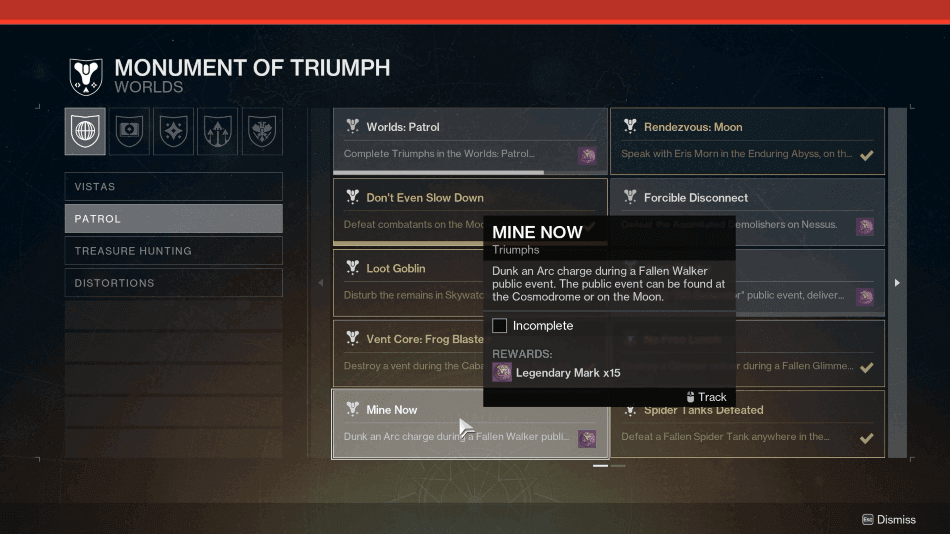
Destiny 2: Mine Now (How to Complete & Rewards) Triumph
Public Events often have mechanics that players ignore in favor of simply defeating enemies as quickly as possible, but some ...
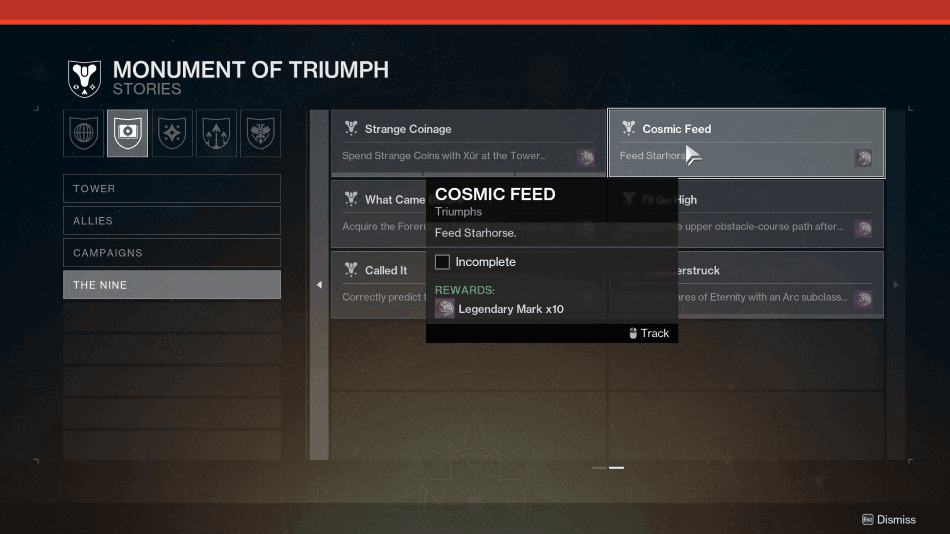
Destiny 2: Cosmic Feed (How to Complete & Rewards) Triumph
Not every Monument of Triumph objective involves defeating enemies, as some simply require you to interact with one of Destiny ...
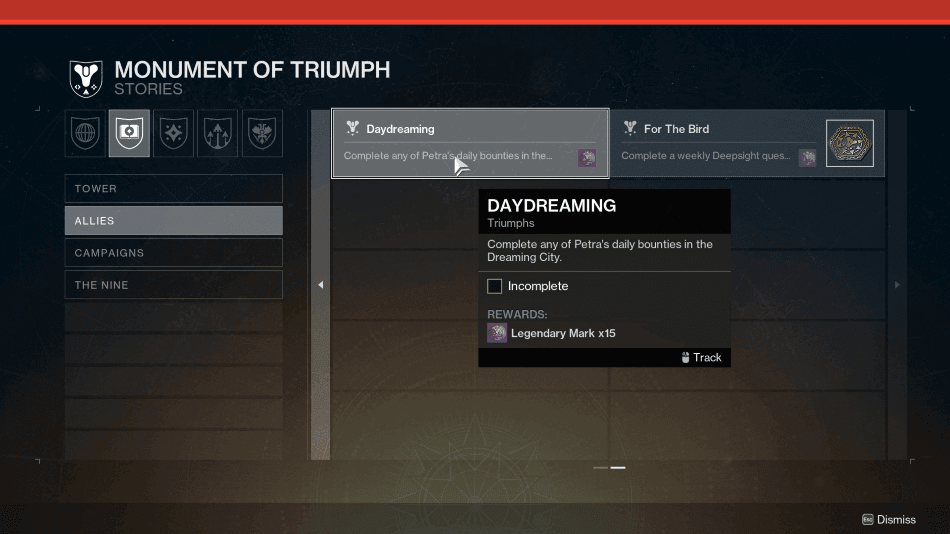
Destiny 2: Daydreaming (How to Complete & Rewards) Triumph
The Dreaming City is home to plenty of activities, but one of the easiest ways to make progress is by ...
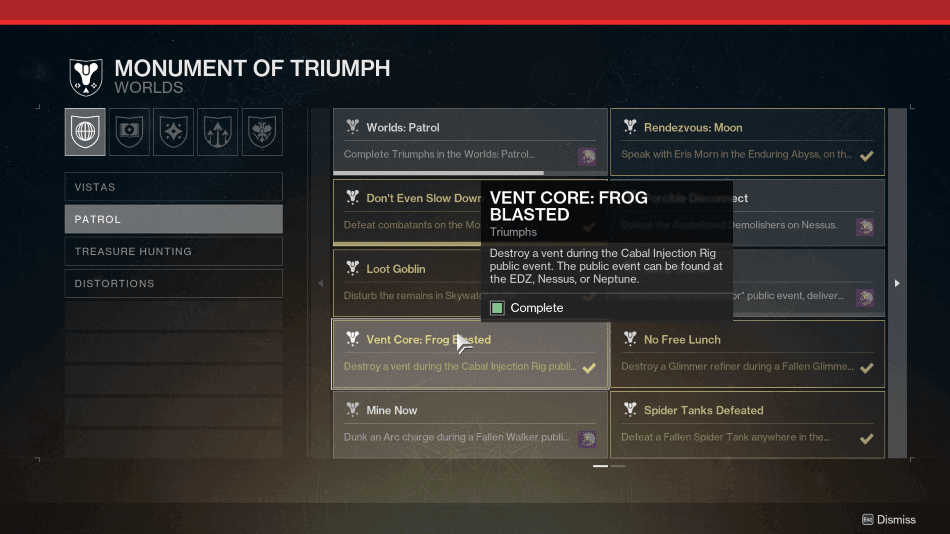
Destiny 2: Vent Core: Frog Blasted (How to Complete & Rewards) Triumph
Destiny 2’s Monument of Triumph includes objectives that encourage players to interact with Public Events in ways they may have ...
Destiny 2: Laid To Rest… Again (How to Complete & Rewards) Triumph
Destiny 2’s Monument of Triumph includes a variety of objectives that encourage players to revisit older activities and interact with ...
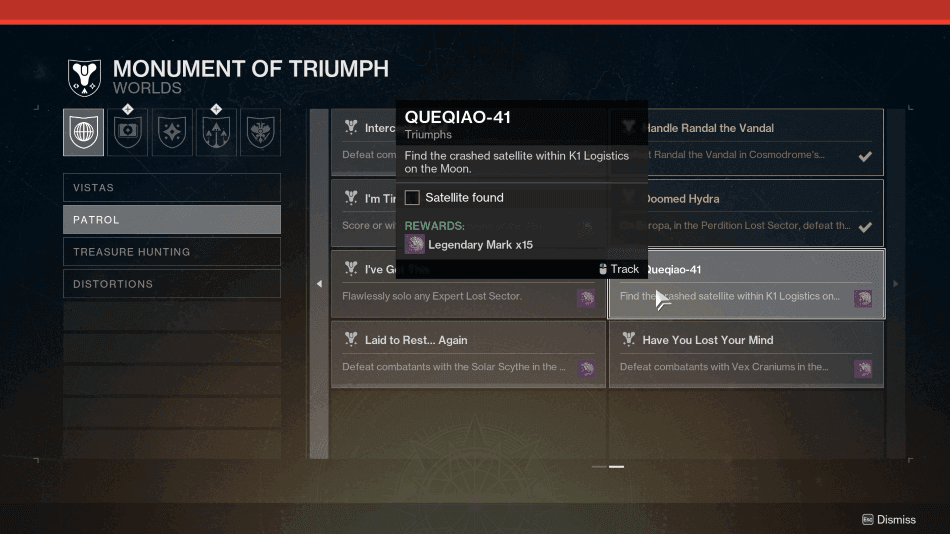
Destiny 2: Quequiao-41 (How to Complete, Rewards & Crashed Satellite Location)
Destiny 2’s Monument of Triumph is filled with objectives that send players across familiar destinations in search of hidden secrets ...
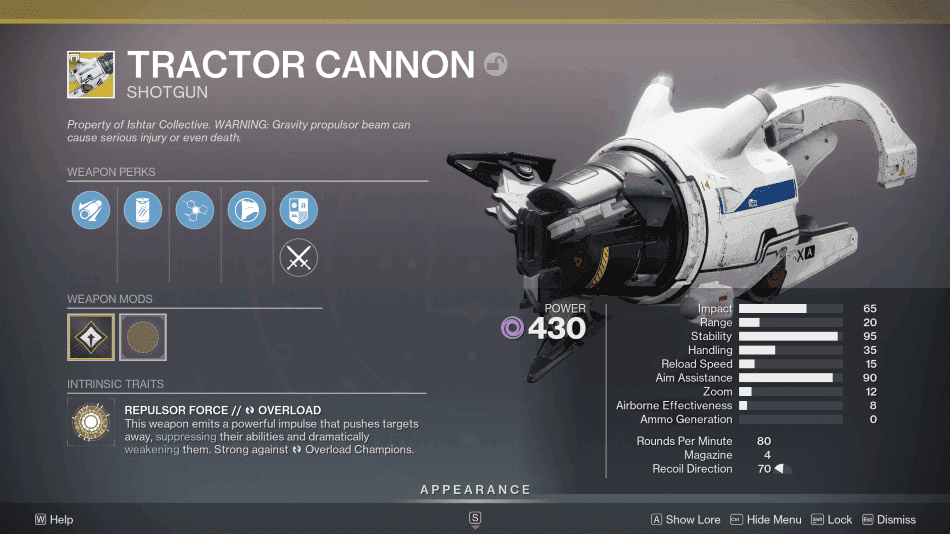
Destiny 2: How To Get Tractor Cannon (Exotic Hand Cannon)
Few weapons in Destiny 2 are as entertaining as Tractor Cannon, turning enemies into airborne projectiles while setting them up ...

Destiny 2: Doomed Hydra (How To Complete & Rewards) Triumph
Destiny 2’s Monument of Triumph includes several objectives that test your knowledge of older destinations and activities throughout the game. ...
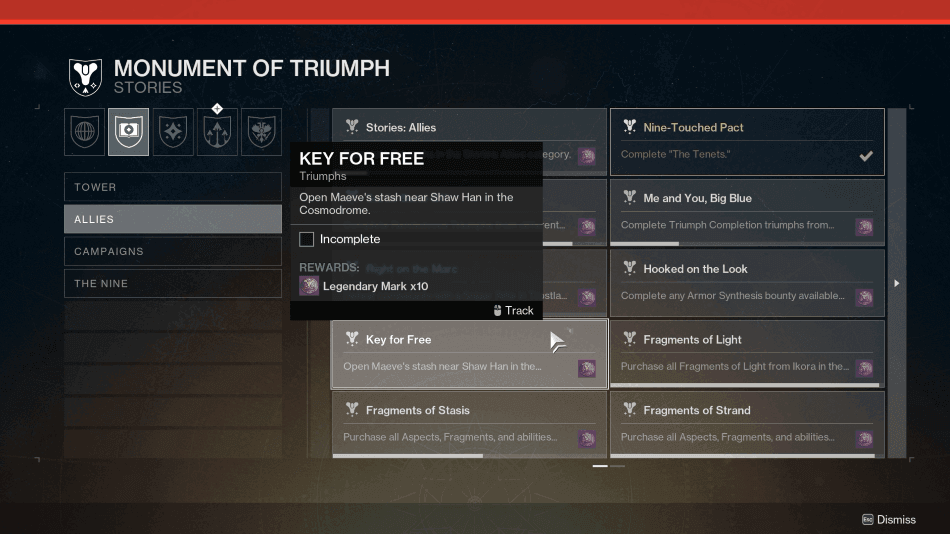
Destiny 2: Key For Free (How To Complete & Rewards) Triumph
Not every Monument of Triumph objective requires combat, as some simply ask you to revisit older locations and uncover rewards ...
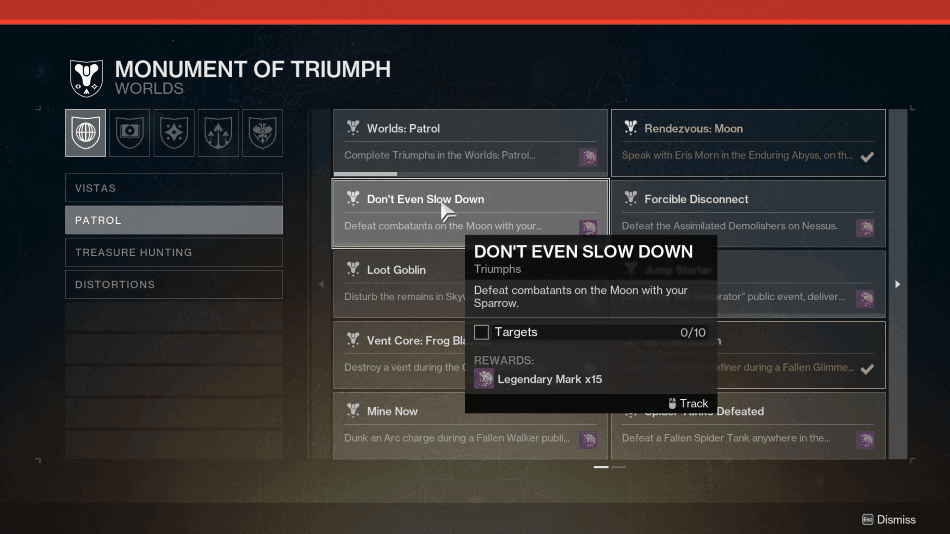
Destiny 2: Don’t Even Slow Down (How To Complete & Rewards) Triumph
There are several ways for you to defeat enemies in Destiny 2, and one of the funniest ways might be ...
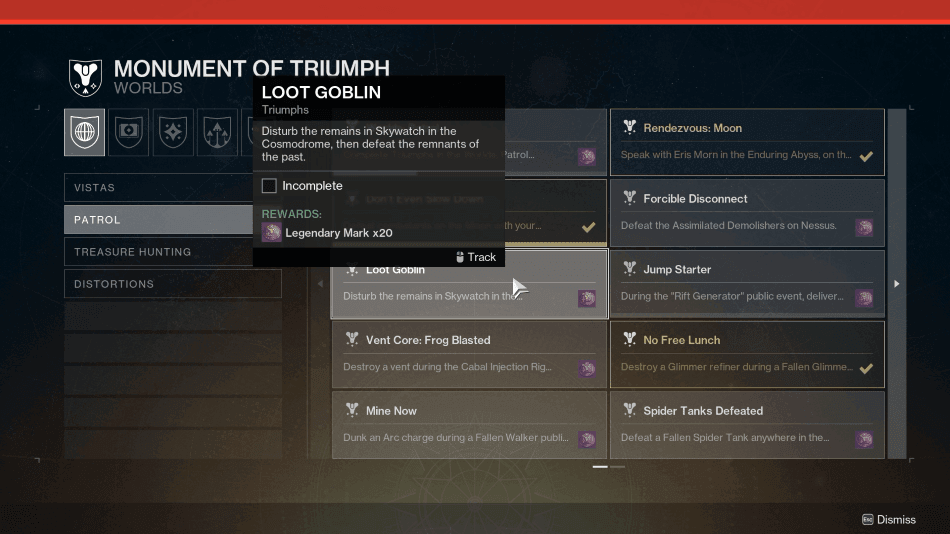
Destiny 2: Loot Goblin (How To Complete, Rewards & Loot Cave Remains Location) Triumph
Destiny 2 has been known to hide a few easter eggs from time to time, and one of the most ...
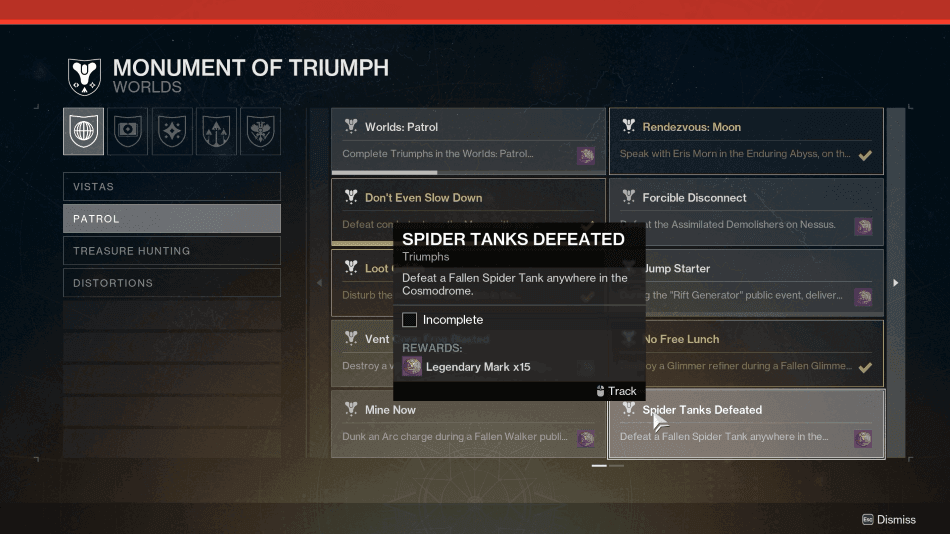
Destiny 2: Spider Tanks Defeated (How To Complete & Rewards) Triumph
Destiny 2 features several Monument of Triumph objectives that encourage players to revisit older destinations and take on familiar enemies. ...
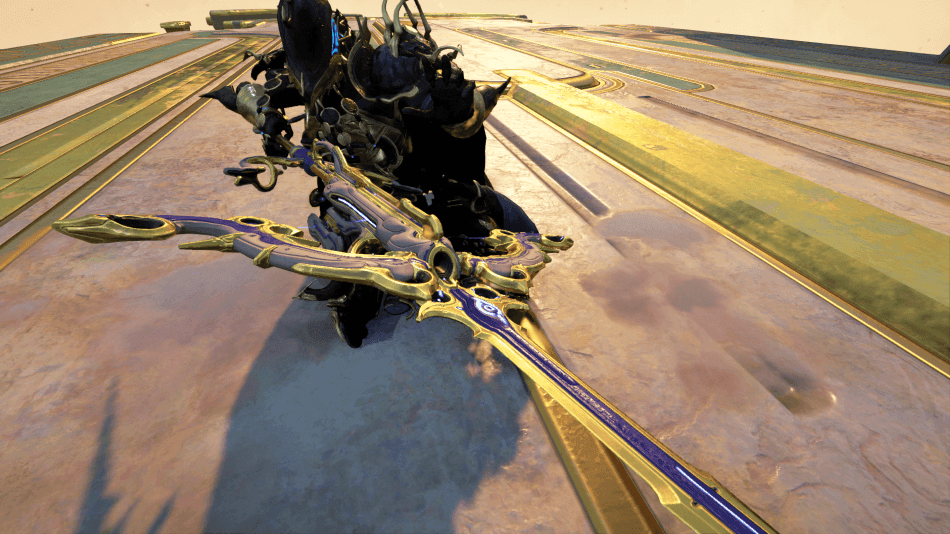
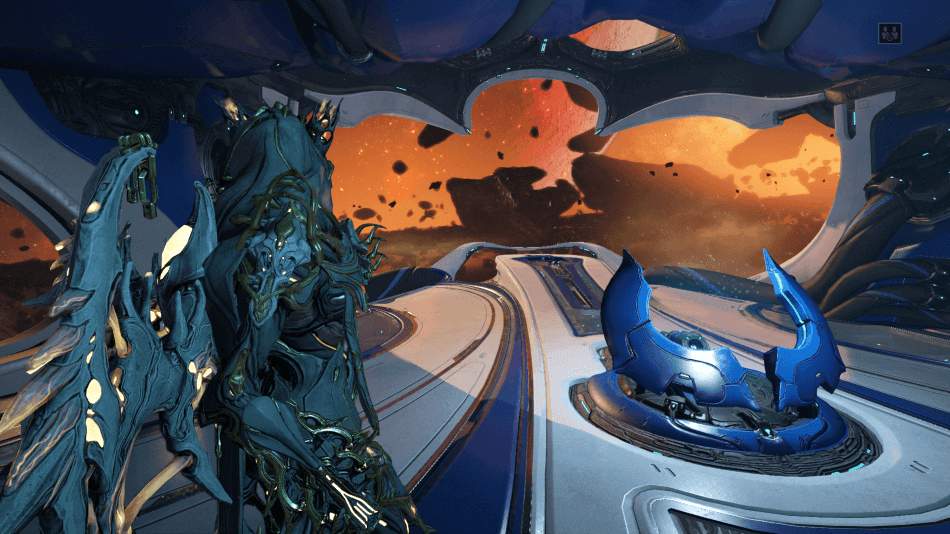
Warframe: Afentis Prime (How to Get & Builds)
With the release of Styanax Prime, his signature speargun also received a Primed version in the form of Afentis Prime. ...
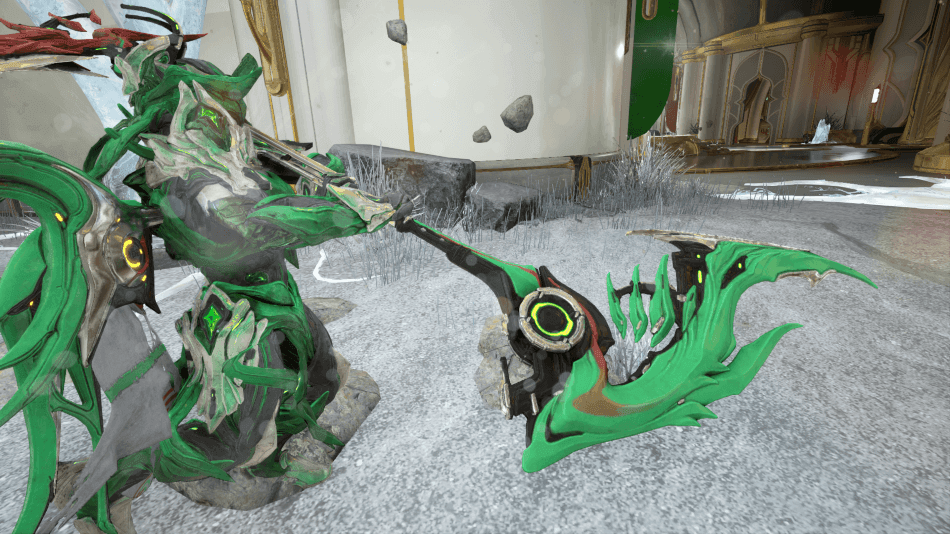
Warframe: Wrath (How To Get & Builds)
Wrath is Orion’s signature scythe, created as the counterpart to Sirius’ Pride and embodying the destructive force behind the celestial ...
Warframe: Pride (Scythe) (How To Get & Builds)
Pride is Sirius’ signature scythe, introduced with the Jade Shadows: Constellations update as one of the new weapons tied to ...
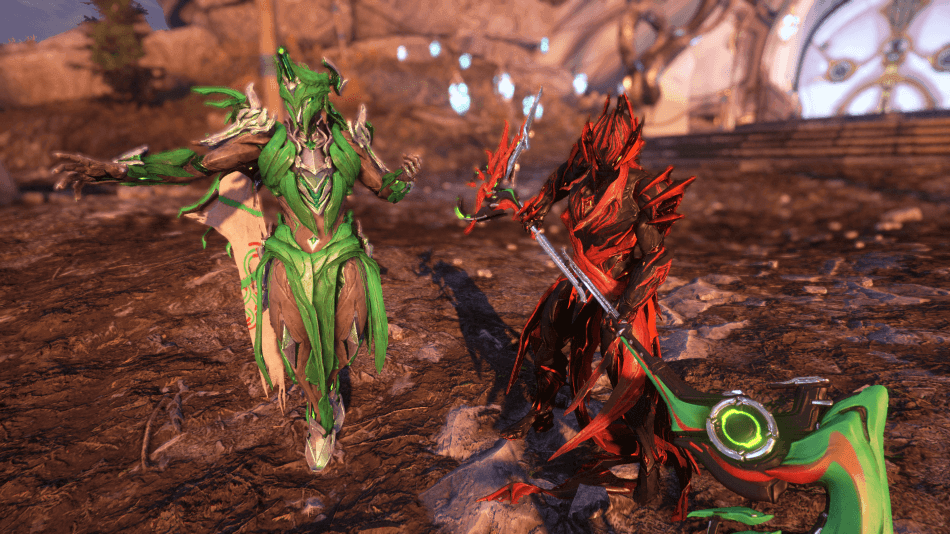
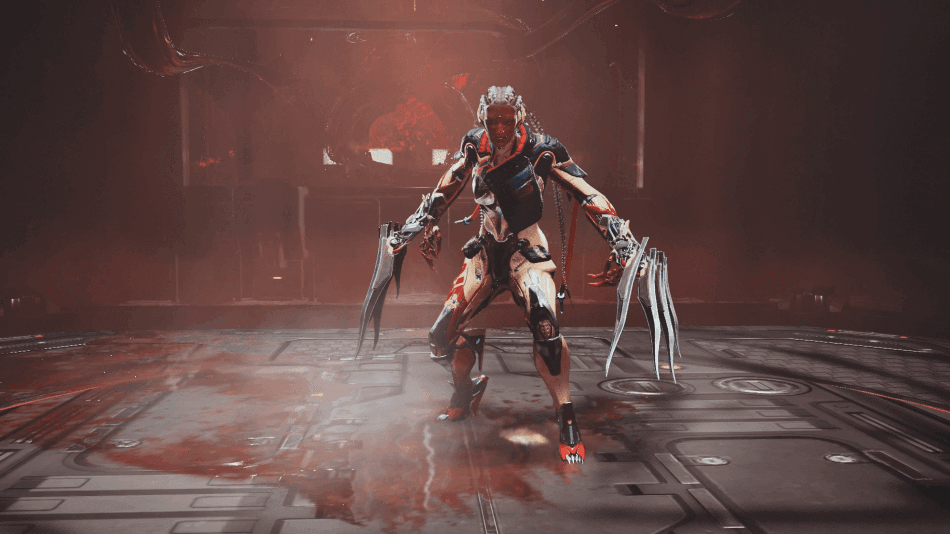
Warframe: How to Get Sirius & Orion
Sirius & Orion are brothers locked in eternal combat, whose celestial powers bring destruction to anything caught between them. Their ...
Warframe: Sirius & Orion Builds
Sirius & Orion bring a unique playstyle to Warframe by allowing you to swap between two forms, each with their ...
Warframe: Nidus Retouch (Changes & Updates)
Nidus gets a retouch in the Jade Shadows: Constellations update, mainly to smooth out how Mutation Stack building works in ...
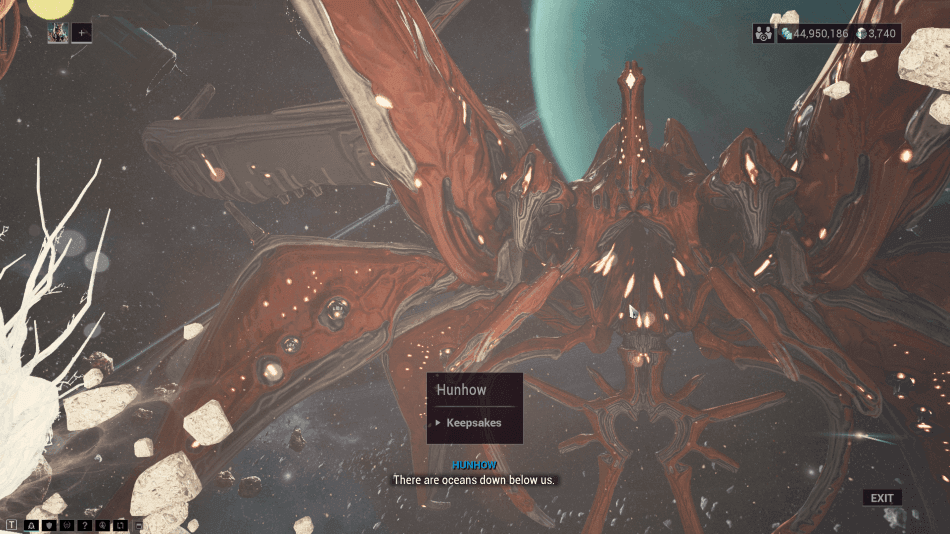
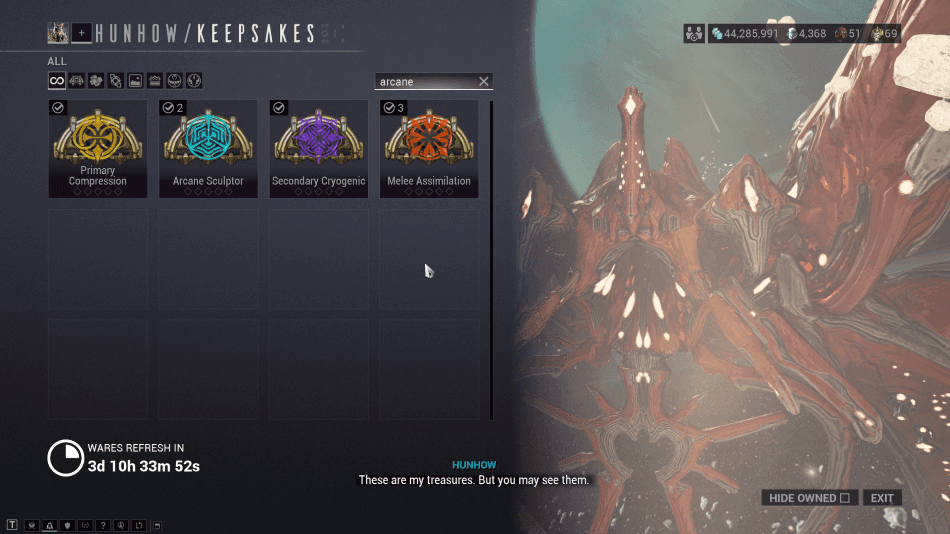
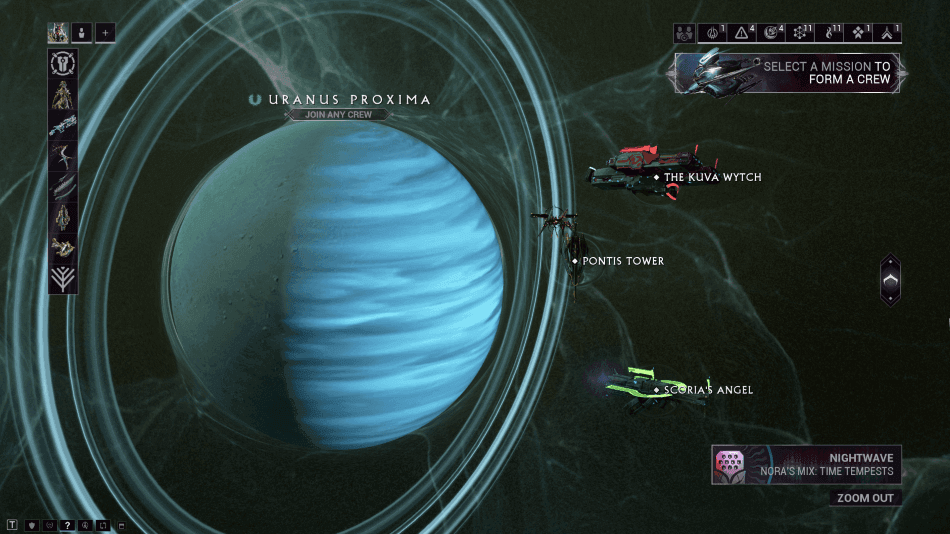
Warframe: Hunhow & Keepsakes (Location, Wares & Lore)
Hunhow is a returning figure in Warframe who now appears as a vendor at Pontis Tower, located in the Uranus ...
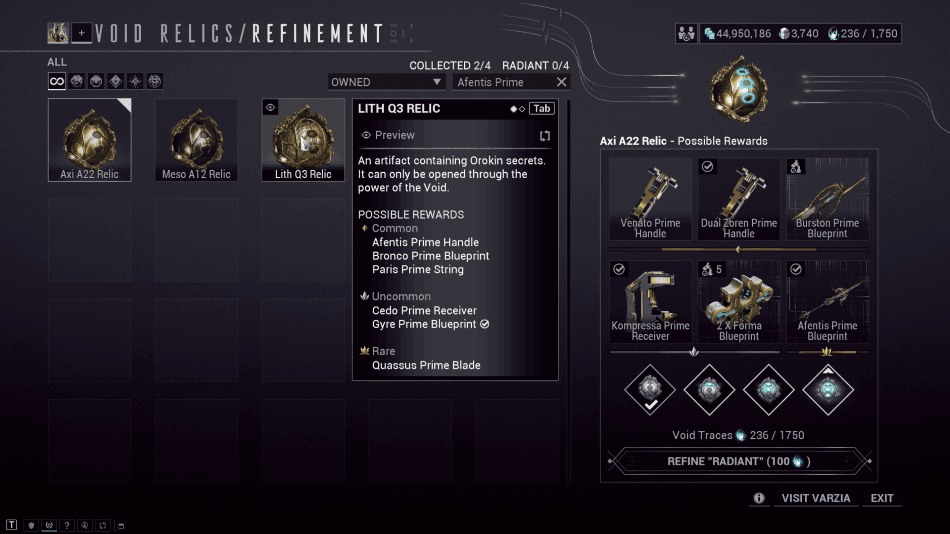
Warframe: All Afentis Prime Relics
The Jade Shadows: Constellations update brought a new wave of Prime Access content, adding Afentis Prime into the Void Fissure ...
Warframe Jade Shadows: Constellations Railjack Changes & Fixes
Railjack got a mix of buffs and fixes this time around, mostly focused on making ships feel stronger and less ...
Warframe Jade Shadows: Constellations Quality of Life Changes
While new content often takes the spotlight, quality of life improvements are what help make the overall experience feel smoother ...
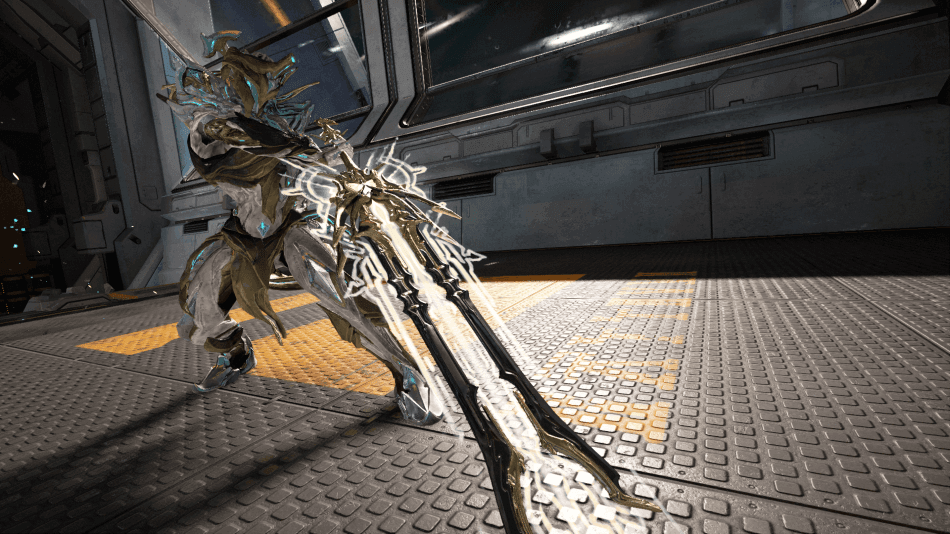
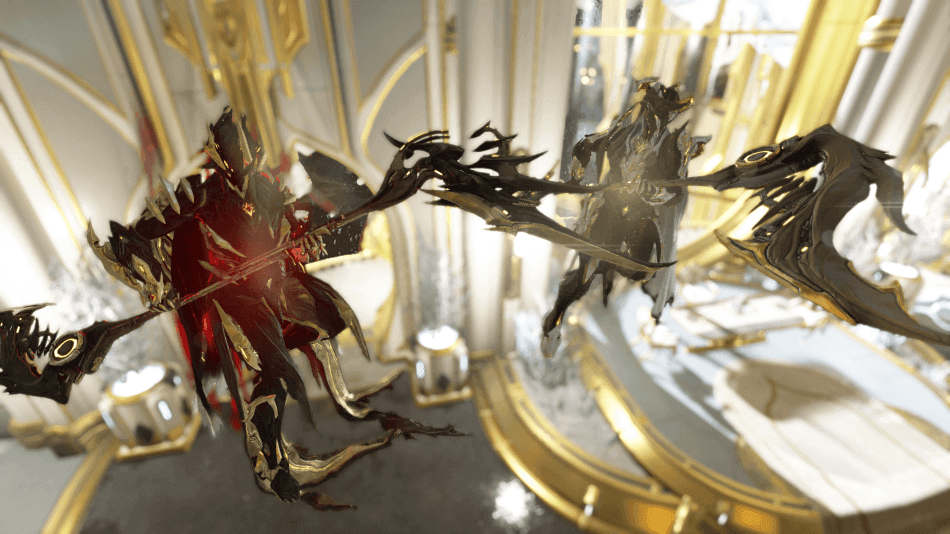
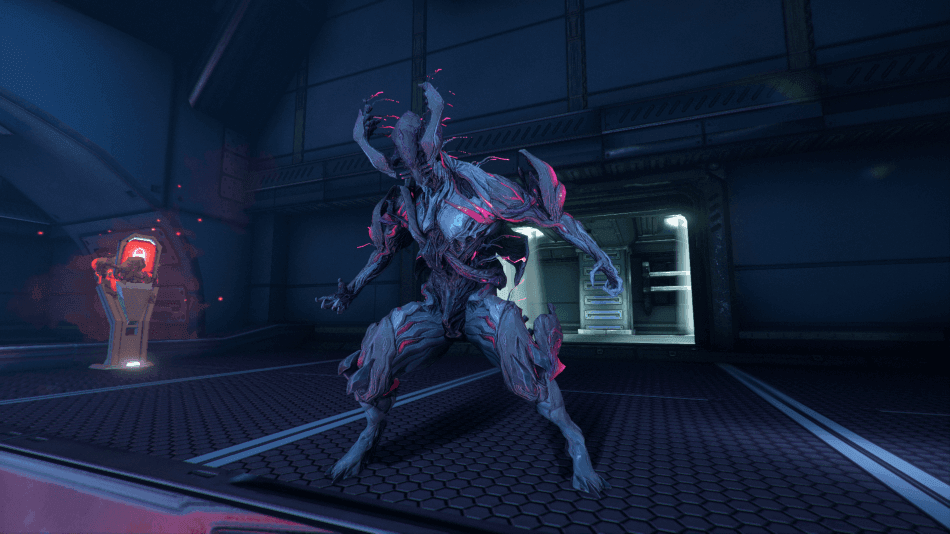
Warframe: War Prime (How To Get & Builds)
One of the biggest surprises introduced in the Jade Shadows: Constellations update came from a mysterious blueprint that many players ...
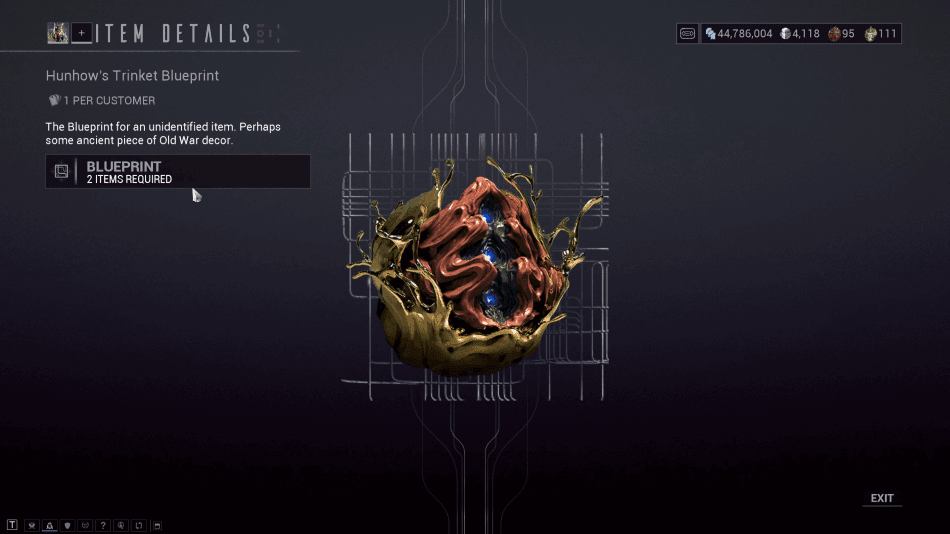
Warframe: How To Get Hunhow’s Trinket & What Is It For?
Hunhow’s Trinket is a special blueprint sold by Hunhow at the Pontis Tower following the Jade Shadows: Constellations update, introduced ...
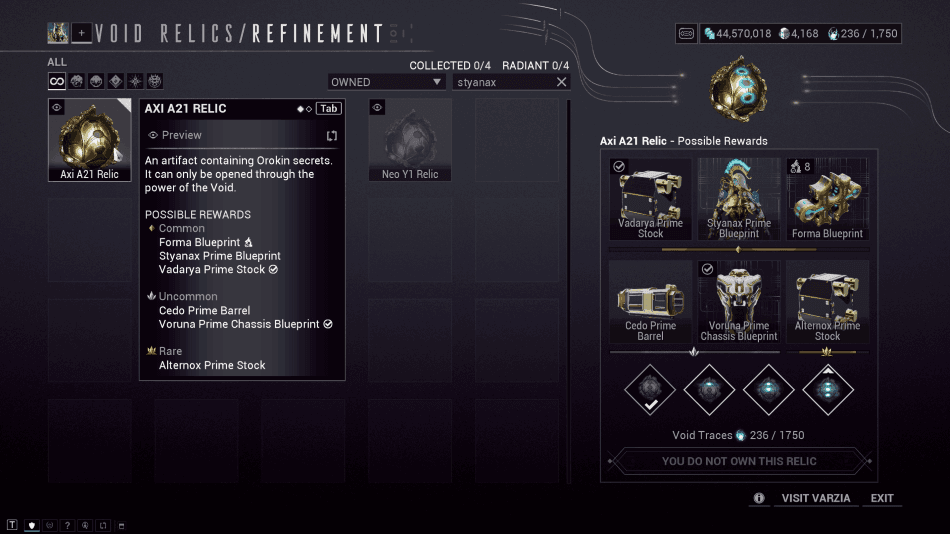
Warframe: All Styanax Prime Relics
With the release of the Jade Shadows: Constellations update, Styanax Prime has been added to the Void Fissure rotation as ...
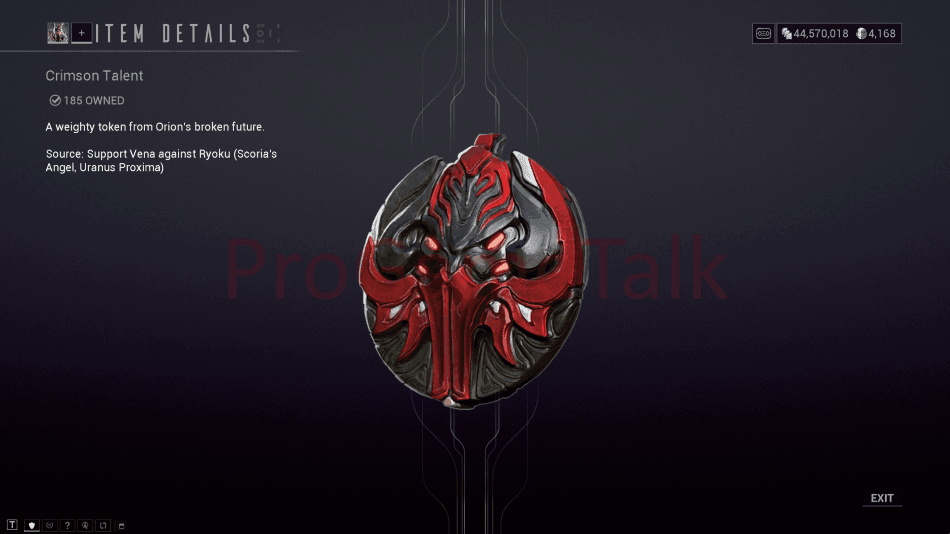
Warframe: Crimson Talent (How To Get, Uses & Resource Booster)
Crimson Talent is one of the new currencies introduced with Jade Shadows: Constellations and serves as one of the primary ...
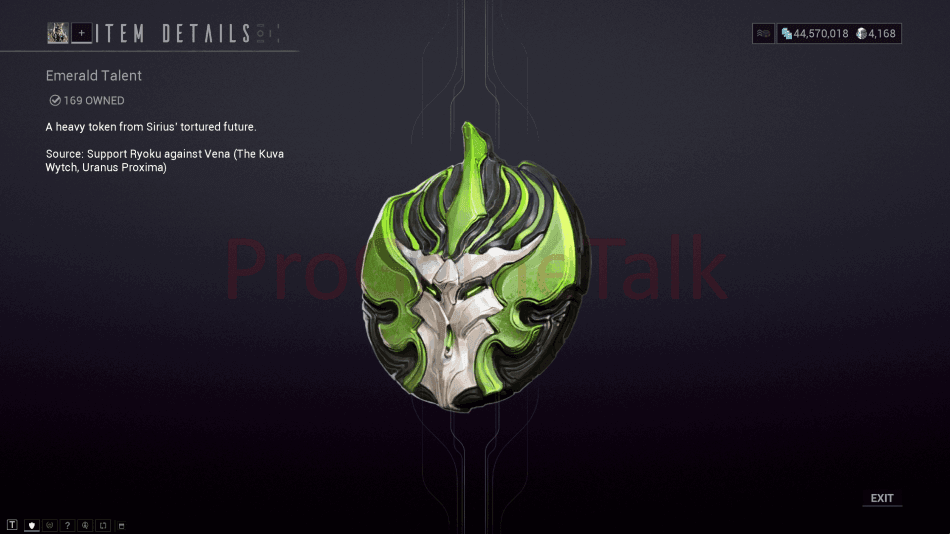
Warframe: Emerald Talent (How To Get, Uses & Resource Booster)
Emerald Talent is one of the new currencies introduced in Jade Shadows: Constellations and is used to purchase rewards from ...
Warframe Jade Shadows: Constellations All New Incarnon Genesis & How To Get Them
Jade Shadows: Constellations adds a new batch of Incarnon Genesis adapters that let older weapons evolve further through Cavalero’s system ...

Warframe Jade Shadows: Constellations All New Augments & How To Get Them
Jade Shadows: Constellations introduces four new Augment Mods that directly enhance specific Warframes, giving them stronger ability interactions and new ...
Warframe Jade Shadows: Constellations All New Arcanes & How To Get Them
Jade Shadows: Constellations doesn’t just push the story forward; it also drops a fresh set of Arcanes that actually shake ...
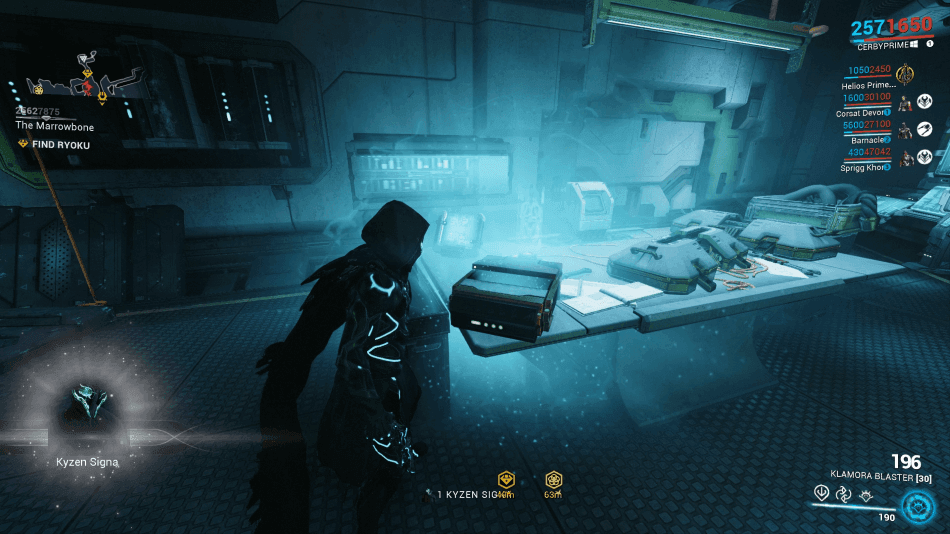
Warframe: How To Get Kyzen Signa
The Kyzen Signa is a hidden cosmetic reward that can be obtained during the Scoria’s Angel mission by uncovering a ...
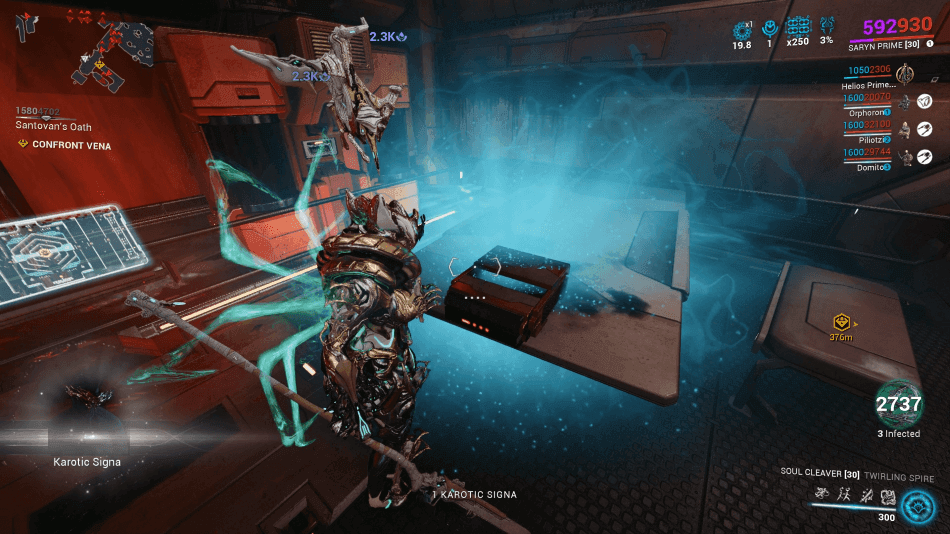
Warframe: How To Get Karotic Signa
The Karotic Signa is a secret cosmetic that can be found during The Kuva Wytch mission, rewarding players who take ...
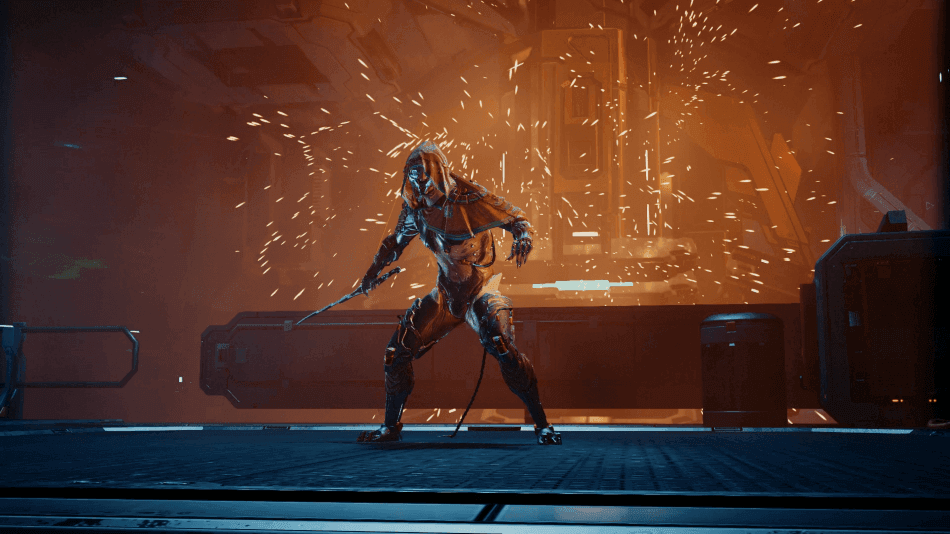
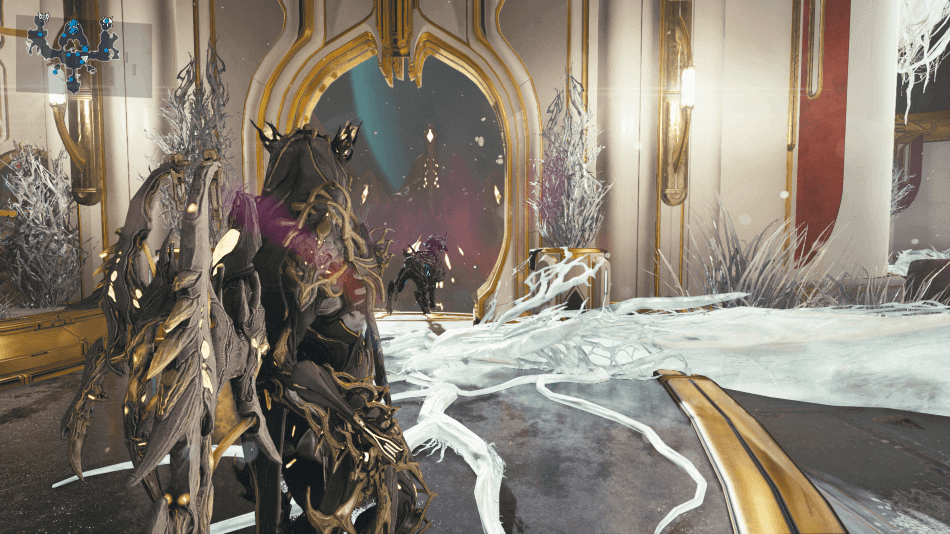
Warframe: Scoria’s Angel Mission Walkthrough
Scoria’s Angel is one of the two hunt missions introduced with Jade Shadows: Constellations, focusing on Orion’s relentless pursuit of ...
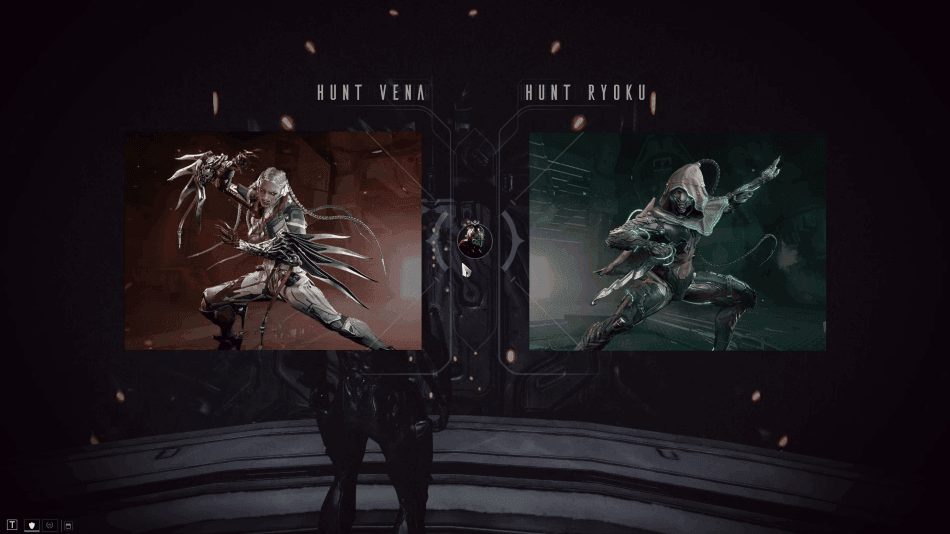
Warframe: Should You Hunt Vena or Ryuko?
Some of Warframe’s quests will have you making certain decisions, and if you have reached Jade Shadows: Contellations, you will ...
Warframe Jade Shadows: Constellations New Railjack Missions
The Jade Shadows: Constellations update introduces two new Railjack missions that continue the story of Sirius and Orion while expanding ...
Warframe: The Kuva Wytch Mission Walkthrough
The Kuva Wytch is one of the new missions introduced with the Jade Shadows: Constellations update, taking players on a ...
Warframe: How To Access Pontis Tower & Unlock Secret Vendor
With the release of Jade Shadows: Constellation, there is a lot for players to get their hands on after completing ...
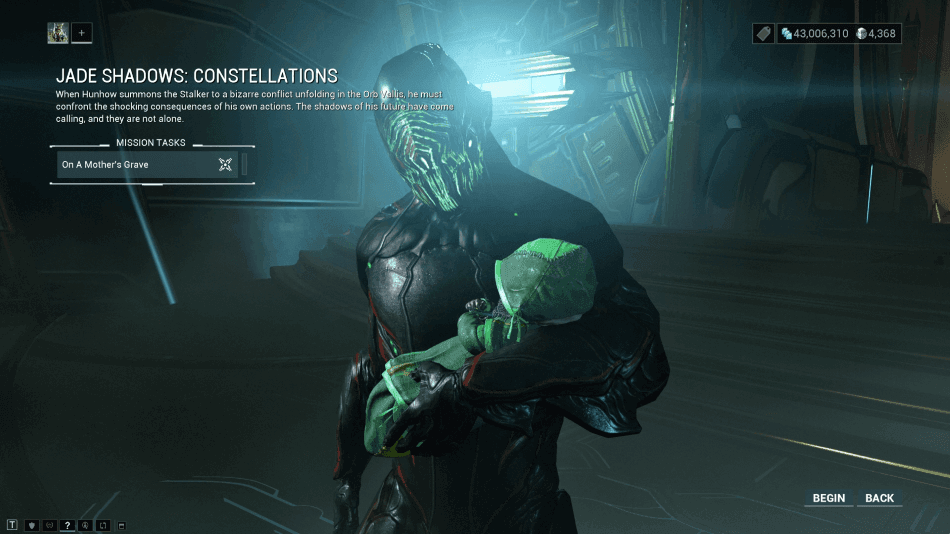
Warframe: Jade Shadows: Constellations Quest Walkthrough
In the previous Jade Shadows quest, we witnessed a different side of the Stalker as his tragic past was revealed, ...
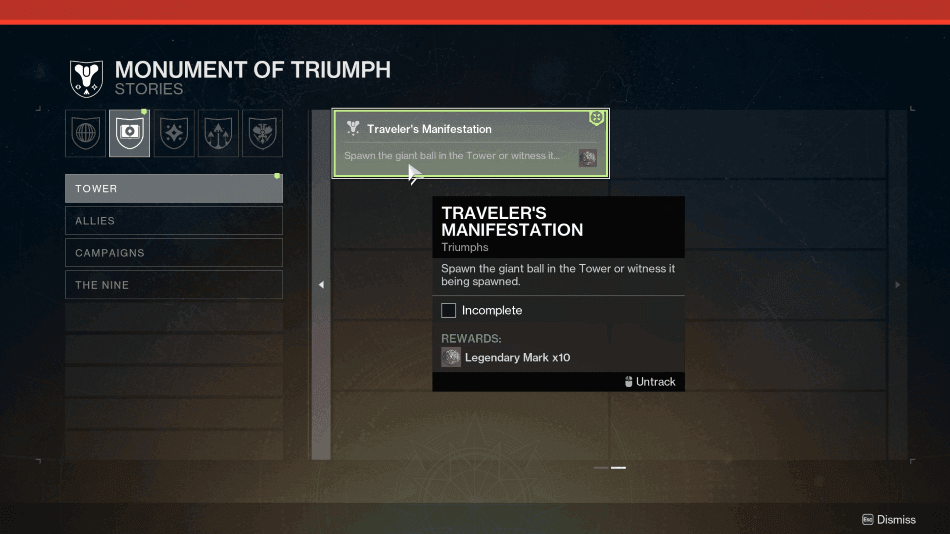
Destiny 2: Traveler’s Manifestation (How to Complete & How To Spawn Giant Ball in the Tower)
Some secrets remain hidden, but some of the veterans will still remember how to cause a scene, and in this ...
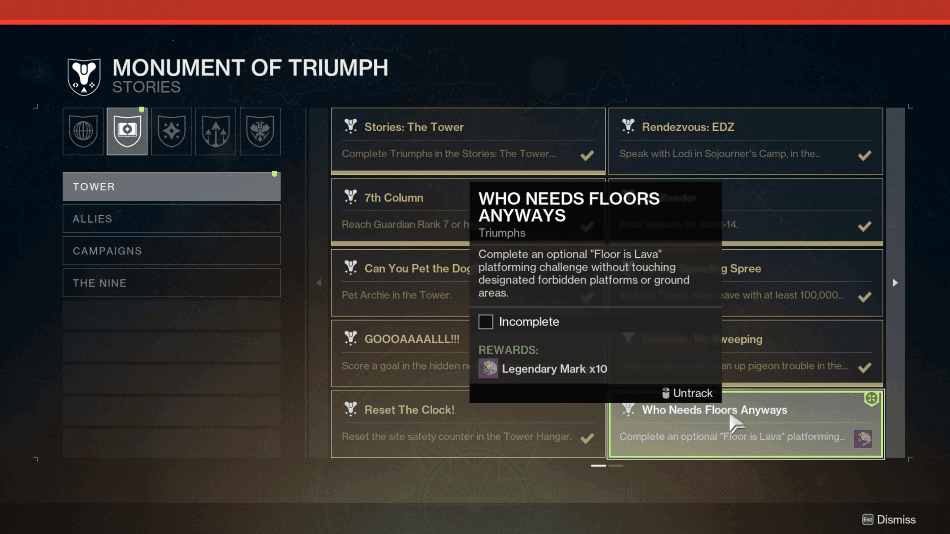
Destiny 2: Who Needs Floors Anyways (Floor is Lava Challenge, How to Complete & Rewards)
Destiny 2 sure knows how to give Guardians other things to do aside from focusing on campaigns, activities, and grinding ...
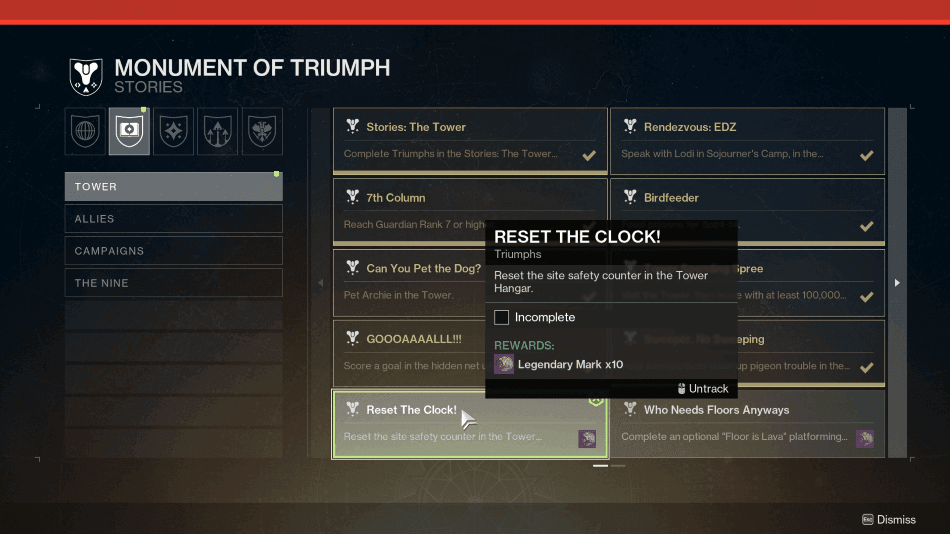
Destiny 2: Reset The Clock! (How To Complete & Rewards) Triumph
The Tower may be an amazing base and place for the last members of a fighting civilization that is well ...
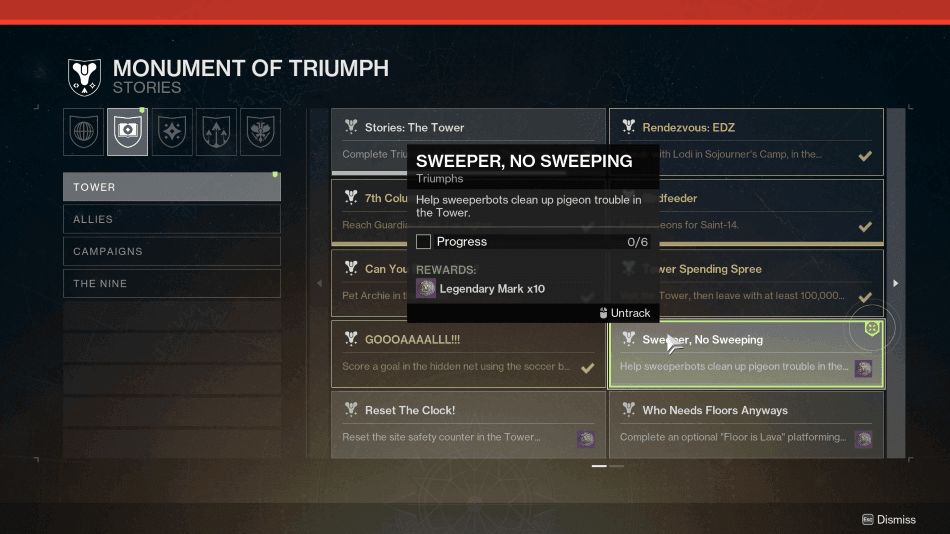
Destiny 2: Sweeper, No Sweeping (How To Complete, Sweeperbot Locations & Rewards)
The Tower is a large place, and in order to keep things clean, it looks like Sweeperbots have been deployed ...
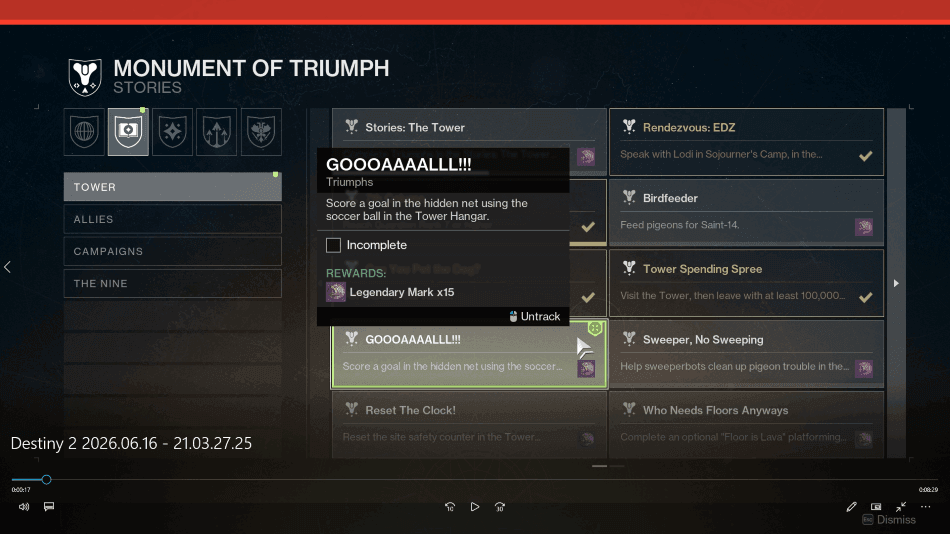
Destiny 2: Goooaaaalll! Triumph (Hidden Soccer Goal Net Location, How To Complete & Rewards)
While some players just see The Tower as a place for transactions and quickly pass by, sometimes certain things may ...
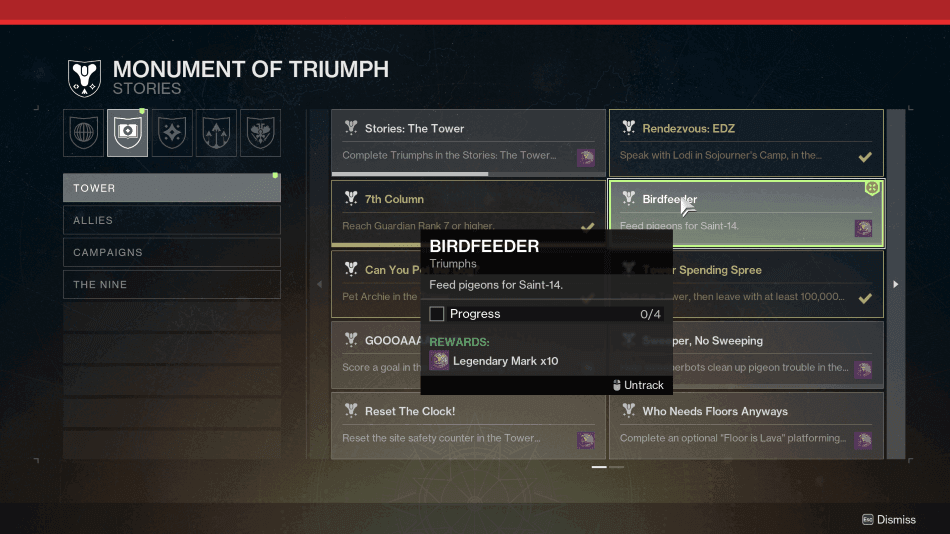
Destiny 2: Birdfeeder Triumph (How To Complete, Pigeon Feeding Locations & Rewards)
Saint-14 is known to be one of the strongest warriors around, but this does not mean that he does not ...
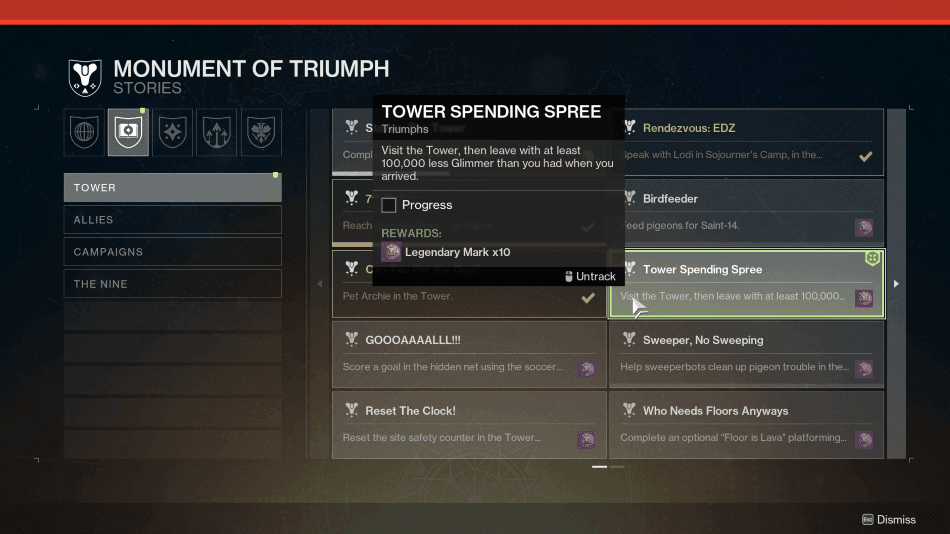
Destiny 2: Tower Spending Spree (How To Complete & Rewards)
Glimmer is one of the most standard currencies in Destiny 2, and there are several ways to get your hands ...
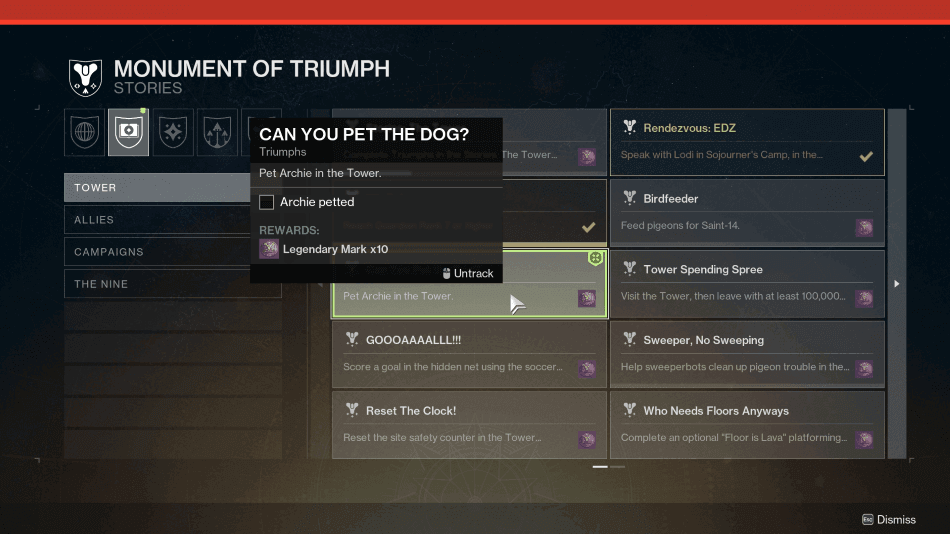
Destiny 2: How To Complete Can You Pet The Dog? Triumph
Some players might remember the cute dog found in The Tower, known as Archie, and now it looks like a ...

Destiny 2: Rendezvous Throne World (How To Complete, Luzaku Throne World Location & Rewards)
Through your journey in Destiny 2, you would believe that most of the factions were all enemies, but sometimes not ...
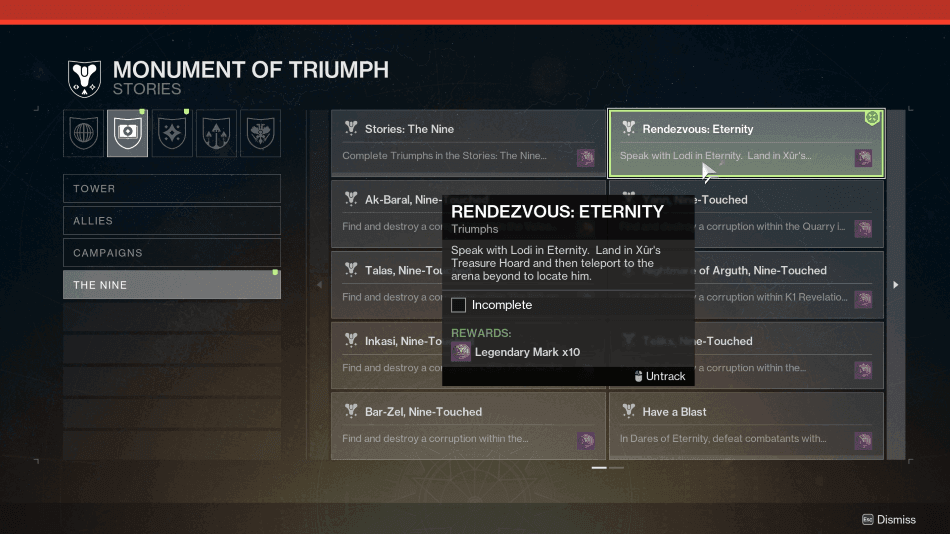
Destiny 2: Rendezvous Eternity (How To Complete, Lodi Eternity Location & Rewards)
Any conversation with Lodi can sometimes be a deep way to reach certain understandings, and he has a few things ...
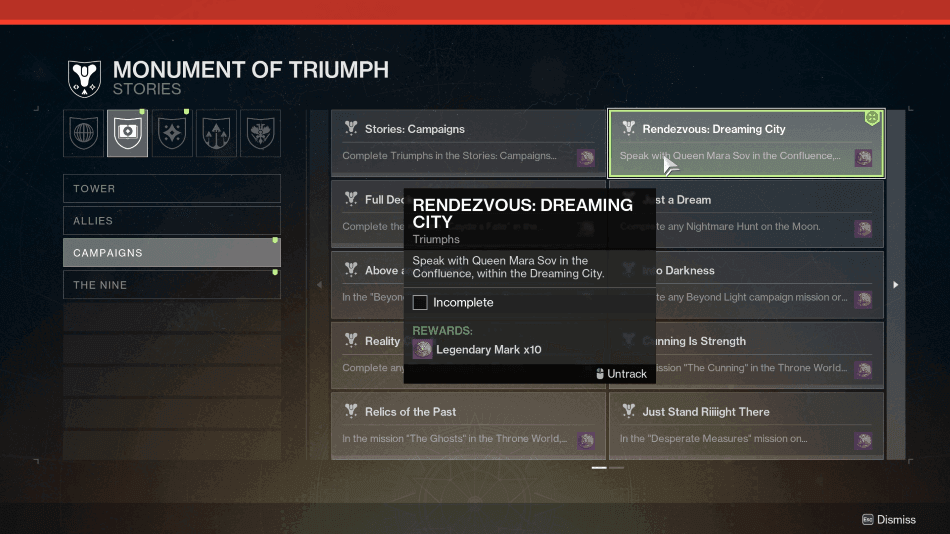
Destiny 2: Rendezvous Dreaming City (How To Complete, Mara Sov Dreaming City Location & Rewards)
You and Mara Sov have gone way back, conquering enemies, protecting allies, and putting a stop to the plans of ...
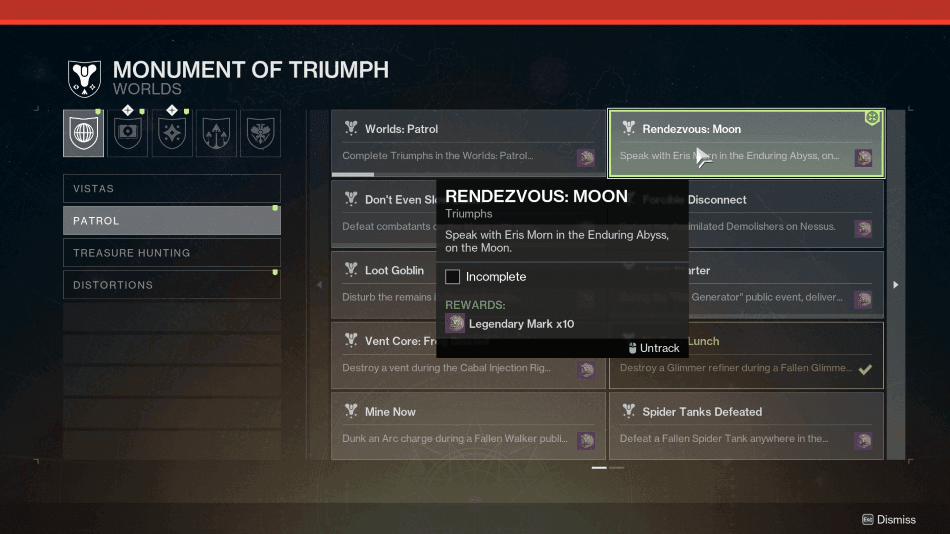
Destiny 2: Rendezvous Moon (How To Complete, Eris Morn Moon Location & Rewards)
Guardians who may wonder what will come next may need to learn more from Eris Morn, who has ascended to ...

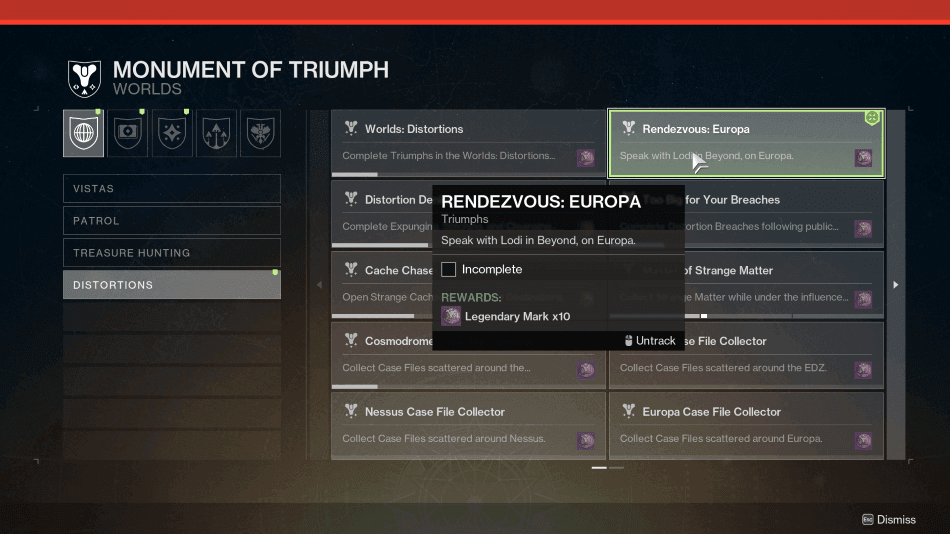
Destiny 2: Rendezvous Europa (How To Complete, Lodi Europa Location & Rewards)
With Lodi being the main contact person when it comes to The Nine, it is time to see what he ...
Destiny 2: Rendezvous EDZ (How To Complete, Lodi EDZ Location & Rewards)
After the chaos that has transpired, especially with the trouble caused by The Nine and the death of III, Lodi ...
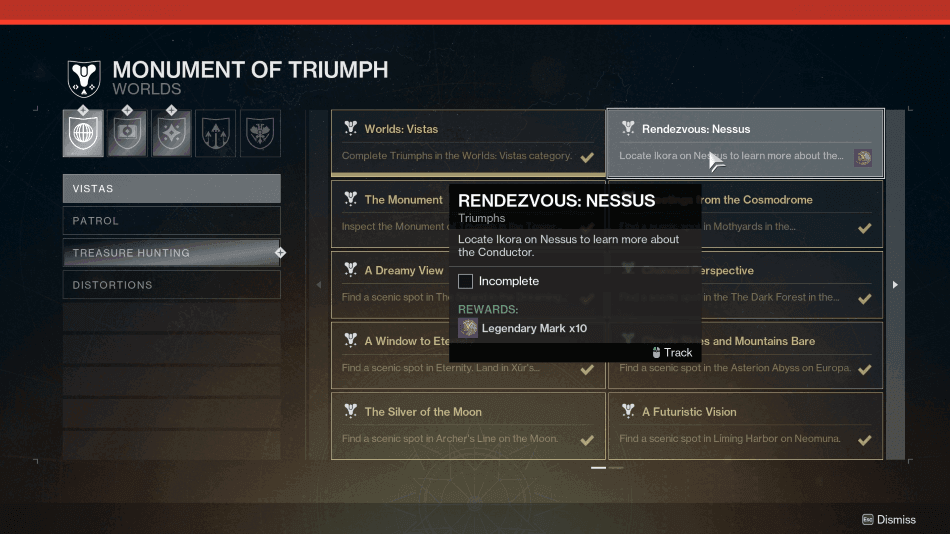
Destiny 2: Rendezvous Nessus (How To Complete, Ikora Nessus Location & Rewards)
Rendezvous: Nessus is a Monument of Triumph challenge that acts as a continuation of the storyline related to Maya Sundaresh, ...
Destiny 2: All Scenic Spot Locations (Moment of Triumph)
There are several Triumphs available to complete as part of the Monument of Triumph update, and some of these are ...
Destiny 2: All Monuments of Triumph Challenges & Rewards (All Triumphs & Rewards)
The Monument of Triumph features hundreds of Triumphs that send Guardians across Destiny 2 to complete unique objectives, revisit old ...

Destiny 2: Distortions Activity (How It Works, Rotation & Rewards)
Destiny 2 brought a new feature to the game with the release of the Monument of Triumph update, providing Guardians ...
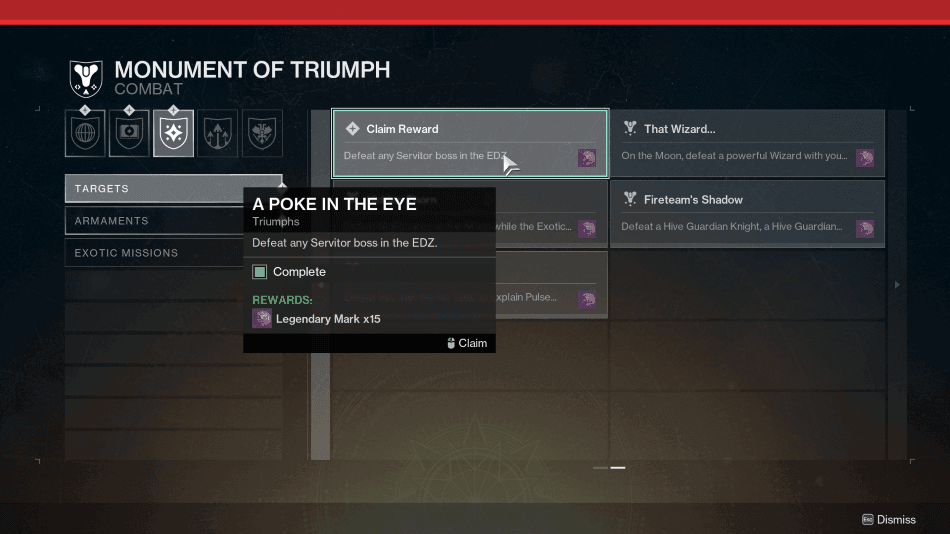
Destiny 2: How To Complete A Poke in The Eye Triumph (Monument of Triumph)
Servitors are some of the most familiar enemies that you may have encountered in Destiny 2, often sturdy and annoying ...

Destiny 2: How To Complete A Bit Much, Really Triumph (Monument of Triumph)
When it comes to farming Legendary Marks, some of the Triumphs you can complete provide a little more than others, ...
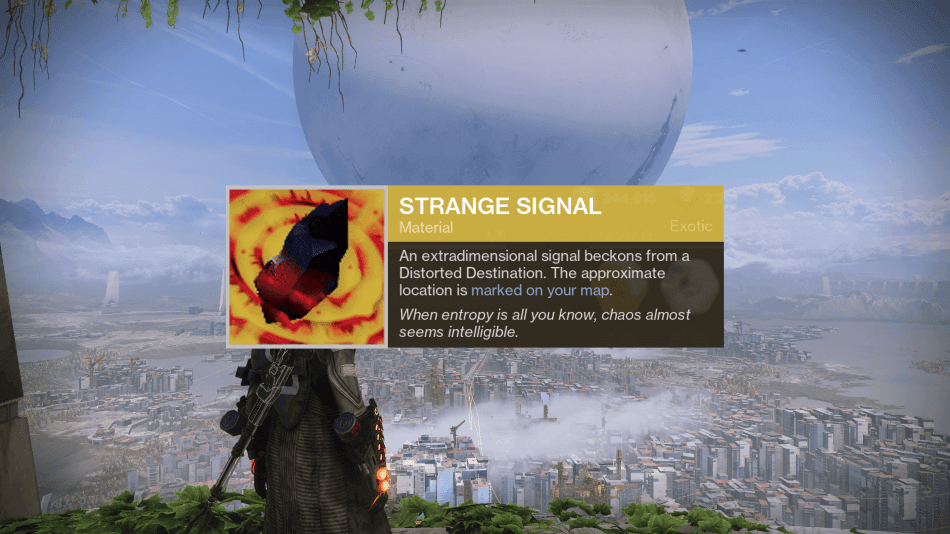
Destiny 2: How To Get & Use Strange Signal
The Monument of Triumph update introduces several new Materials to Destiny 2, including Strange Signal, which plays an important role ...

Destiny 2: How To Get Strange Matter
With the arrival of the Monument of Triumph update, certain things were added to Destiny 2, including a new material ...
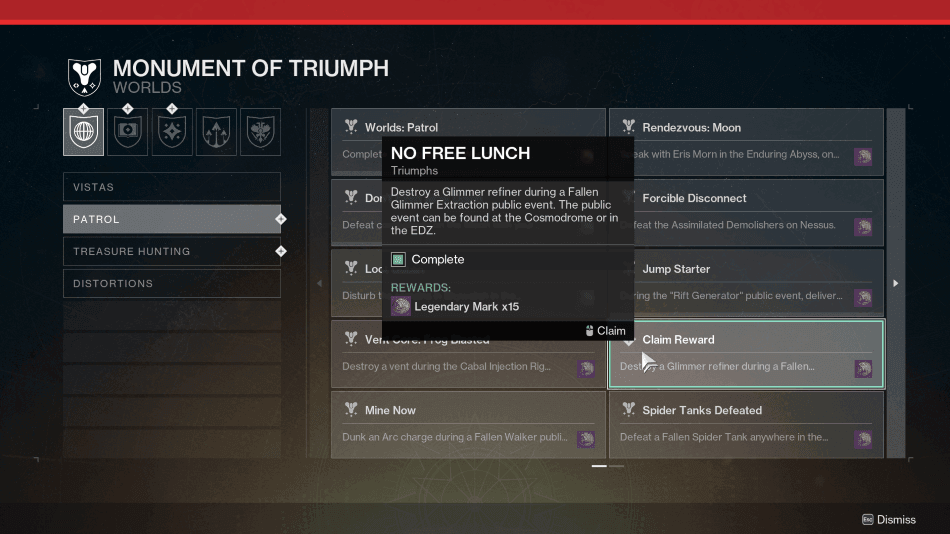
Destiny 2: How To Complete No Free Lunch Triumph (Monument of Triumph)
No Free Lunch is a Monument of Triumph challenge tied specifically to the Fallen Glimmer Extraction Public Event, where players ...
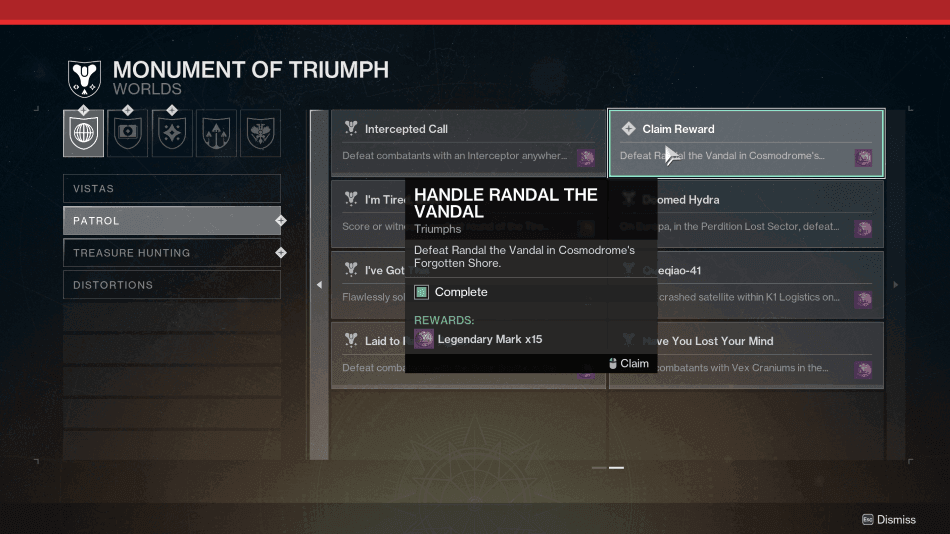
Destiny 2: How To Complete Handle Randal The Vandal Triumph (Monument of Triumph)
Handle Randal The Vandal is a Monument of Triumph challenge that requires players to hunt down a specific named Fallen ...
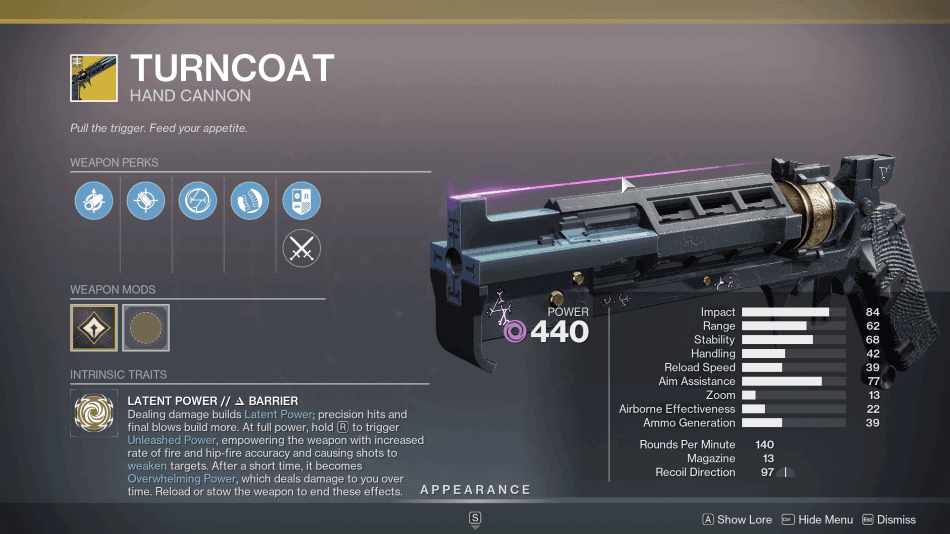
Destiny 2: How To Get Turncoat & Its Catalyst
Hand Cannons have always been among the most satisfying weapons to use in Destiny 2, rewarding precision with devastating shots ...
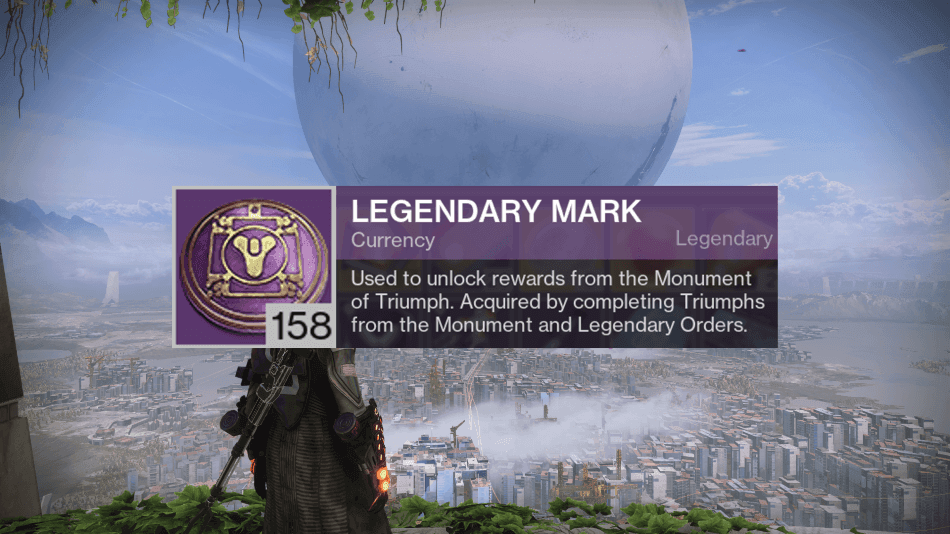
Destiny 2: Legendary Marks ( How To Get & Use)
The Monument of Triumph update introduces a final wave of progression systems, including a new currency known as Legendary Mark ...

Destiny 2: Distortions Quest Steps
With the introduction of the Monument of Triumph update, a new feature was added to Destiny 2, which are distortions, ...

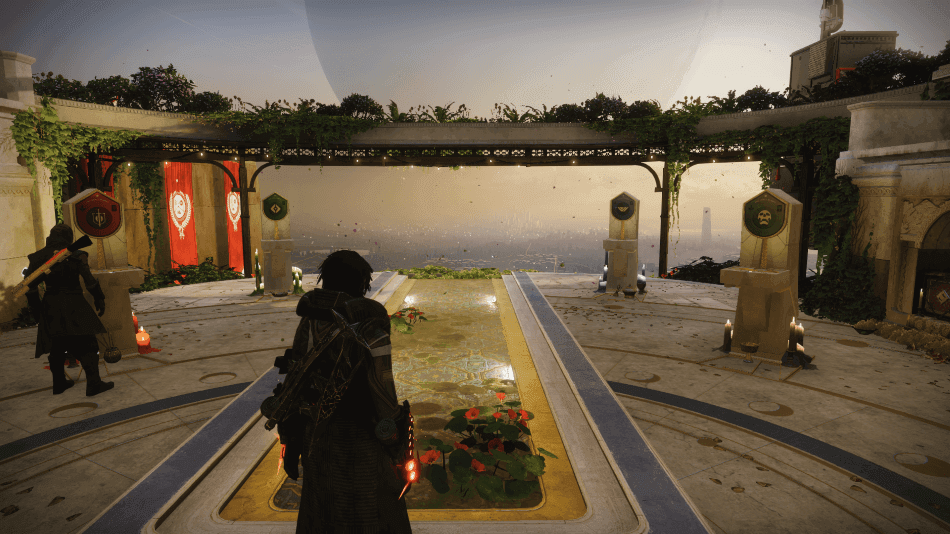
Destiny 2: The Tenets Quest Walkthrough
Ikora has explained that a monument in the Courtyard in the Last City is being constructed to honor the Guardian ...
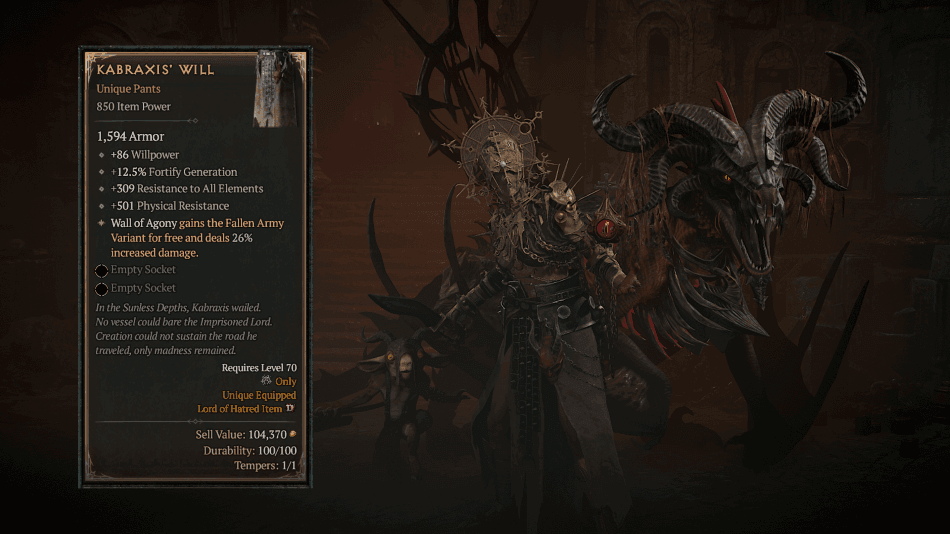
Diablo 4: Kabraxis’ Will (How To Get, Effects, Boss Drop & Location)
Warlock builds often rely on to fight off enemies, control space, block enemy movement, and apply consistent pressure during fights. ...
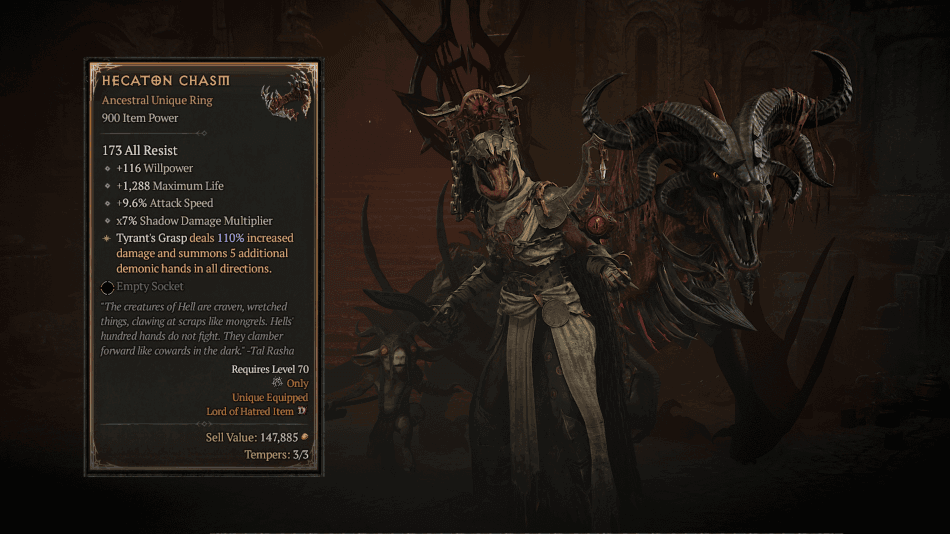
Diablo 4: Hecaton Chasm (How To Get, Effects, Boss Drop & Location)
Tyrant’s Grasp already plays a key role in builds that revolve around positioning enemies and controlling fights through its core ...
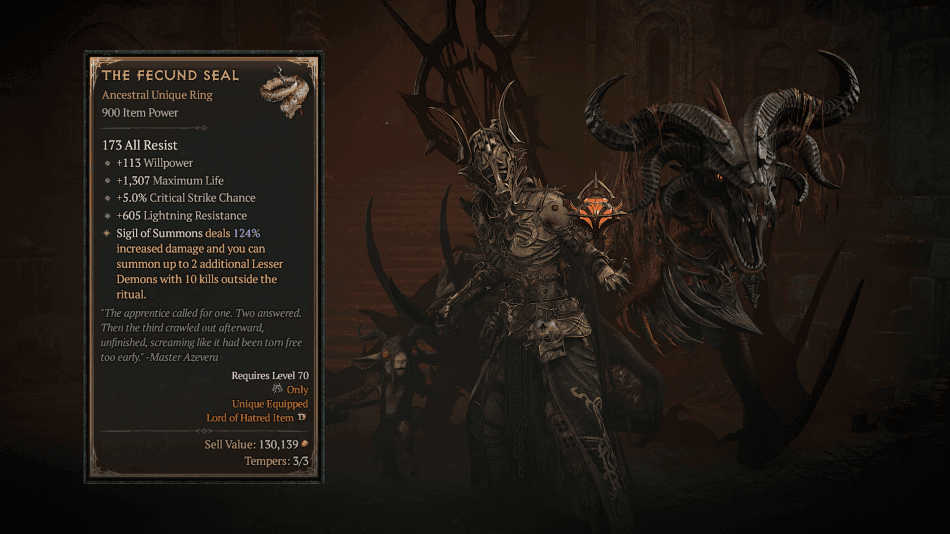
Diablo 4: The Fecund Seal (How To Get, Effects, Boss Drop & Location)
Warlocks have several ways to fight alongside demonic allies, allowing them to overwhelm enemies with summoned creatures while staying focused ...
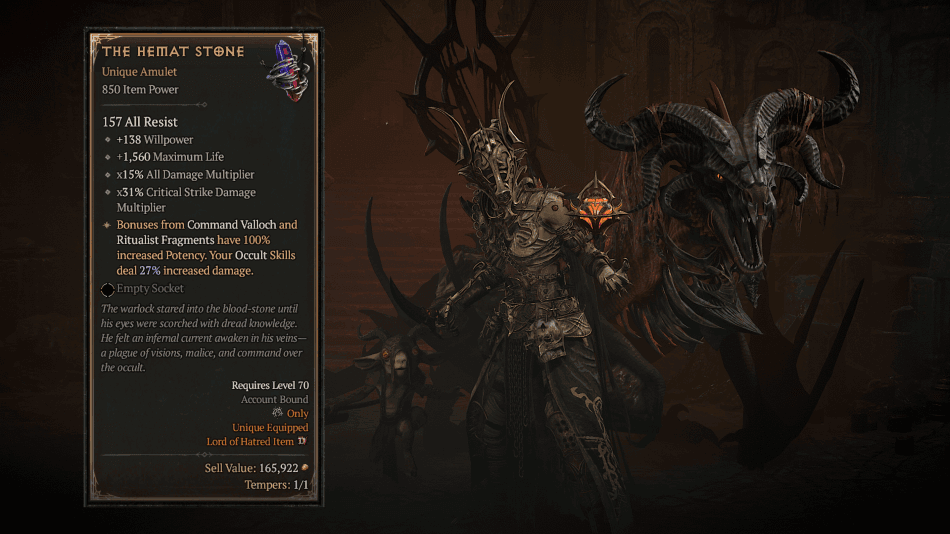
Diablo 4: The Hemat Stone (How To Get, Effects, Boss Drop & Location)
Valloch is one of the demons that Warlocks can bind through a Soul Shard, providing powerful bonuses that enhance both ...
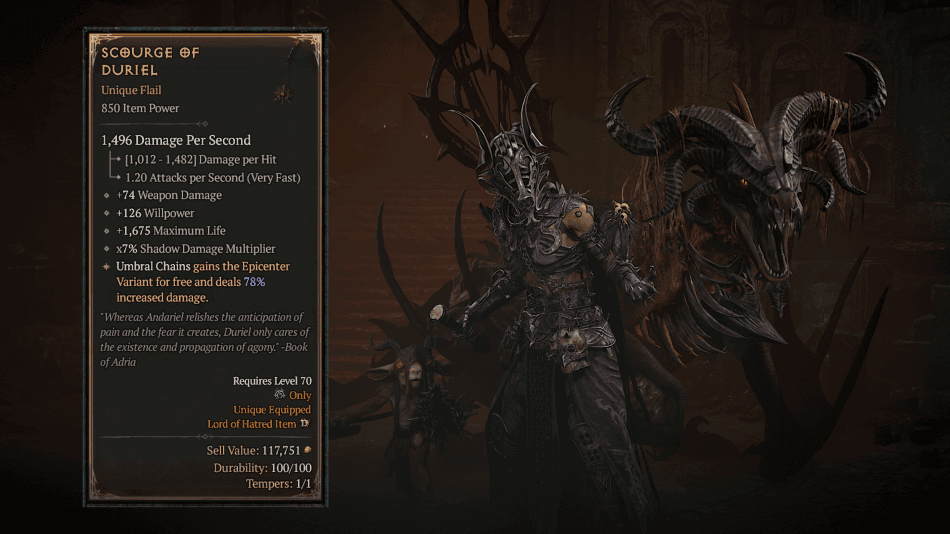
Diablo 4: Scourge of Duriel (How To Get, Effects, Boss Drop & Location)
Umbral Chains is a useful skill for controlling enemies, linking them together while slowing them and dealing damage over time. ...
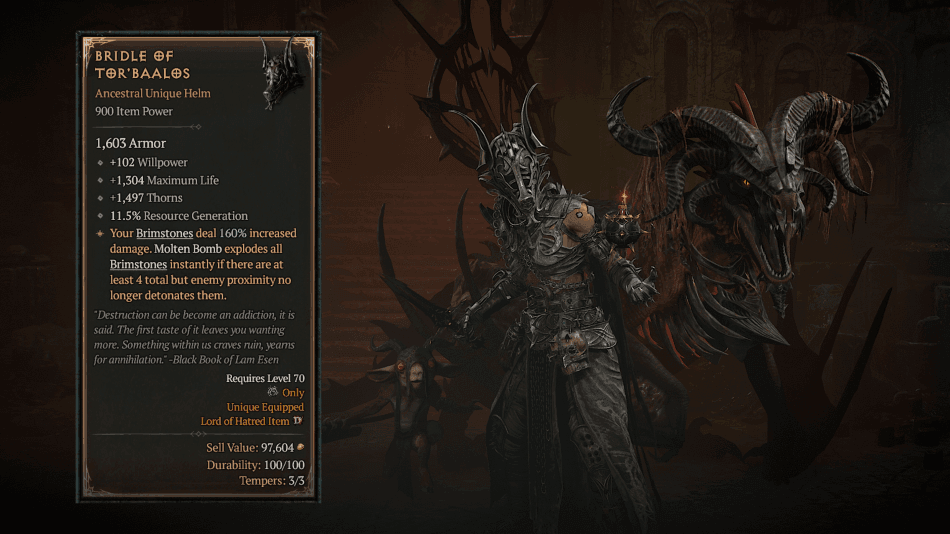
Diablo 4: Bridle of Tor’Baalos (How To Get, Effects, Boss Drop & Location)
Brimstones are a powerful source of damage for Warlocks, acting like demonic mines that explode when enemies get too close ...
Diablo 4: Tuning Prisms (How to Get & Use)
Tuning Prisms are one of the most important materials used with the Horadric Cube in Diablo 4 Season 13, allowing ...
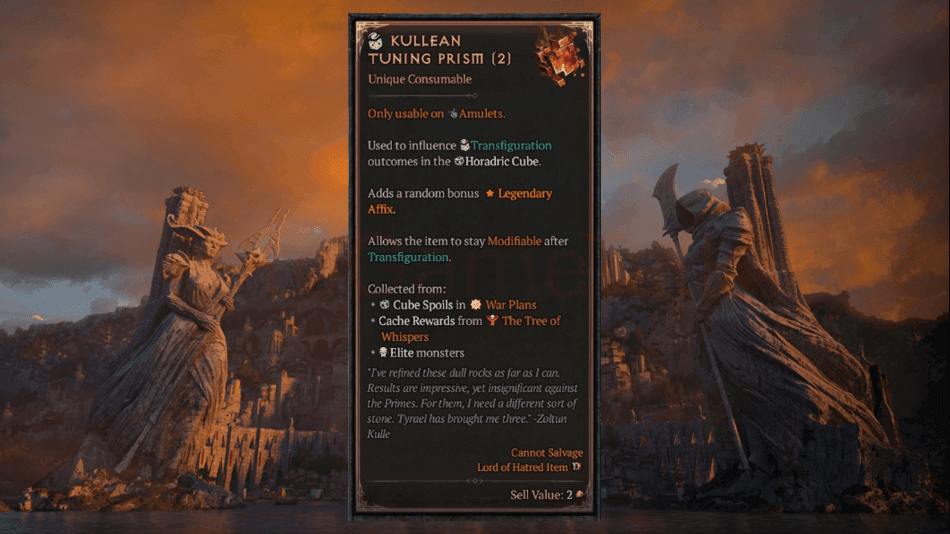
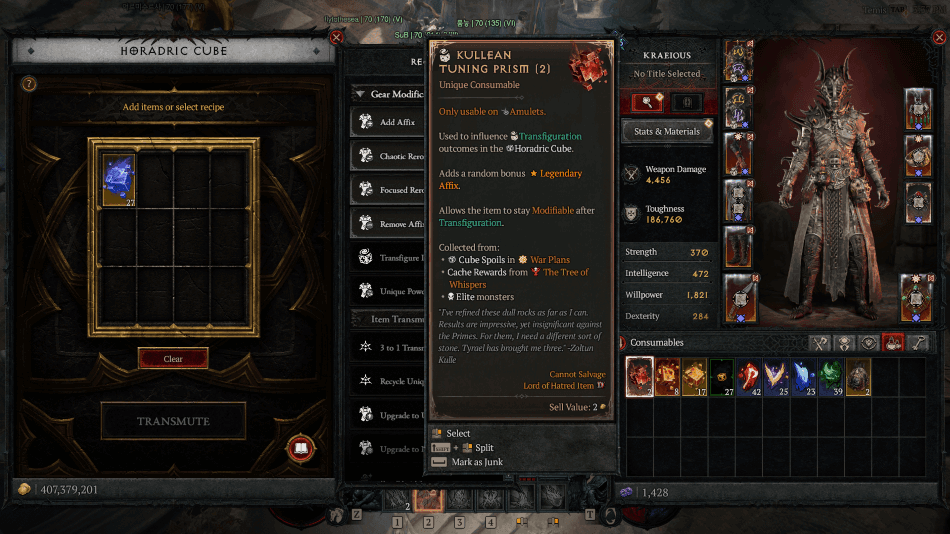
Diablo 4: Kullean Tuning Prism (How To Get & Its Uses)
Kullean Tuning Prism is a unique prism used when transmuting gear through the Horadric Cube, shaping the outcome of item ...
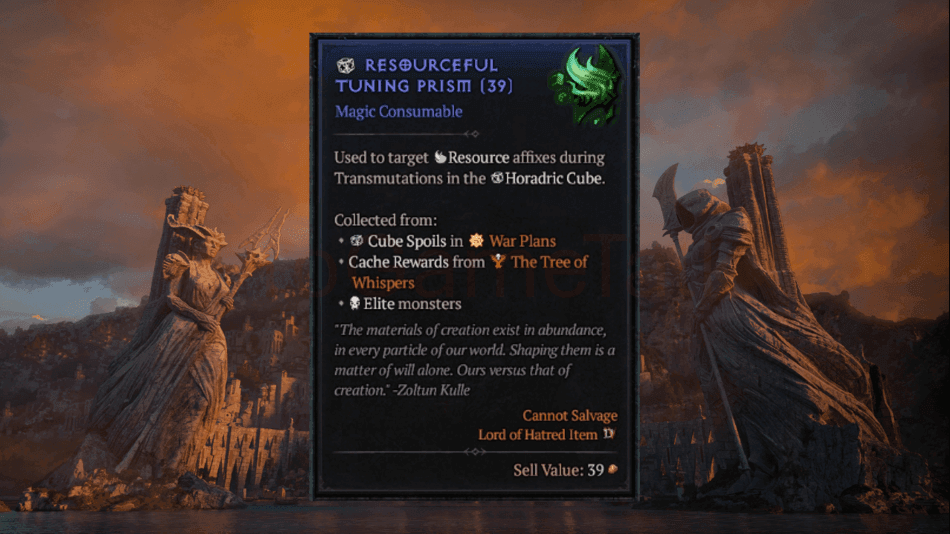
Diablo 4: Resourceful Tuning Prism (How To Get & Its Uses)
Resourceful Tuning Prism is one of several crafting materials used with the Horadric Cube to influence the outcome of item ...
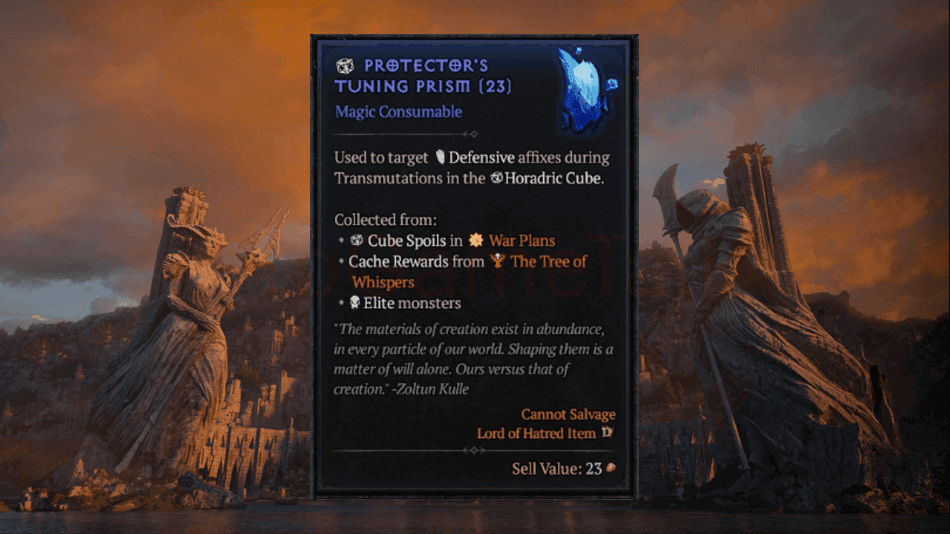
Diablo 4: Protector’s Tuning Prism (How To Get & Its Uses)
Dealing more damage is important in Diablo 4, but surviving incoming attacks becomes just as valuable once you begin tackling ...
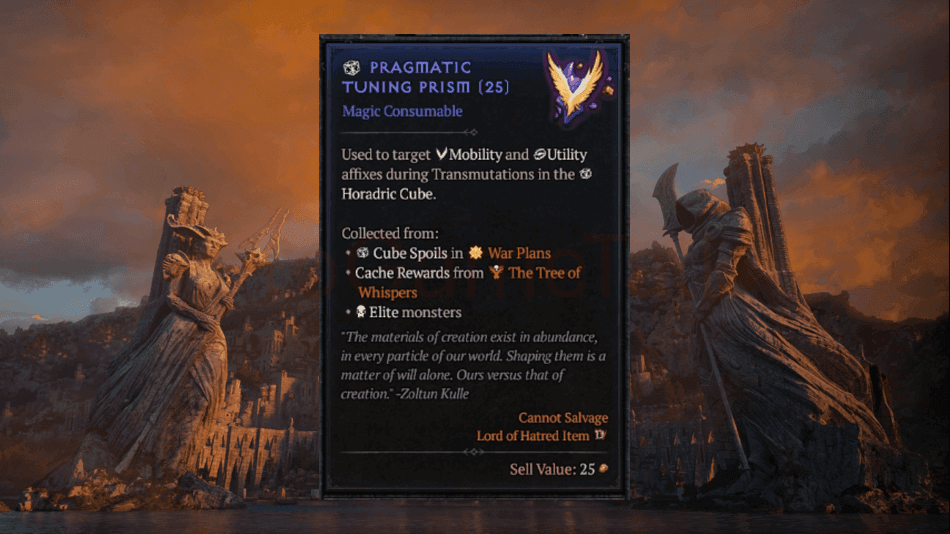
Diablo 4: Pragmatic Tuning Prism (How To Get & Its Uses)
Pragmatic Tuning Prism is used during Horadric Cube Transmutations to influence item modifications toward utility and mobility-related affixes. Rather than ...
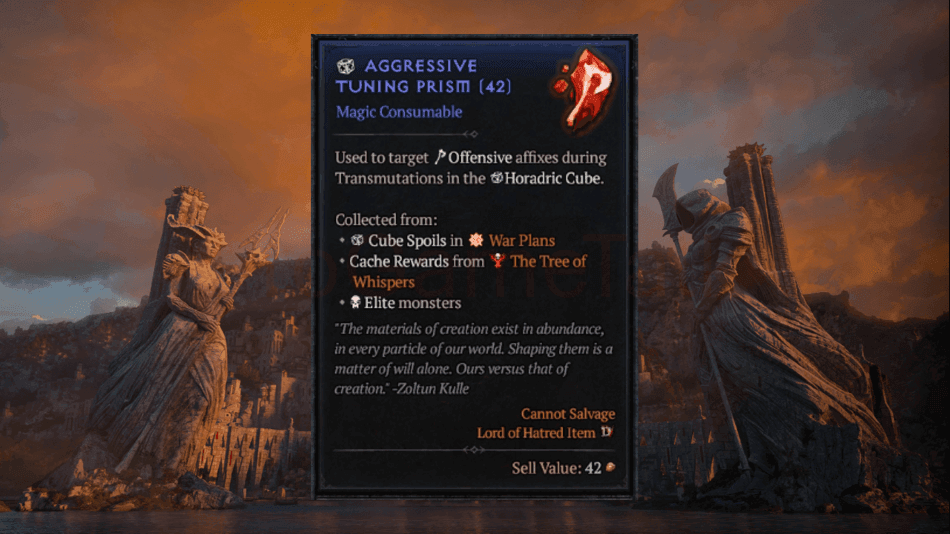
Diablo 4: Aggressive Tuning Prism (How To Get & Its Uses)
Aggressive Tuning Prism is a Horadric Cube material used to influence Transmutations toward offensive affixes that increase overall damage output. ...
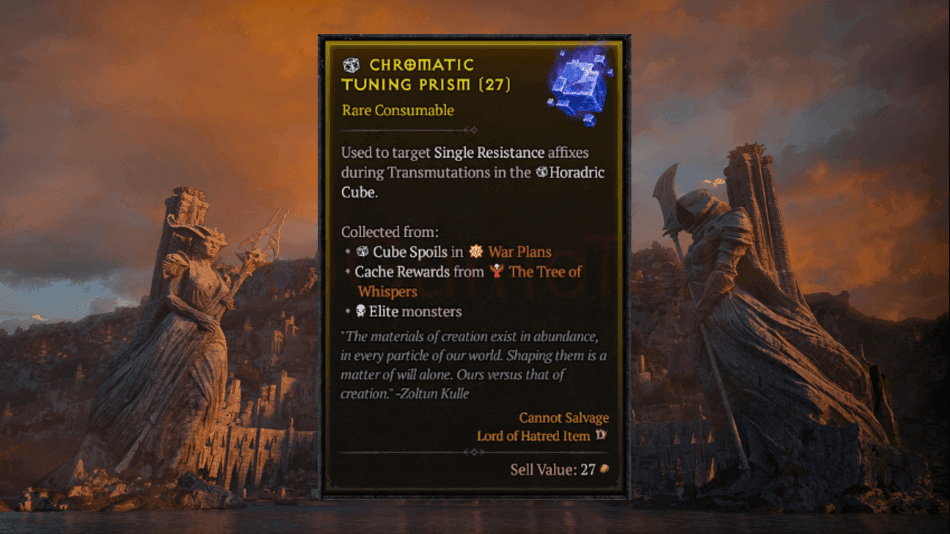
Diablo 4: Chromatic Tuning Prism (How To Get & Its Uses)
Chromatic Tuning Prism is a Horadric Cube material used to guide Transmutations toward resistance-based affixes on gear. It is mainly ...

Diablo 4: Adept’s Tuning Prism (How To Get & Its Uses)
Certain builds rely heavily on affixes, and sometimes ones that boost your skills or core stats can make a huge ...
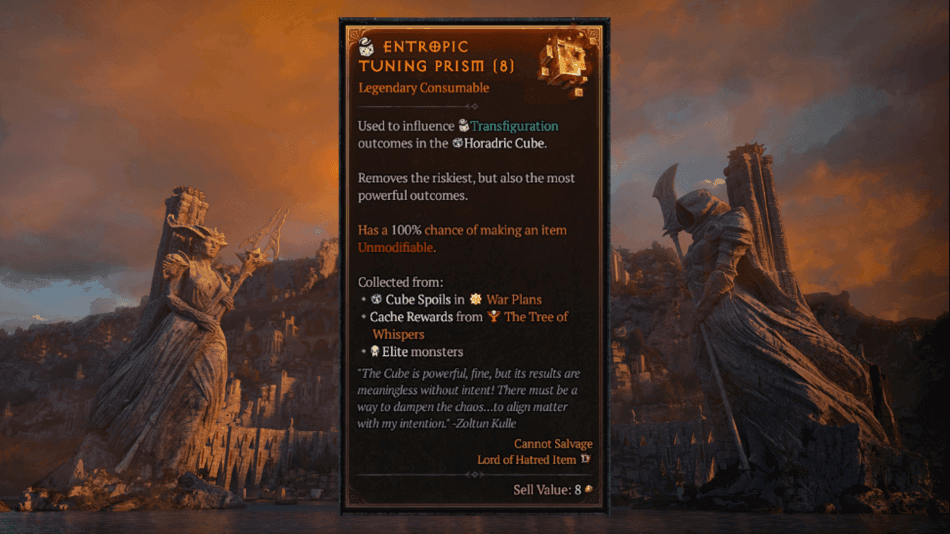
Diablo 4: Entropic Tuning Prism (How To Get & Its Uses)
Entropic Tuning Prism is one of several crafting materials used with the Horadric Cube to influence the outcome of item ...
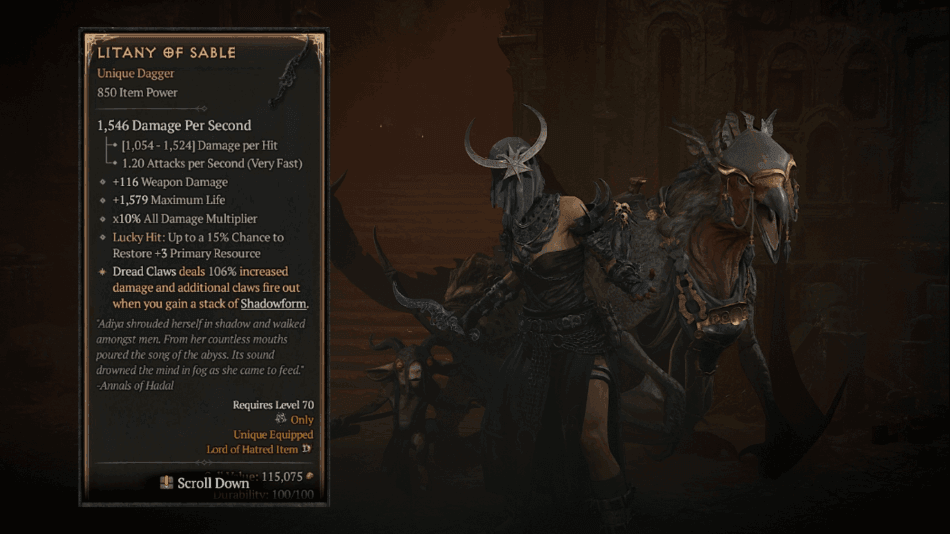
Diablo 4: Litany of Sable (How To Get, Effects, Boss Drop & Location)
Dread Claws is a fast and aggressive skill that works well for builds focused on constant pressure, especially when combined ...
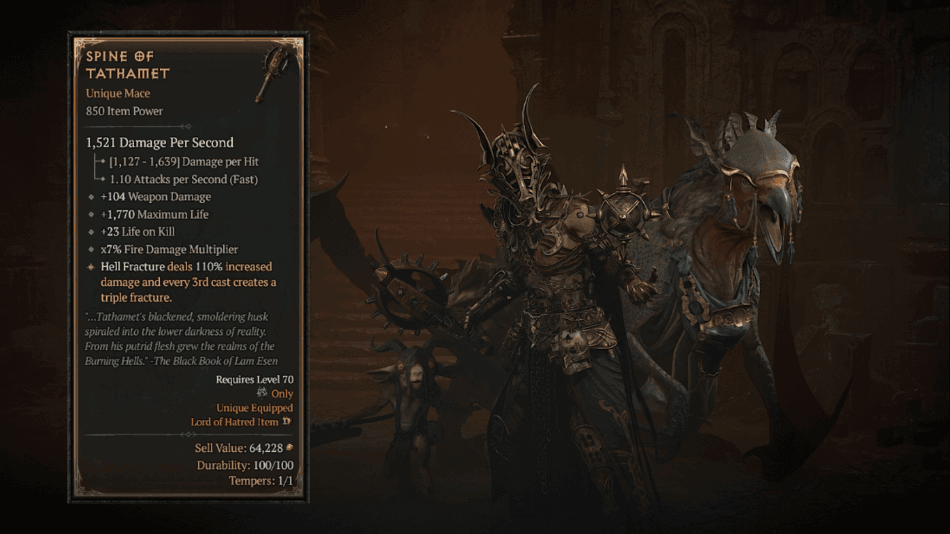
Diablo 4: Spine of Tathamet (How To Get, Effects, Boss Drop & Location)
Hell Fracture is a strong offensive skill that can quickly deal heavy damage across an area, especially when multiple fractures ...
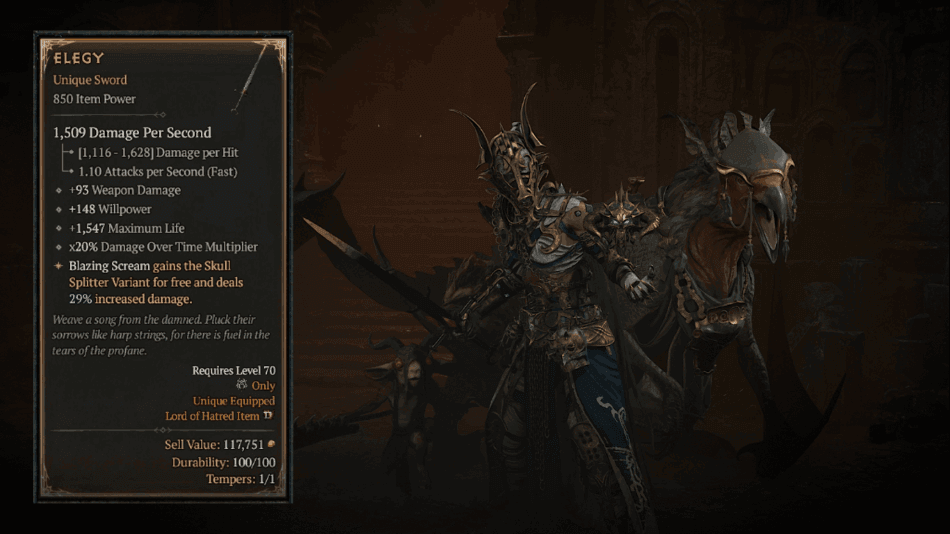
Diablo 4: Elegy (How To Get, Effects, Boss Drop & Location)
Blazing Scream already has multiple variants that can completely change how the skill behaves depending on the type of setup ...
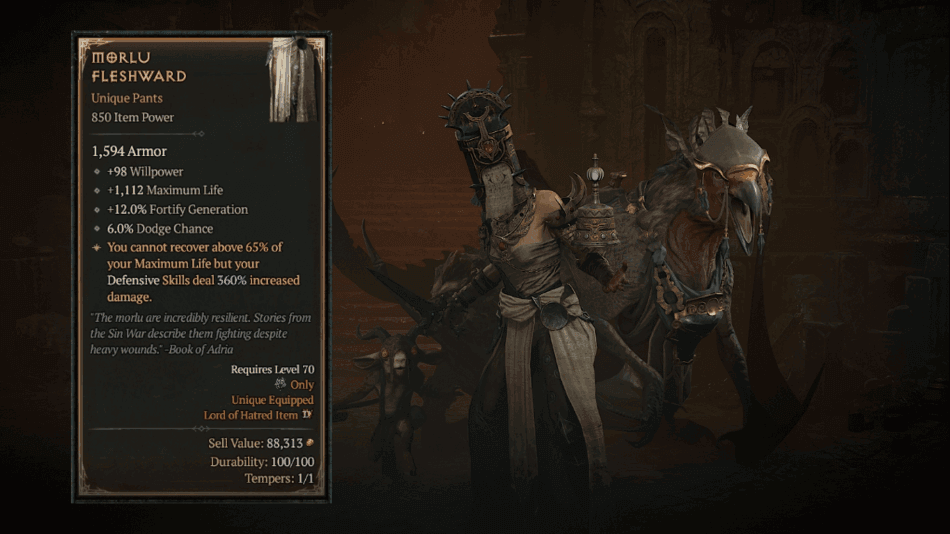
Diablo 4: Morlu Fleshward (How To Get, Effects, Boss Drop & Location)
Warlocks have access to several Defensive Skills that can help them survive dangerous fights while still keeping pressure on enemies ...
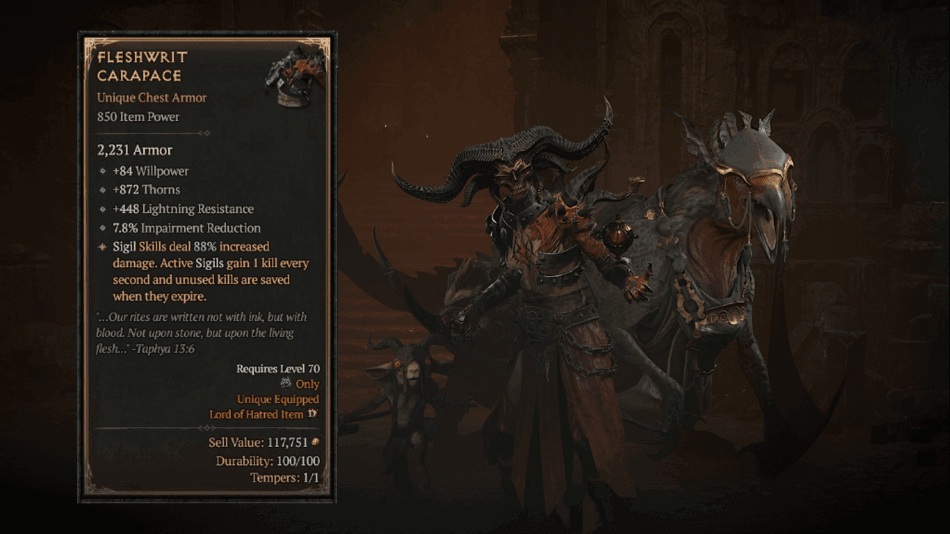
Diablo 4: Fleshwrit Carapace (How To Get, Effects, Boss Drop & Location)
Warlocks can make use of different Sigil Skills depending on their build, especially when it comes to dealing damage over ...
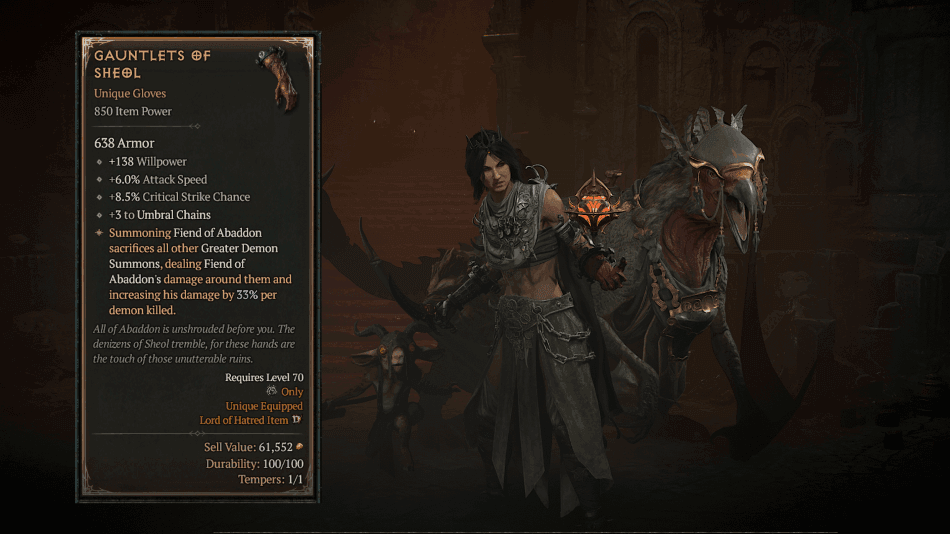
Diablo 4: Gauntlets of Sheol (How To Get, Effects, Boss Drop & Location)
Warlocks have different ultimates they can use depending on their build, and Fiend of Abaddon already stands out as one ...
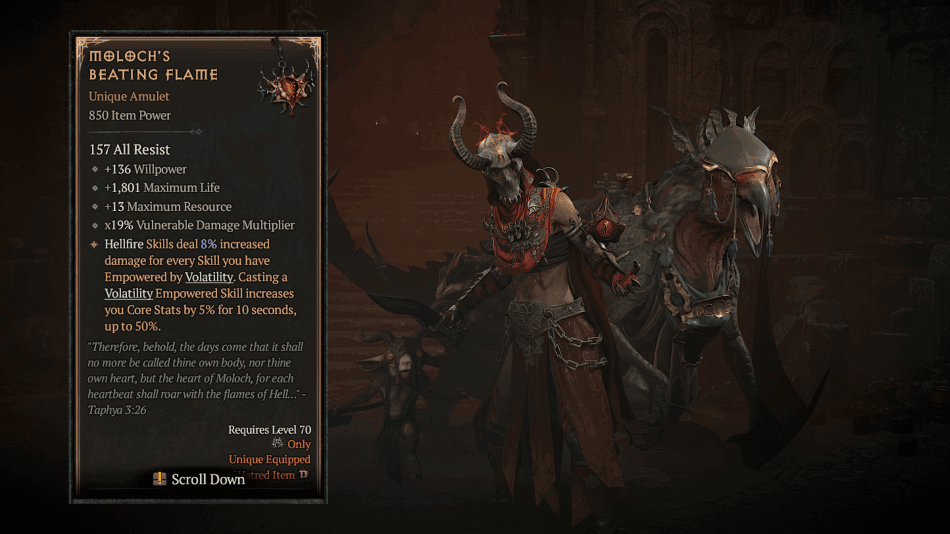
Diablo 4: Moloch’s Beating Flame (How To Get, Effects, Boss Drop & Location)
Hellfire Skills already scale heavily off empowered interactions, especially when you start layering multiple buff sources that increase their overall ...

Diablo 4: The Eightfold Idol (How To Get, Effects, Boss Drop & Location)
Blazing Scream is already a strong pressure skill on its own, but it becomes much more dangerous when it starts ...
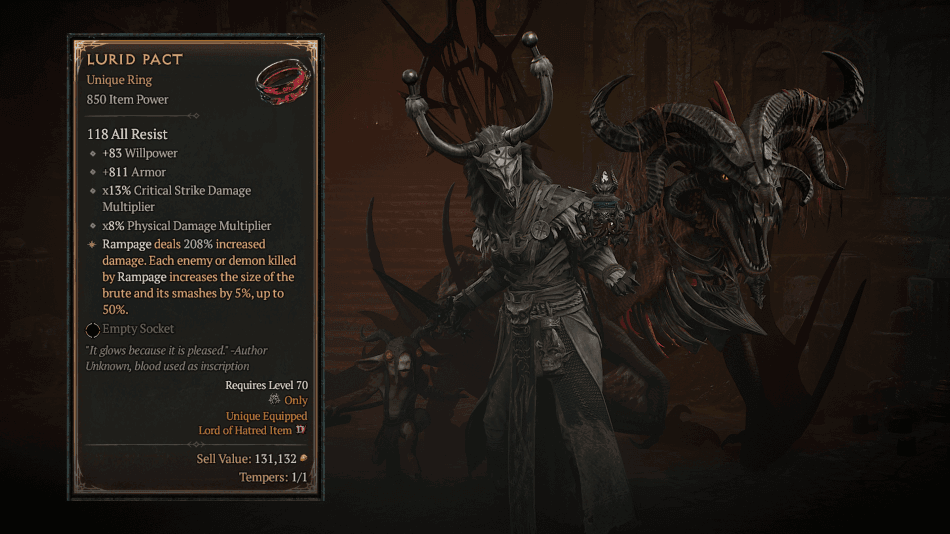
Diablo 4: Lurid Pact (How To Get, Effects, Boss Drop & Location)
Rampage is a strong Archfiend Skill built for area damage, especially when paired with Tortured Wretch for better clearing pressure ...
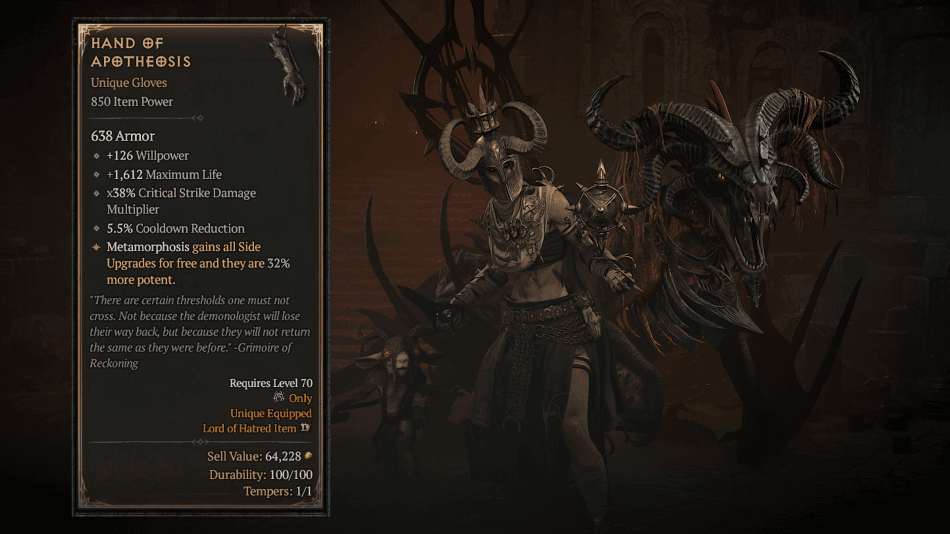
Diablo 4: Hand of Apotheosis (How To Get, Effects, Boss Drop & Location)
Metamorphosis is one of those skills that normally gets shaped heavily by side upgrades, letting players tweak how it behaves ...
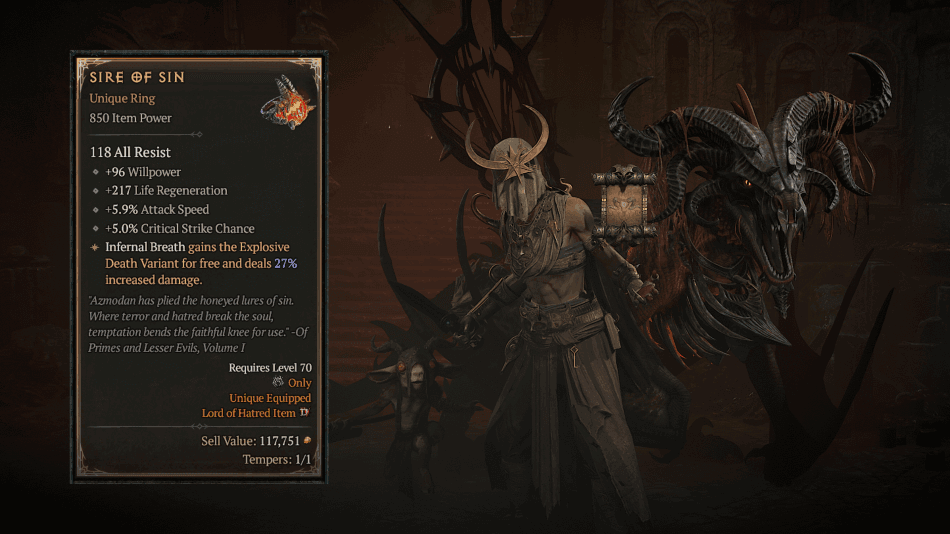
Diablo 4: Sire of Sin (How To Get, Effects, Boss Drop & Location)
Infernal Breath already has strong flexibility thanks to its variant system, letting players change how the skill behaves depending on ...
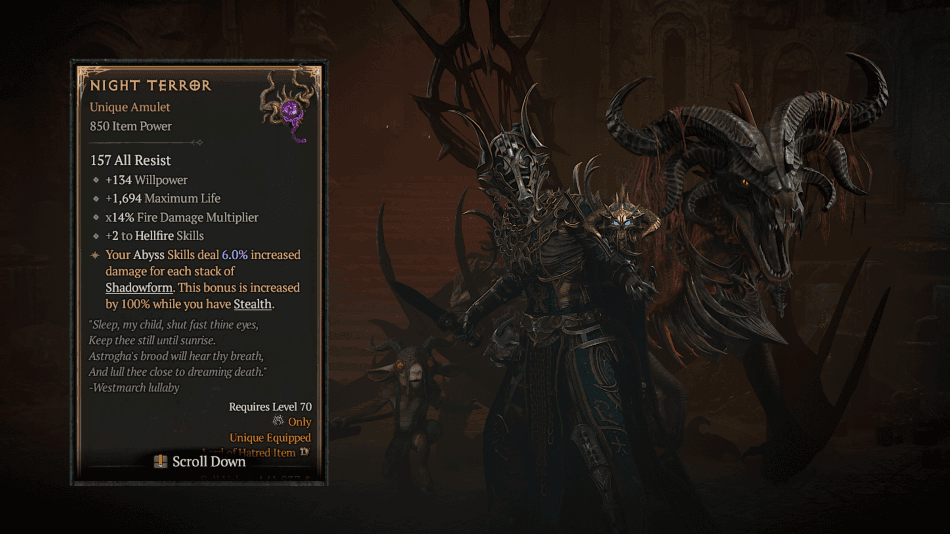
Diablo 4: Night Terror (How To Get, Effects, Boss Drop & Location)
Abyss Skills already scale well with stacking effects, and they become even stronger when used alongside Shadowform in combat. Shadowform ...
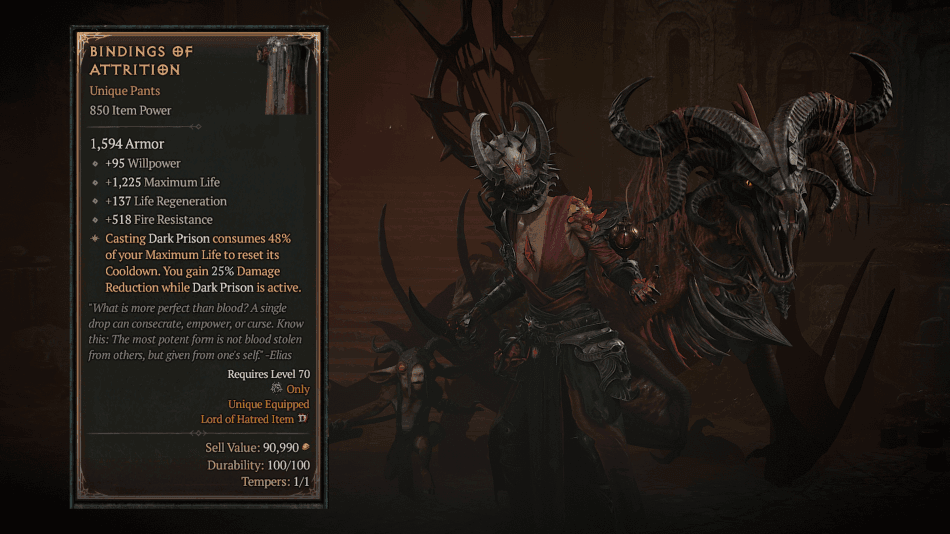
Diablo 4: Bindings of Attrition (How To Get, Effects, Boss Drop & Location)
Dark Prison is a powerful skill in Diablo 4 that benefits heavily from repeated uptime, but its cooldown normally limits ...
Diablo 4: Lair Bosses System Guide
Diablo 4 has a great story for players to experience, but after that, there is even more to experience once ...
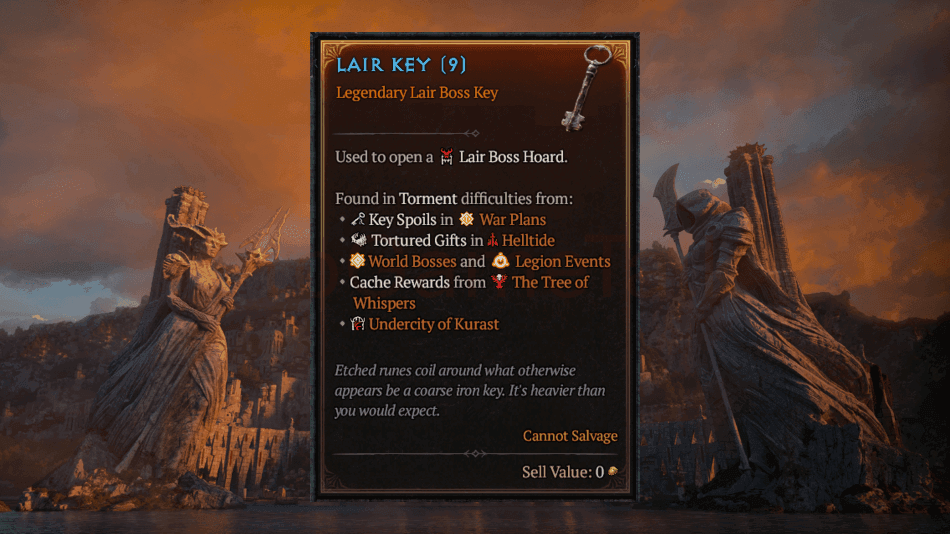
Diablo 4: How To Get & Use Lair Keys
Diablo 4 changed the entire Lair Boss reward system in Season 13, especially after the Lord of Hatred expansion introduced ...
Diablo 4: Level Cap Increase
Diablo 4’s level cap increase extends character progression beyond previous limits, now ranging from level 60 to 70, giving players ...
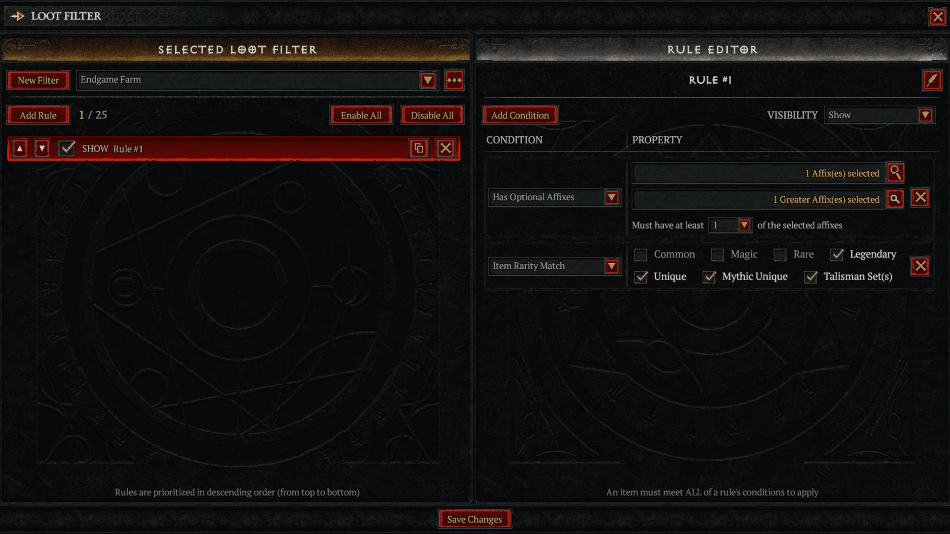
Diablo 4: Loot Filter (How To Create, Customize & Import Codes)
Diablo 4 now includes a Loot Filter system that allows players to control item visibility, highlighting, and drop relevance during ...
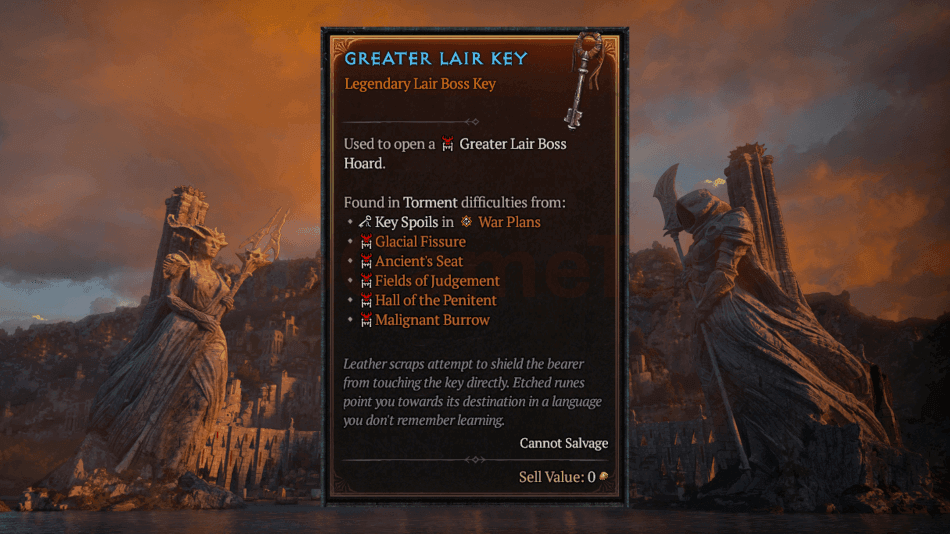
Diablo 4: Greater Lair Keys (How To Get & Uses)
Challenging stronger Lair Bosses is one of the best ways to farm high-end rewards in Season 13, especially once your ...
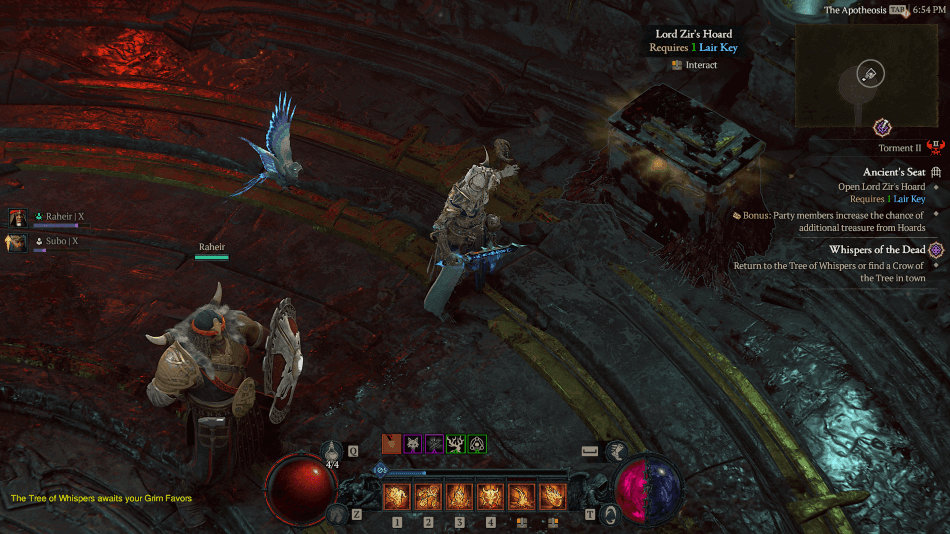
Diablo 4: How To Open Lair Boss Hoards in Season 13
Season 13 completely changed how Lair Boss rewards work, especially now that older boss materials are no longer used to ...
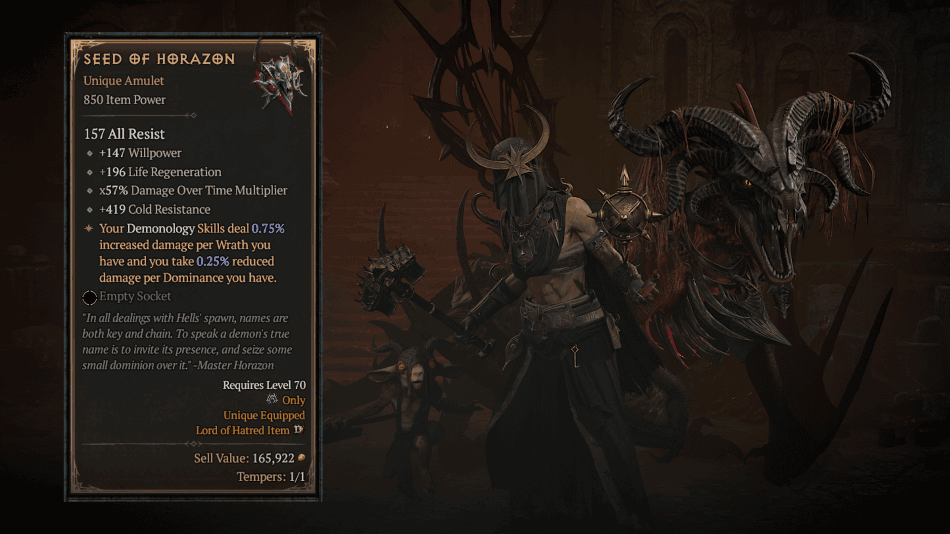
Diablo 4: Seed of Horazon (How To Get, Effects, Boss Drop & Location)
Warlock skills often overlap heavily with the Demonology category, allowing broad scaling effects to improve a large portion of the ...
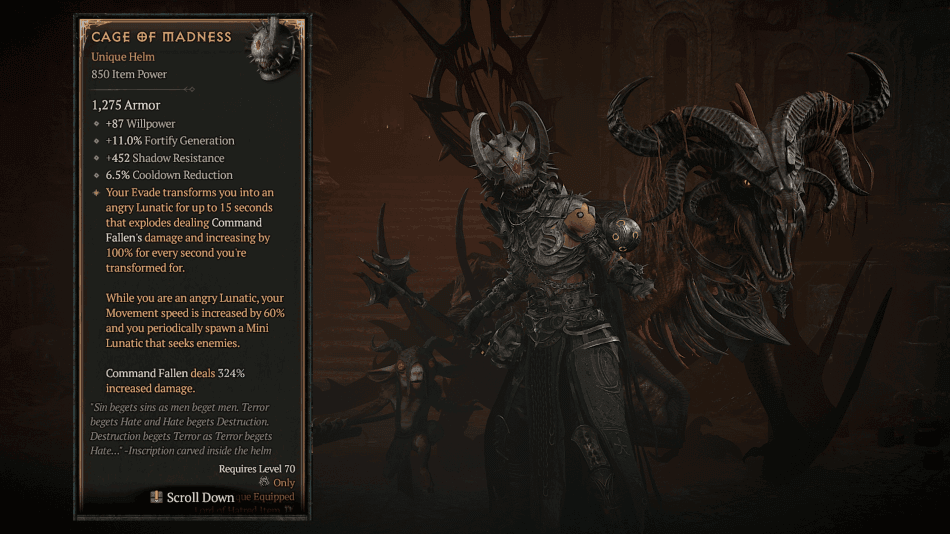
Diablo 4: Cage of Madness (How To Get, Effects, Boss Drop & Location)
Some Warlock builds can turn mobility into part of their combat flow, using movement to reposition before diving back into ...
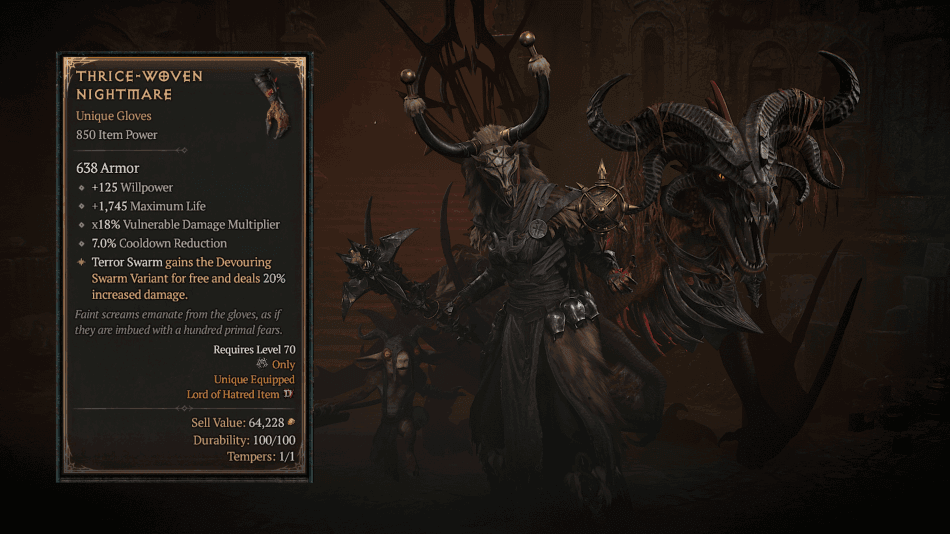
Diablo 4: Thrice-Woven Nightmare (How To Get, Effects, Boss Drop & Location)
Some Abyss Ultimate builds focus on amplifying a single cast into a long-lasting battlefield effect rather than repeating rotations. Thrice-Woven ...
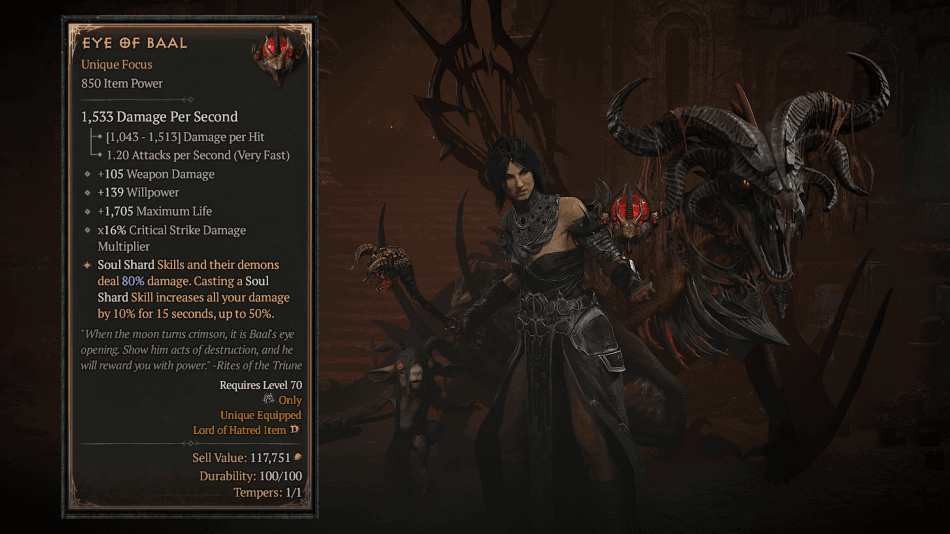
Diablo 4: Eye of Baal (How To Get, Effects, Boss Drop & Location)
Some Warlock setups lean into Soul Shard skills as a way to scale both personal damage and demon output at ...
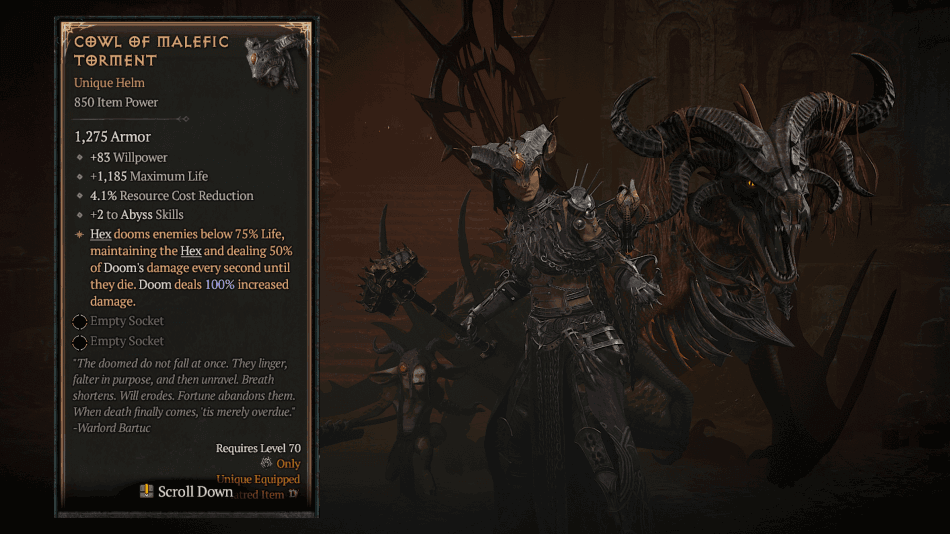
Diablo 4: Cowl of Malefic Torment (How To Get, Effects, Boss Drop & Location)
Some Warlock builds slowly wear enemies down instead of bursting them immediately, turning fights into a lingering death sentence once ...
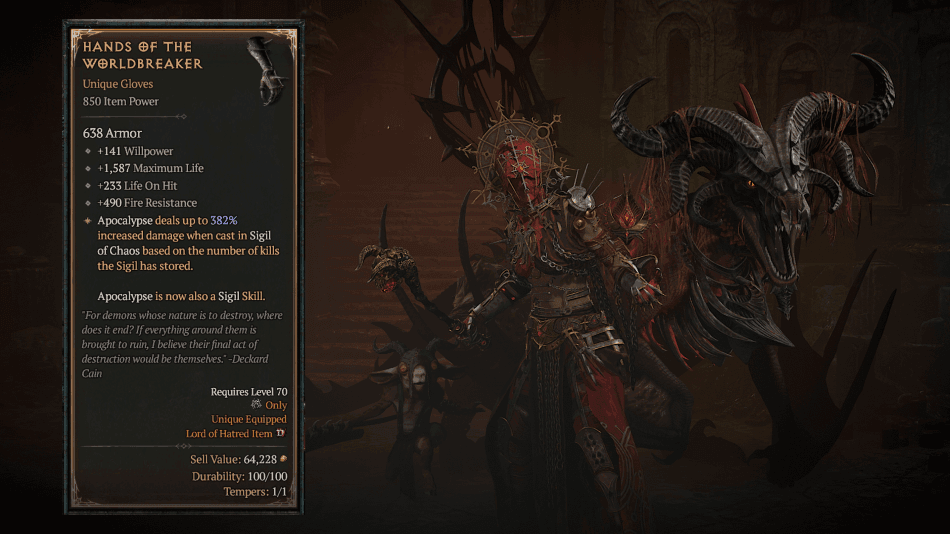
Diablo 4: Hands of the Worldbreaker (How To Get, Effects, Boss Drop & Location)
Some Warlock builds focus less on constant damage and more on preparing one devastating attack capable of wiping out entire ...
Diablo 4: Season 13 Lair Boss Loot Tables
Farming the right Lair Boss can save you a massive amount of time when trying to target specific Uniques for ...
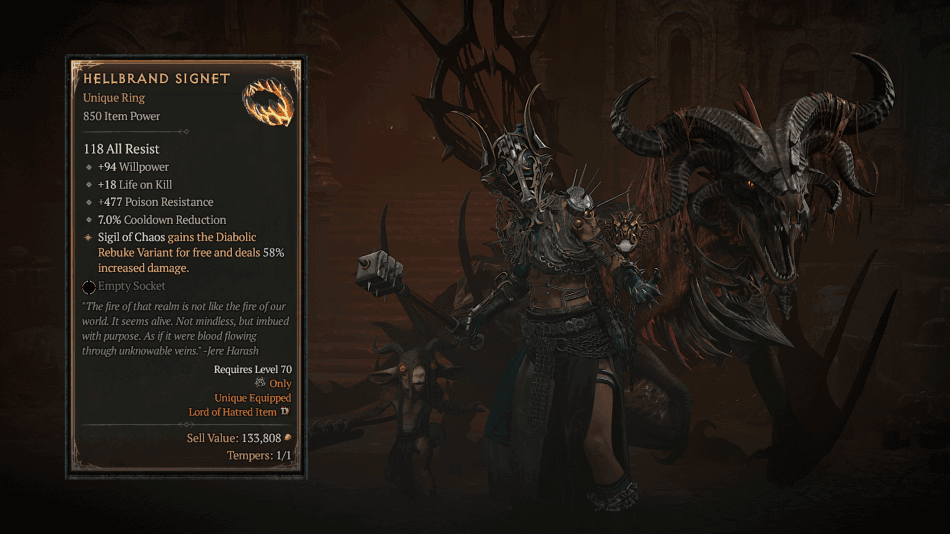
Diablo 4: Hellbrand Signet (How To Get, Effects, Boss Drop & Location)
Some Warlock skills, such as Sigil of Chaos, become much more dangerous when you can combine multiple variants instead of ...
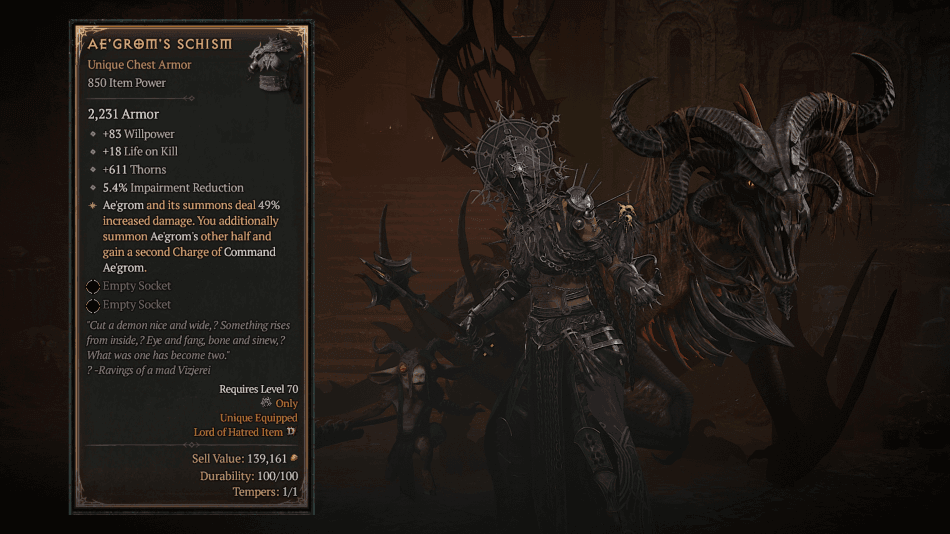
Diablo 4: Ae’Grom’s Schism (How To Get, Effects, Boss Drop & Location)
Some Warlock summoner setups don’t rely on direct combat, they rely on building a battlefield full of demons that handle ...

Diablo 4: Seal of the Ophanim (How To Get, Effects, Boss Drop & Location)
Some Abyss setups rely on staying consistent in fights, where pressure builds over time instead of relying on short burst ...
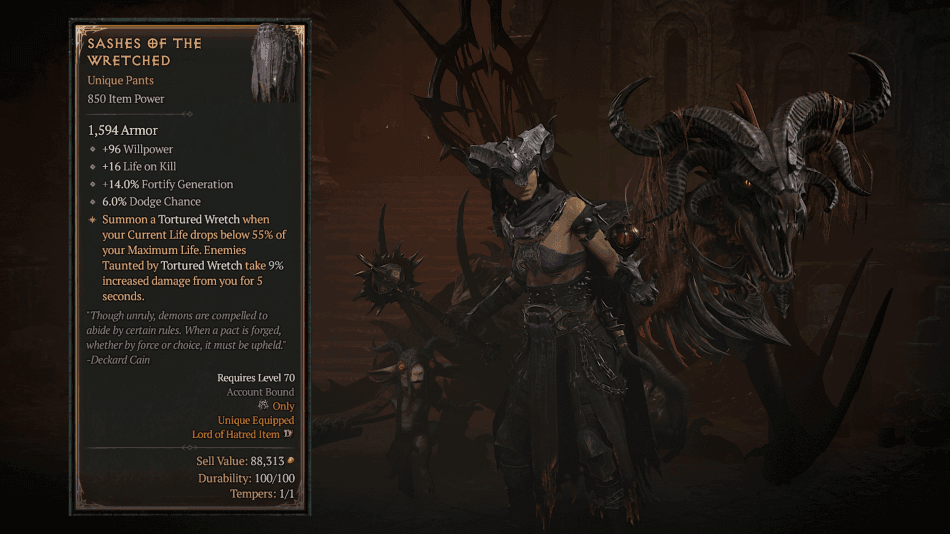
Diablo 4: Sashes of the Wretched (How To Get, Effects, Boss Drop & Location)
At times, you may take more damage than expected, but Sashes of the Wretched turns those moments into an instant ...

Diablo 4: Footfalls of the Waning World (How To Get, Effects, Boss Drop & Location)
A single step in Shadowform can decide survival or death, but Footfalls of the Waning World turns every evade into ...
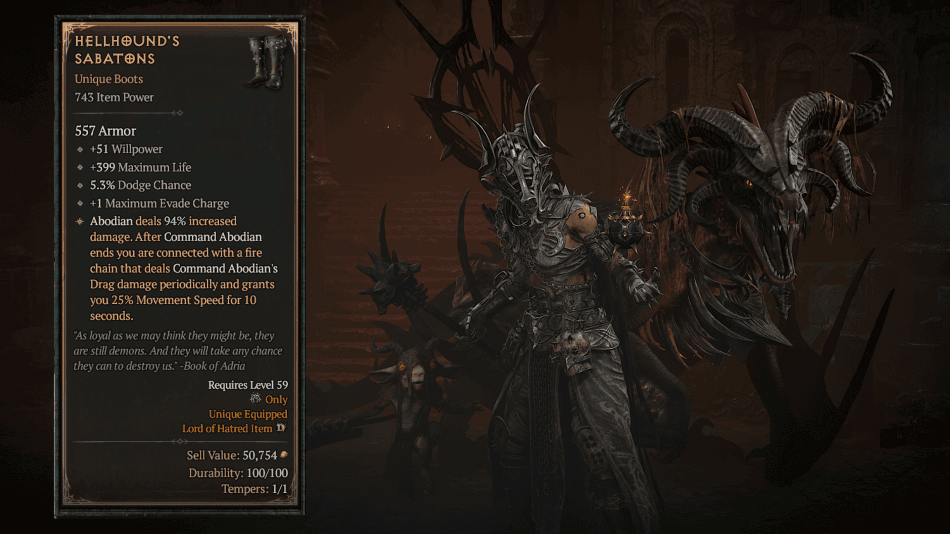
Diablo 4: Hellhound’s Sabatons (How To Get, Effects, Boss Drop & Location)
When Abodian enters combat, it already turns the battlefield into chaos, but Hellhound’s Sabatons make that chaos linger long after ...
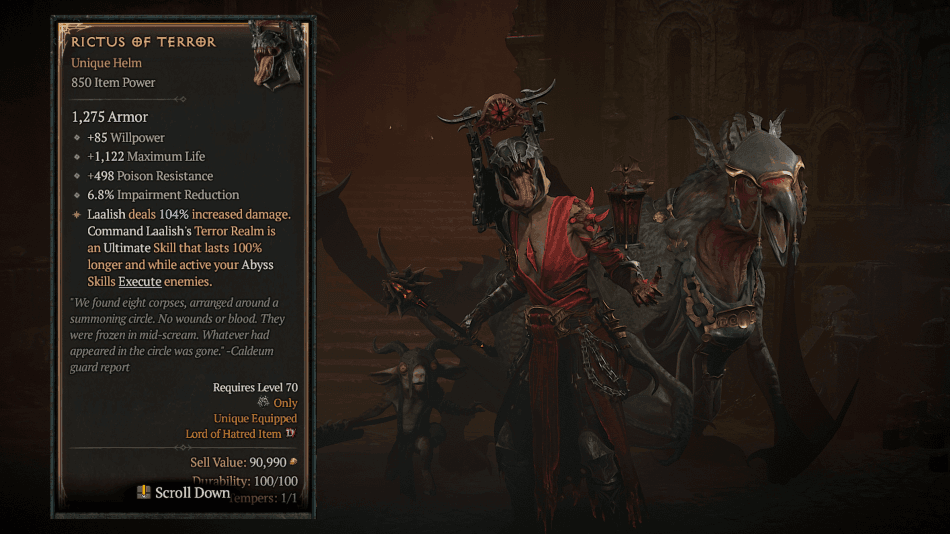
Diablo 4: Rictus of Terror (How To Get, Effects, Boss Drop & Location)
Laalish already brings strong pressure through the Terror Realm, but Rictus of Terror greatly extends its uptime while turning Abyss ...
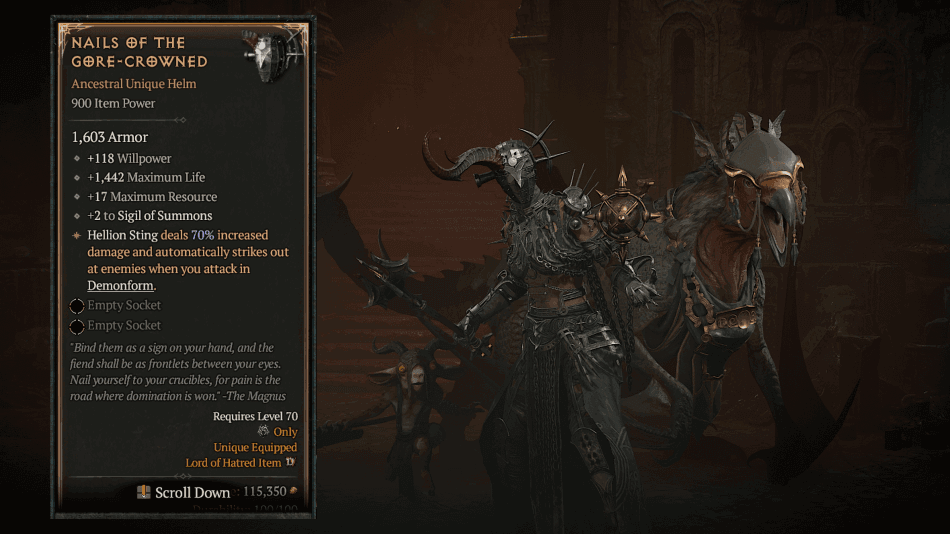
Diablo 4: Nails of the Gore-Crowned (How To Get, Effects, Boss Drop & Location)
Hellion Sting is already a fast and aggressive Basic Skill, but Nails of the Gore-Crowned turns it into constant pressure ...
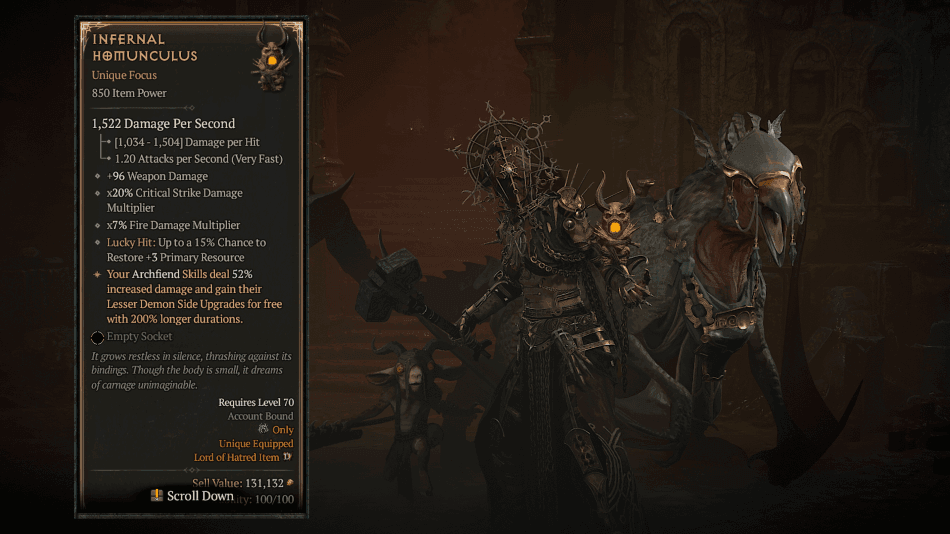
Diablo 4: Infernal Homunculus (How To Get, Effects, Boss Drop & Location)
Archfiend Skills can already be quite powerful, but with an item like Infernal Homunculus, their Lesser Demon effects become far ...
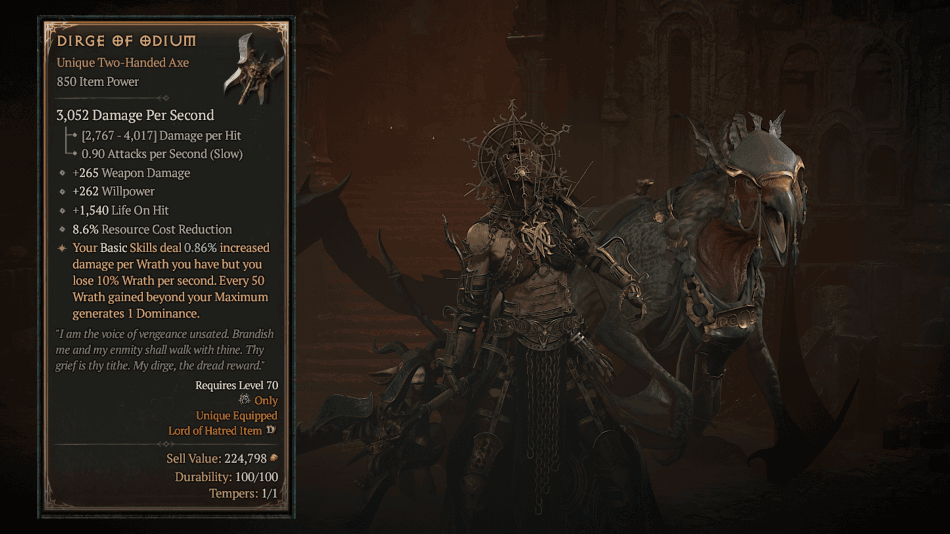
Diablo 4: Dirge of Odium (How To Get, Effects, Boss Drop & Location)
A steady flow of Wrath turns even simple strikes into growing pressure, but losing control of it quickly flips the ...
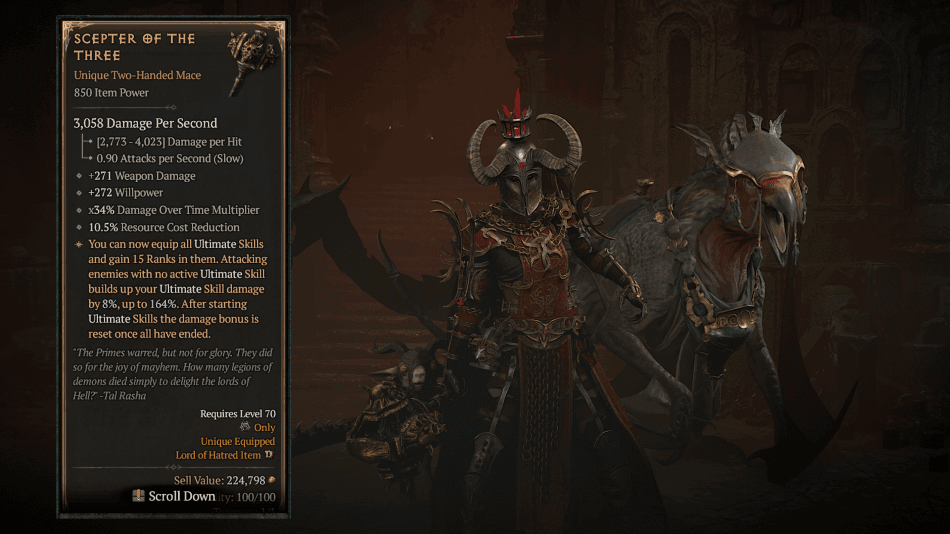
Diablo 4: Scepter of the Three (How To Get, Effects, Boss Drop & Location)
A Warlock without an Ultimate fights incomplete, but the Scepter of the Three turns every strike into preparation for overwhelming ...
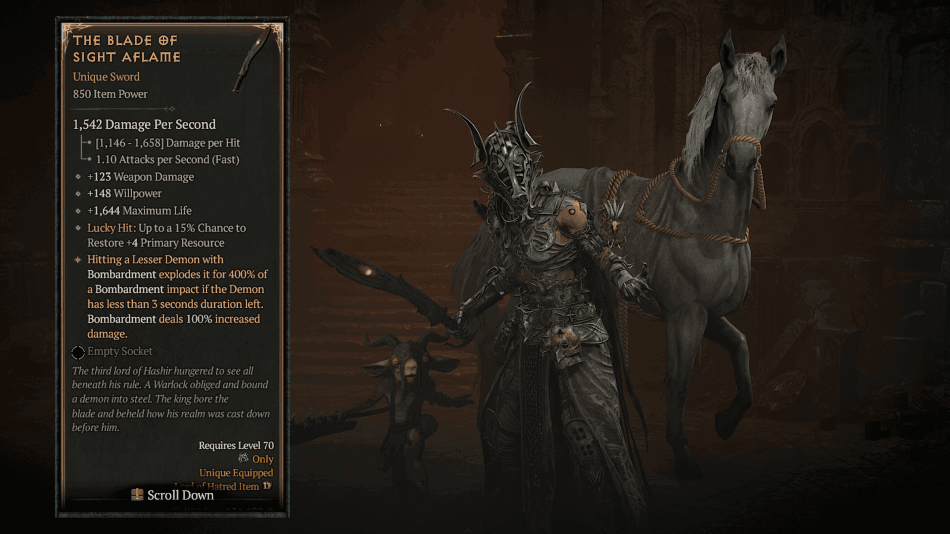
Diablo 4: The Blade of Sight Aflame (How To Get, Effects, Boss Drop & Location)
A single Bombardment cast can turn a fading Lesser Demon into a massive explosion that wipes out groups or bosses ...
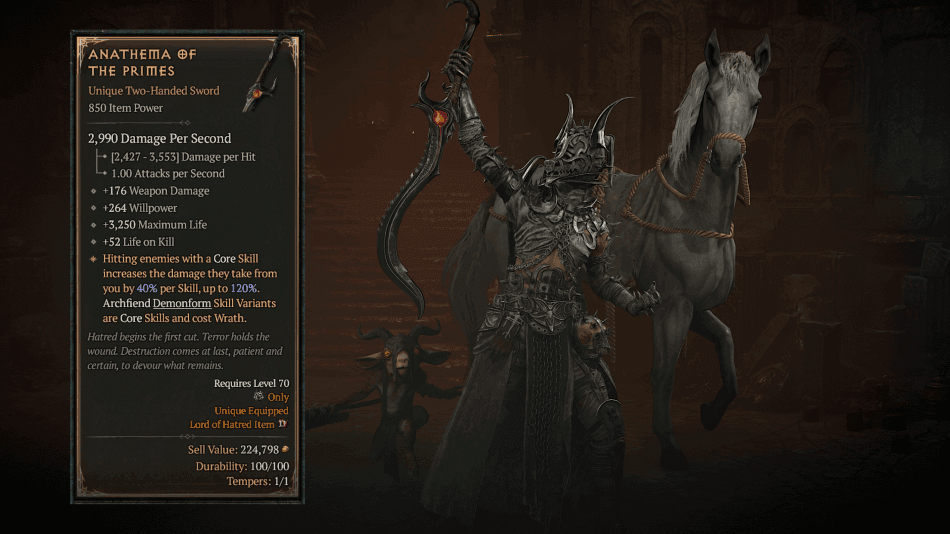
Diablo 4: Anathema of The Primes (How To Get, Effects, Boss Drop & Location)
Warlocks have access to different Core Skills that work well with certain builds, but those who utilize Demonform can greatly ...

Diablo 4: Season 13 Reliquary Rewards
Diablo 4 Season 13: Season of Reckoning introduces a brand-new lineup of Reliquary rewards filled with cosmetics, mounts, pets, weapon ...