A strange voice has been heard by Loid and his dreams have begun to seem less of an imagination and more of a reality, which is where you come in.
It seems that something has been hidden in Deimos and this is tied to the Entrati family but only Loid knows where to go as the clues have started to unravel.
Seek out Loid and find out what he knows before things get out of hand but watch out, something powerful has turned out to be missing.
How To Get the Whispers in the Walls Quest?
The Whispers in the Walls Quest became available on December 13 and is automatically shown to players once they log in.
From there on, a quest will be available that can be accessed via the Codex or through Navigation onboard your Orbiter.
This leads to a series of missions where you assist Loid and a mysterious person to figure out what is going on and start The Kalymnos Sequence.
Whispers in The Walls Walkthrough
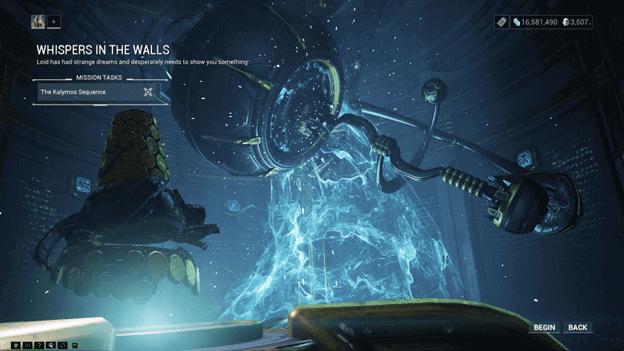
The Kalymnos Sequence

Upon starting the Whispers in the Walls Quest, you will be shown a cinematic cutscene that introduces the story in some way. (Including a person being sealed in a strange coffin)
After witnessing the cutscene, you will be in Deimos and Loid will be nearby, which results in the two of you talking while you follow him to the entrance to a laboratory.
Continue following Loid until you reach a round room that will serve as a way into the laboratory, which is activated once the two of you arrive.

Proceed to make your way further into the laboratory as you will need to explore what is within, starting with going down the spiral stairs and heading into a room with a large dormant figure.
Approach the waypoint and this will trigger Loid to begin speaking to you once again about a sleeper who you must now find.
Continue following the waypoint and you will be led into a room that lets you enter the mission area, which is where enemies will now be present. (Your weapons become available to use here)

The place will be crawling with Necramechs, which are the abandoned creations of the person who once lived in the laboratory grounds.
Fight your way through the creatures until you reach the coffin by following the waypoint and interacting with it to awaken the sleeper.
This will reveal a mysterious man who is the original Loid since the one you are traveling with was just a construct with a similar mind.
You will eventually come across Albrecht Entrati’s Grimoire and will need to pick it up before you proceed with the next waypoint.

Loid will now lead you further into the laboratory and into a portal that opens when one of the dormant constructs opens its mouth.
A cutscene will begin where you follow Loid into this portal and are brought to the inner part of the lab where Necraloid (Loid Construct) tells you to meet the Cavia.
The Cavia can be found around the lab and are marked by waypoints, which you must go to to learn about them. (They are previous experiments kept in stasis)
After meeting the Cavia, head to Loid, who will be near a computer (identified as an antique device) which you will need to interact with. (Hold the key that appears until the sequence is done)

This will create a transference where you enter the mind of a character named Arthur, who is currently existing in the year 1999.
You will need to play as Arthur, who is traveling through the subway, and will need to make your way towards the exit as you fight strange robotic creatures.
At the end of the last fight, Arthur will fall to the ground, and you will see a glimpse of a grinning Albrecht Entrati before the transference is cut.
Upon returning, Loid will speak with you and shortly after, the laboratory will be attacked, and you will need to help defend it. (You will be instructed to equip the Grimoire.

After Necraloid is dismissed by the real Loid, you will need to head into the nearby chamber that takes you to the laboratories.
Follow your way towards the Auricle that is marked by a waypoint, and you will need to defend it until the first wave runs out of time.
You will then need to proceed to the Vitreum, which you will also have to defend in the same manner as you did with the Auricle.
After successfully defending the Vitreum, the mission will be complete, and you will be brought back to Loid in the laboratory. (later revealed to be called Sanctum Anatomica)

Upon returning, Loid will have another task for you, which requires you to extract data from the Pom-2 (the computer) but before doing this you will need to replace its “board.”
This requires that you head to one of the creatures (Cervultie) called Tagfer, who will give you a Keyglpyh that you will need to access a Netracell.
Follow the waypoint once more into the chamber that leads you to the terminal and interact with it to open the path ahead.
You will now need to locate the Netracell by fighting through the enemies and using Terminals to pinpoint its location. (Using the terminals is optional and you can find them on your own)

Once you find the Netracell, interact with it and this will alert enemies, which requires you to defeat them in the marked areas.
After defeating a certain number of enemies to reduce the Netracell Alert Level, you will need to find a Necramite nearby and destroy it to find the new area you will need to go to.
You will repeat the task of defeating enemies in the alert areas and destroying Necramites until the Netracel Alert Level is depleted.
Head back to the Netracell once the alert levels have gone down and go to the room that looks like an office where you will find the board. (Take the board)
Once you have the board, head back to the extraction area to complete the mission and you will be brought back to Loid in the Sanctum Anatomica.

After returning, Loid will ask you to do the honors, which means you will need to interact with Pom-2 (the computer), and this will reveal a series of messages from Albrecht Entrati.
Loid will speak with you after the two of you have viewed the messages and this results in Loid giving you “Albrecht’s Blueprint)
Head back to your Orbiter and craft the blueprint from your foundry (you can skip the wait time for free) and return to Loid in the Sanctum Anatomica.
Place the item (Jahu Gargoyle) on the table and speak with Loid, who will instruct you to interact with it and this will cause a voice to begin to speak.

The voice will tell Loid to let you figure out where they are, which happens to be one of the Cavia, the fish inside of the tank. (Later known as Fibonacci)
As you make your way towards the voice, Fibonacci will teasingly tell you if you are going in the right or wrong direction until you find him.
Speak with Fibonacci, who will tell you that you need to proceed with the sequence, but he also mentions that the task that needs to be done has been made impossible by Loid.
This is because the last page of the Grimoire was lost by Loid and now you have been tasked to retrieve it, which will have you entering the nearby chamber again to reach the laboratories.

This will begin an extermination mission within the laboratories, and you will need to defeat a certain amount of enemies before the mission ends.
Immediately after the mission results screen appears, you will be brought into another mission that has you rushing back to the Sanctum Anatomica as it is under attack.
Follow the waypoint that leads you back to the sanctum and you will find Loid armed and rushing out to fight enemies outside.
A health bar will appear, and the name of the enemy will be “The Fragmented Tide” and you will need to defeat the enemies that appear to reduce its health.
A second wave of these creatures will appear with another health bar, which requires you to continue clearing out enemies until it is depleted.

After defeating the second wave, an enemy called The Fragmented Suzerain will appear and begin attacking you. (It will be invulnerable)
To fight this creature, you will have to run back to the Sanctum Anatomica and interact with the Jihu Gargoyle to make a portion of its life vulnerable.
Once the first health bar has been taken out, interact with the Jihu Gargoyle again and you will be able to defeat The Fragmented Suzerain.
This causes one of the large humanoid constructs to appear and attempt to attack you, but a transference will suddenly be made when it pushes you out of your Warframe.

A transference appears to be made and the other construct inside of the Sanctum Anatomica comes to life, with you controlling it.
This part is more of a cutscene but be ready to interact since a key will be displayed when the other construct approaches.
While it may have seemed that this would have been a fight, the construct instead gently touches the face of the other construct which calms it down.
The position of both constructs and the facial expressions is revealed to be how Albrecht said goodbye to Loid before being sealed in the coffin, which causes both constructs to become dormant.

Once you regain control of your Warframe, head back to Loid and speak with him and the Whisper in the Walls quest will shortly come to an end.
Loid has come up with the idea of repeating what Albrecht Entrati has done, which was going into the past but since you were late in 1999, the two of you will need to try again.
This means that you and Loid will now work together to figure out how to get you there on time, with him doing things from his end.
The quest ends with a cutscene showing Albrecht Entrati and a figure that appears to look like your operator talking before everything fades to black.
Whispers in the Walls Rewards
Upon completing the quest, you will receive messages from both Loid and Fibonacci, where Loid has given you the Qorvex Blueprint. (New Warframe)
Fibonacci on the other hand will speak to you about melee weapons and a new technique that he calls Tennokai.
You will receive a Melee Upgrade Segment, the Mentor’s Legacy Aura Mod, and a Melee Arcane Adapter from Fibonacci.
This will also unlock the Sanctum Anatomica, which you can access to do bounties, purchase items, and gain access to the laboratories.
Verdict

With the Sanctum Anatomica left damaged and Albrecht missing, you and Loid will be continuing your efforts to find a way to reach the year 1999 in time.
It seems that whatever happened to Albrecht has changed him and the other figure that copies your operator is now working with him.
Only through the efforts of Loid with your help will Albrecht be found, and his fate will be decided once this happens.