The New War is a solo-only main quest and one of the most anticipated continuations of the Warframe storyline which changes the game greatly.
During this quest, you will experience an all-out war waged by the Sentients as they return from there, seeking to be non-existence as they hunt down the Tenno.
You will experience how The New War affects the Grineer, Corpus, and Tenno during this quest and will discover what lies ahead for the Tenno, Lotus, and more.
Things To Keep In Mind
Once you start The New War, your equipment options will be limited, so be sure that you choose the right equipment for all of your loadouts.
Starting The New War will put your account in a different state until you finish the quest, disallowing you to do anything else until finished.
After completing The New War, everything will be back to normal, aside from the addition of newer bounties and items that came with the update.
How To Get Caliban?
If you are wondering how to get Caliban, you may do this once you have completed The New War, as this will unlock Narmer Bounties.
Narmer Bounties will allow you to farm Calaban’s parts (bounty rewards) as well as some of the resources needed to craft Caliban.
Other items will become available from Narmer Bounties, making it vital to complete The New War to get more goodies from the update.
Also read our below guides:
- How to Get Amar’s Set Mods
- How to Get Nira’s Set Mods
- How to Get Boreal’s Set Mods
- How to Defeat Ballas Boss
The New War Walkthrough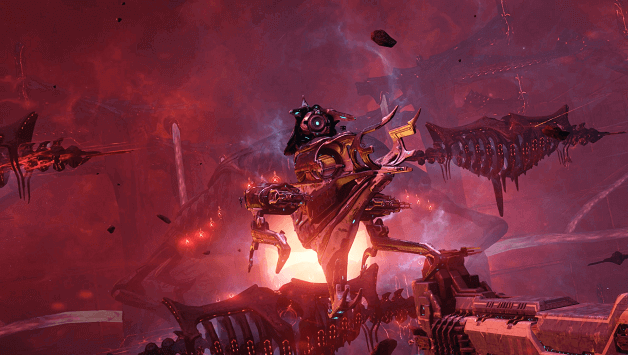

The New War starts with an opening cutscene and afterward you witness the invasion of the Narmer happening.
Kahl-175
During the Narmer invasion, a Grineer dropship will crash and a lone surviving Grineer named Kahl-175 is all that remains.
Armed with a Grakata and Machete, you will attempt to first regroup with Councilor Vay Hek as he commands you to head to his beacon.
Kahl-175 is diverted as he witnesses a Dargyn shot down and attempts to aid the pilot, only finding out that they have died.
Without any mission remaining as Councilor Vay Hek appears to think all hope is lost, you will take control of Kahl-175 to fight through the enemies and attempt to blow up the Sentient Condrix.
Veso-R
Aboard a Corpus Ship, you will be taken the role of Veso-R, who immediately responds to Alad V who is demanding that a tech disengages the command overrides of the ship.
You will be fighting through enemies that the Sentient has seemed to have taken control of, making your way with fighting and a bit of puzzle-solving.
Armed with a Plinx and Prova you will need to fight your way and use robots to assist you in fighting and getting through areas.
Eventually, you will have to take on a Jackal with the use of the robots you have available which then allows you to proceed to the terminal for overriding.
Railjack
Veso-R went against Alad V and reactivated the fire controls after learning that Alad V had made negotiations with the Sentients.
As the destruction occurs, your Railjack will appear and you will need to fight alongside the Grineer and Corpus to push back the Sentients.
You will then fight through the Sentients using your Railjack until you can come into proximity of the Sentient mothership.
After reaching the Sentient Mothership, you will need to align your Railjack’s slingshot so that Teshin can board the Mothership.
Teshin
Taking on the role of Teshin, you will need to fight your way through the Mothership but combat will be slightly different as the Sentients have specific weaknesses.
Teshin’s abilities allow him to toggle between 3 different elements, allowing you to pick the right one when attacking certain enemies.
Aside from fighting through enemies, you will need to deactivate energy locks which can be done by destroying one and following a trail to each next one.
After progressing through multiple enemies and a few Orphix fields (which you deactivate the energy locks of) Teshin will eventually reach his destination and a cutscene plays.
Shift to The New War (Cutscene)
As Teshin reaches the end he is defeated and later killed by Erra, causing the Tenno to jump in to attack as well only to hesitate as he sees Lotus.
The cutscene ends with Ballas stealing Lotus’ remaining power with a kiss as he opens a black hole that pulls her in.
The Tenno attempts to save her but Ballas cuts off Lotus’ hand and stabs the Tenno, ending with Lotus, the Tenno, and Warframe being sucked into the black hole.
The Drifter
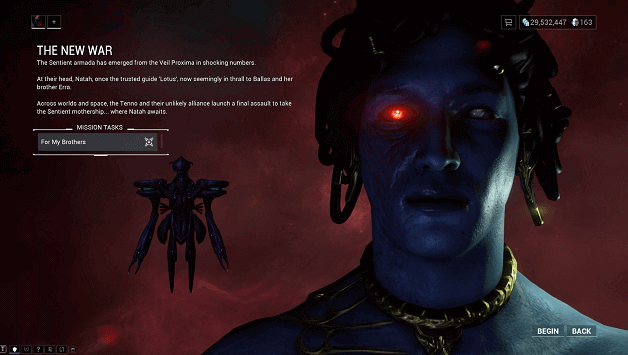
A cutscene opens showing Ballas being worshipped with people calling out “Narmer” as he claims “all as one” making a speech to the veiled followers.
A Grineer ship lands and from it a figure appears, this character is later known as The Drifter and you will be taking control of him as a result of the aftermath of the invasion.
You will need to make your way towards a waypoint and will learn about their abilities and discover some new enemies and even a different hacking method.
Make your way into the Narmer outpost to bypass security codes and free prisoners (optional) as you progress further into the outpost.
Continue making your way to each waypoint until you gain access to the inner part of the outpost, eventually starting a cutscene.
The cutscene shows Narmer units converting people and you will be spotted, requiring that you defeat all Sentients in the area.
Archon name Nira will attack you and you will have to escape, rushing towards the waypoint marking your ship’s location.
Drifter’s Camp
Once you have escaped, you will arrive at The Drifter’s camp and things will be quite familiar by now as your Orbiter will be at the camp.
As you head into what appears to be a disassembled Orbiter, you will need to go to the Operator’s room and the remains of Lotus will be there.
It is revealed that The Drifter is somewhat connected to the Operator as Ordis is present and can’t stop calling him “Operator”.
Stolen Plates
The Stolen Plates mission has you infiltrating what appears to be a brainwash-filled Fortuna, requiring that you sneak past Deacons to avoid being captured.
You will need to make your way around starting from the first crowd, crossing into the center through containers, and making your way to some vents.
As you continue making your way to the waypoints, you will eventually find yourself talking to Little Duck, who later has you take a K-drive to a facility and use a veil to disguise yourself.
You will need to continue sneaking your way around Deacons as they will know it’s a disguise but other enemies will not notice you.
Keep making your way until you reach the console, which also prompts action for you to remove the veil before you can hack it.
Once you hack the console, you will need to escape and it is later revealed that the Narmer Veil Factory has been destroyed, commended by Nora on her radio.
Enemies of Enemies
The Drifter needs to make his way inside a facility on Uranus as he needs to speak with Hunhow, being a desperate and last choice for help.
You will make your way through the facility and fight your way past enemies until you reach Hunhow and along the way, the Shadow Stalker will be killing enemies around you.
You are captured by the Shadow Stalker and brought before Hunhow who then explains the situation and talks about the three Archons which you later must defeat.
Hunhow will give you the Nataruk Sentient Bow as you leave and also does a little test if you can handle its powers before you make your way back to the surface to extract.
Temporal Axioms
The Drifter claims to have been assigned homework and you will get what appears as a flashback of you learning in the Zariman Ten Zero.
You will go through multiple slides which will provide you answers to three different questions that need to be answered. (Does not matter if you get them right or wrong)
The following answers to the questions:
- B) Futurism
- A) It Considers the Present to be the only reality.
- C) Her parents will survive. Her parents will die.
After answering the questions, a void jump will occur and the scene ends.
The Wild Hunt
During this step, you will need to face the different Archons to obtain their shards which are used to heal the Lotus.
You can challenge the Archons in any order and they will each have some different abilities but retain teleportation, Sentient summoning, and a final cutscene attack.
Once the Archons have low health, they will jump up to your character and a short scene will occur which requires you the correct key to fight them off.
Each time you defeat one of them, you will get a shard which you will bring back to the Lotus to help her recover.
The three different Archons are:
1) Archon Boreal
Sends out Electricity that can stay on the ground and deal damage over time as well as do a screech that knocks you back.
Boreal may create an expanding field that allows it to heal which also pushes you away but you may use the Smoke Screen ability to get through and disable it by attacking him.
Read: Defeating Archon Boreal Boss Guide
2) Archon Amar
Amar deals Heat damage, attempting to leap at you and stomp the ground or attack you up close with several slashes if you remain near him.
He tends to clone himself when a certain amount of damage is received but shooting the real Amar will remove the rest.
Read: Defeating Archon Amar Boss Guide
3) Archon Nira
You may remember Nira from the earlier missions, who uses Toxin attacks, striking from a far distance with her whip and even using an ability similar to Rip Line.
Nira may also create a shield and heal herself before sending out a shockwave-like attack and may also release a screech to paralyze you, which you need to hide from.
Read: Defeating Archon Nira Boss Guide
The Aftermath
Each time you defeat an Archon, you will obtain its shard and will bring it back to the Lotus, which prompts a different response each time until the second shard.
First Archon
The first Archon you face will end with the Shadow Stalker dealing the final blow after you weaken the Archon and he will hand over the shard to you.
Once you bring this to the Lotus she will demand more and even take a bite at you in aggression, showing signs that she doesn’t remember who you are and is dangerous.
You enter a flashback where the Zariman Ten Zero incident occurs as the Tenno are hiding in a room and the Operator needs to comfort some of the others inside.
In the end, you meet one last person who is later revealed to be the Man in the Wall.
Second Archon
Defeating the second Archon will have The Drifter pull out the Archon’s Shard and once again they give it to the Lotus to restore her.
The Lotus suddenly goes berserk and starts to attack The Drifter which prompts you to escape for a short period until The Drifter is destroyed but Ordis gets in the way to protect him.
A cutscene appears where the Tenno and the Man in the Wall make a deal, causing him to protect the Tenno resulting in them swapping places with The Drifter.
The Lotus recognizes the Tenno and leaves to chase after Ballas to attack him.
Zariman Ten Zero
During this part, you will resume the role of the Tenno who is back aboard the Zariman Ten Zero and will be following The Drifter.
You both meet up in a room where you are told to sit down and afterward speak with The Drifter, explaining how things ended up as they did.
After your friendly conversation with The Drifter, you will be able to choose between either the Operator or The Drifter on who will continue the quest.
The Tenno is still the one who needs to continue the quest and will be the result, awakening on the Orbiter that Ordis has brought out of stasis.
She Gives, We Live
The Tenno needs to seek the help of the Unum to make it aboard the Murex by stopping time, giving them an advantage and a better chance at success.
Within Cetus
Before you can start the quest, you will first need to equip a Paracesis and if you do not have one, there will be one provided for you.
You will be entering The Quills hideout and will make your way into Cetus where you will first remove the veils from Konzu, Fisher Hai-Luk, Master Teasonai, and Hok.
Using a Void Dash will prompt the removal and you will need to react with the right keys but beware as there will be Deacons which you must avoid with Operator abilities.
After rescuing the four of them, you will head over to a blimp and take it going to the Unum Tower where you will recover your Warframe.
You will need to make your way up the tower, using your Void abilities to activate crystals until you need to destroy two crystals that awaken the Unum.
Aboard The Murex
The Lotus tells the Tenno that this is not their fight and attacks them, eventually resulting in the Tenno deflecting her attacks to her guards.
After the attack, the Tenno is knocked out of the Murex but their Railjack arrives and they will then continue to pursue them.
Approach Praghasa
As you make your way to Praghasa, you will need to take cover behind broken ships and proceed whenever the beams from the Sun are not being released.
Once you make your way to the waypoint on your Railjack, Cephalon Cy will inform you that you should get a Necramech in the barrel, meaning you should go to the Slingshot.
This will propel you towards the Praghasa and you will then burst inside, only to be met by a Sentient enemy which is quickly destroyed by Erra, who wants to help you.
You will need to follow Erra and fight through enemies until you reach the end where he sacrifices himself so that you may pass through to reach the final Archon.
The Last Archon
The Final Archon will be waiting and you will need to disable Orphix Generators before you can begin attacking them.
This can be done by luring them to the Orphix Generators for them to attack, removing the shields so you can destroy them.
Once all three Orphix Generators have been destroyed, you may attack the Archon and will eventually pull out their shard after defeating them.
A cutscene will play and the Tenno will attempt to bring the shard to the Lotus only for it to be stolen by Ballas and then a boss fight will begin.
The Final Fight
After the cutscene, you will be using your Warframe and Tenno and must survive attacks from a now-controlled Lotus, who instantly pushes the Operator out of the Warframe.
When using your Operator you will need to deflect the attacks from the Lotus to destroy the orbs in the background and defeat the Deacons that spawn afterward.
After destroying all orbs and defeating the other Deacons, Ballas will join the fight and you will have to dodge his beams and make them hit orbs as well.
Once an orb is destroyed, you will be able to attack Ballas with your Operator and after one bar has been depleted he will fire a beam that chases after you.
Repeat the steps of having him destroy an orb and damaging him afterward until he has no more health left and a cutscene will begin.
Ballas will stab the Lotus and is about to deal a final blow but the Tenno jumps on him and places a Veil which tricks him into kissing her.
The Lotus can take back her power by siphoning it with a kiss and at the last minute, they are met by a large wall-like figure with the Man in the Wall sitting on top of it.
The figure disappears after the Lotus attempts to protect the Tenno, ending with her later being brought back into the Orbiter by The Drifter.
Ending of The New War
The Lotus thanks The Drifter and later on explains what she has seen, only to be told by the Tenno that she has a choice on who she wishes to be.
From here on you have a choice and can pick whether the Lotus will remain as Natah, Lotus, or Margulis, which is permanent.
The quest will come to an end and gameplay will be back to normal, with the exception of The New War items available from Narmer Bounties on Cetus and Fortuna.
The New War Quest Rewards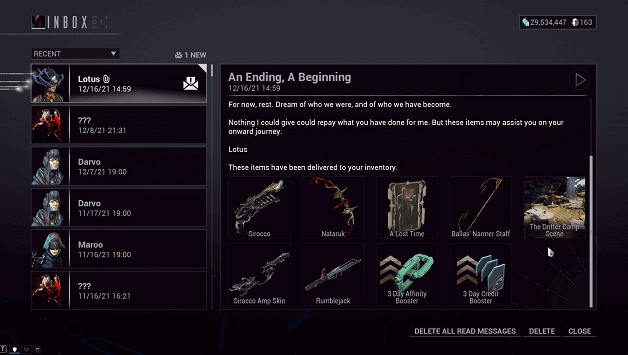
Certain equipment that you have been using during The New War will be rewarded to you after you have completed the quest along with a few other goodies.
The following are rewarded after completing The New War Quest:
- Sirocco
- Nataruk
- A Lost Time
- Ballas Namer Staff
- The Drifter Camp Scene
- Sirocco Amp Skin
- Rumblejack
- 3 Day Affinity Booster
- 3 Day Credit Booster
Verdict
The New War was one of the most anticipated updates in Warframe history and rewards the players with a lot once they finish it.
To get Caliban and other equipment from The New War update, you will need to complete this quest first and at the end, you also get the equipment from within the quest.
Some elements from The New War will permanently affect your game, mainly the Lotus’ permanent form.