One of the neutral Syndicates in Warframe is Cephalon Simaris, who operates within the Sanctuary and focuses on collecting research data from enemies and the environment.
The Tenno can earn standing with Cephalon Simaris to unlock rewards, but unlike other Syndicates, this is primarily done through scanning and analysis rather than combat.
Instead of simply killing enemies during missions, players assist Simaris by performing Synthesis Scans, completing personal targets, and finishing daily Synthesis Tasks to gain standing.
Cephalon Simaris
Cephalon Simaris is one of the many Cephalon constructs in Warframe, also known as Irmis, who has an obsessive focus on research and data collection.
He resides within the Sanctuary and is often found analyzing data at relays, which also serve as access points to the Simulacrum for Tenno training.
Players assist Simaris by scanning enemies and objects, which unlocks detailed information about them and provides additional targets that reward significant standing when scanned.
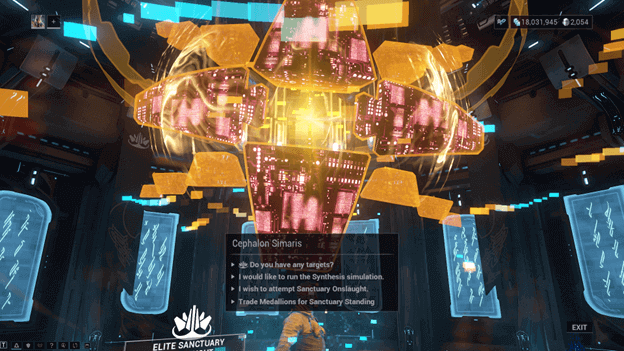
Where To Find Cephalon Simaris?

Cephalon Simaris can be accessed at any Relay in the Origin System, and you must travel to the Relay to interact with him directly.
Once at a Relay, you can either take the lift to his location or teleport instantly by selecting Cephalon Simaris from the Navigation Menu.
The Sanctuary is a vast data network, which allows Cephalon Simaris to maintain a presence at multiple Relays for Tenno to access his services.
How To Get Cephalon Simaris Standing?
Cephalon Simaris Standing is gained by scanning enemies, but there are additional ways to earn it, which include the following methods:
1) Scanning Enemies
Scanning enemies will provide you with standing, and the more enemies you scan in a mission, the more standing you will get.
If you perform Stealth Scans (scanning enemies while being undetected), you will gain even more standing per enemy, which is especially useful on higher-level missions or The Steel Path.
2) Personal Target Tasks
These are scan targets assigned to you at the start of certain missions, where Simaris alerts you of a target that needs to be scanned.
You will need to locate the target and deploy a Kinetic Syphon Trap to disable them so that you can scan multiple points on their body to complete the task.
3) Synthesis Daily Task
The Synthesis Daily Task can be obtained from Simaris, which marks a certain enemy that needs to be scanned, often in specific spawn locations on the map.
Once you know where to go to scan the targets, you will need to scan them a set number of times to complete the daily task and earn bonus standing.
Cephalon Simaris Offerings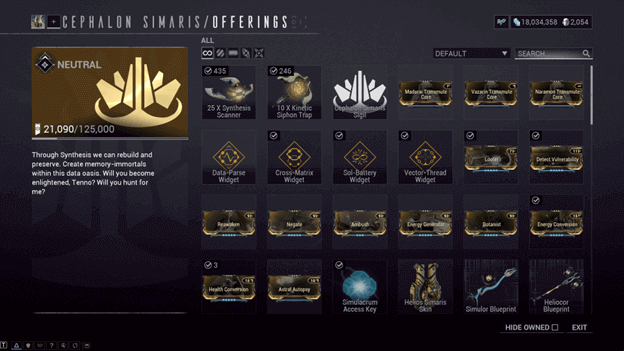
Once you have gained standing for the Cephalon Simaris syndicate, you may head to his location and interact with the offerings NPC to trade standing for items.
This will open the Offerings Menu, which you can browse through to select items that you would like to purchase for standing.
All of these items can be purchased for a certain amount of standing, which includes upgrades for your Synthesis Scanner.
Item | Type | Cost |
25x Synthesis Scanner | Gear | 5,000 (Credits) |
| 10x Kinetic Siphon Trap | Gear | 5,000 (Credits) |
Cephalon Simaris Sigil | Sigil | 25,000 |
| Madurai Transmute Core | Mod | 5,000 |
Vazarin Transmute Core | Mod | 5,000 |
| Naramon Transmute Core | Mod | 5,000 |
Data-Parse Widget | Synthesis Scanner Upgrade | 25,000 |
| Cross-Matrix Widget | Synthesis Scanner Upgrade | 50,000 |
Sol-Battery Widget | Synthesis Scanner Upgrade | 50,000 |
| Vector-Thread Widget | Synthesis Scanner Upgrade | 50,000 |
Looter | Carrier Mod | 75,000 |
| Detect Vulnerability | Helios Mod | 75,000 |
Reawaken | Djinn Mod | 75,000 |
| Negate | Wyrm Mod | 75,000 |
Ambush | Shade Mod | 75,000 |
| Energy generator | Dethcube Mod | 75,000 |
Botanist | Oxylus Mod | 75,000 |
| Energy Conversion | Warframe Mod | 100,000 |
Health Conversion | Warframe Mod | 100,000 |
| Astral Autopsy | Archmelee Mod | 1000,000 |
Simulacrum Access Key | Decoration | 50,000 |
| Helios Simaris Skin | Helios Skin | 100,000 |
Simulor Blueprint | Weapon | 75,000 |
| Heliocor Blueprint | Weapon | 75,000 |
Exilus Warframe Adaptor Blueprint | Adaptor | 50,000 |
| Color Key Scene | Captura Scene | 100,000 |
Orokin Derelict Plaza Scene | Captura Scene | 100,000 |
| Sanctuary Conduit Scene | Captura Scene | 100,000 |
Orvius Blueprint | Weapon | 100,000 |
| Ludoplex | Decoration | 50,000 |
Happy Zephyr | Ludoplex Game | 25,000 |
| Wyrmius | Ludopplex Game | 25,000 |
Simaris Offerings Console | Decoration | 75,000 |
| Simaris Research Console | Decoration | 75,000 |
Companion Weapon Riven Mod | Riven Mod | 100,000 |
| Gara Blueprint | Warframe | 50,000 |
Limbo Chassis Blueprint | Component | 25,000 |
| Limbo Systems Blueprint | Component | 25,000 |
Limbo Neuroptics Blueprint | Component | 25,000 |
| Chroma Blueprint | Warframe | 50,000 |
Chroma Chassis Blueprint | Component | 25,000 |
| Chroma Systems Blueprint | Component | 25,000 |
Chroma Neuroptics Blueprint | Component | 25,000 |
| Mirage Chassis Blueprint | Component | 25,000 |
Mirage Systems Blueprint | Component | 25,000 |
| Mirage Neuroptics Blueprint | Component | 25,000 |
Harrow Blueprint | Warframe | 50,000 |
| Yareli Blueprint | Warframe | 50,000 |
Inaros Blueprint | Warframe | 50,000 |
| Inaros Chassis Blueprint | Component | 25,000 |
Inaros Systems Blueprint | Component | 25,000 |
| Inaros Neuroptics Blueprint | Component | 25,000 |
Titania Blueprint | Warframe | 50,000 |
| Titania Chassis Blueprint | Component | 25,000 |
Titania Systems Blueprint | Component | 25,000 |
| Titania Neuroptics Blueprint | Component | 25,000 |
Nidus Blueprint | Warframe | 50,000 |
| Octavia Blueprint | Warframe | 50,000 |
Atlas Blueprint | Warframe | 50,000 |
| Broken Scepter Blueprint | Weapon | 100,000 |
Odonata Blueprint | Archwing | 100,000 |
| Odonata Harness Blueprint | Component | 50,000 |
Odonata Systems Blueprint | Component | 50,000 |
| Odonata Wings Blueprint | Component | 50,000 |
Imperator Blueprint | Archmelee | 100,000 |
| Veritux Blueprint | Archmelee | 100,000 |
Revenant Blueprint | Warframe | 50,000 |
| Garuda Blueprint | Warframe | 50,000 |
Protea Blueprint | Warframe | 50,000 |
| Sevagoth Blueprint | Warframe | 50,000 |
Xaku Bueprint | Warframe | 50,000 |
| Mandachord | Special Gear | 25,000 |
Shedu Blueprint | Weapon | 100,000 |
| Umbral Vitality | Mod | 100,000 |
Umbral Fiber | Mod | 100,000 |
| Umbral Intensify | Mod | 100,000 |
Sacrificial Pressure | Mod | 100,000 |
| Sacrificial Steel | Mod | 100,000 |
Xoris Blueprint | Weapon | 100,00 |
| Xoris Blade | Component | 15,000 |
Xoris Core | Component | 15,000 |
| Ether Daggers Blueprint | Weapon | 100,000 |
Xoris Handle | Component | 15,000 |
| Zenistar Blueprint | Weapon | 100,000 |
Azima Blueprint | Weapon | 100,000 |
| Zenith Blueprint | Weapon | 100,000 |
Sigma & Ocantis Blueprint | Weapon | 100,000 |
| Vitrica Blueprint | Weapon | 100,000 |
Machete Blueprint | Weapon | 100,000 |
| War Hilt | Component | 50,000 |
War Blade | Component | 50,000 |
| War Blade | Component | 50,000 |
Paracesis Sheath | Decoration | 50,000 |
| Nataruk Blueprint | Weapon | 100,000 |
Sirocco Blueprint | Weapon | 100,000 |
| Rumblejack Blueprint | Weapon | 100,000 |
Sun & Moon Blueprint | Weapon | 100,000 |
| Syam Blueprint | Weapon | 100,000 |
Sampotes Blueprint | Weapon | 100,000 |
| Edun Blueprint | Weapon | 100,000 |
Azothane Blueprint | Weapon | 100,000 |
Synthesis Scanner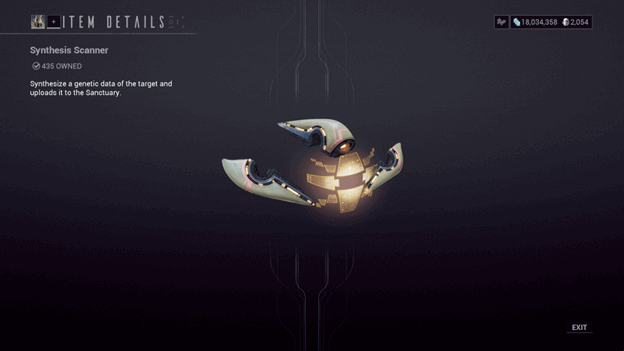
The Synthesis Scanner is a device like the Codex Scanner, used to scan enemies and objects for Cephalon Simaris’ research.
Scanners can be purchased in bulk for 5,000 Credits, giving 25 charges per purchase, which are consumed when scanning enemies or objects.
Scanning enemies or objects rewards standing for Cephalon Simaris, which can later be used to buy items and upgrades from the Simaris Offerings Console.
The Synthesis Scanner also reveals hidden trails, tracks, or enemies that are otherwise difficult to see during missions.
Synthesis Scanner Upgrades
To furthermore improve your Synthesis Scanner and make it easier for you in several ways, you have the option of purchasing upgrades for your Synthesis Scanner.
These are available in the offerings menu for standing as well and it is advisable to purchase these to effectively farm Cephalon Simaris Standing.
1) Data-Parse Widget
The Data-Parse widget allows you to view the weaknesses and resistances of the enemies allowing you to view which damage types are effective and ineffective against enemies.
2) Cross-Matrix Widget
The Cross-Matrix Widget gives a chance for each scan to be able to count as two scans which will give you more amounts of standing as well as double the chance to acquire special items from scans such as those from scanning Kavats or plants during missions.
3) Sol-Battery Widget
The Sol-Battery charger is the most important upgrade you can get and must be purchased first before anything else since it allows you to use the Synthesis Scanner without consuming charges.
You get unlimited synthesis scans which will save you the time from purchasing charges frequently as well as saving Credits.
4) Vector-Thread Widget
The Vector-Thread Widget is the second most important upgrade for your Synthesis Scanner as it greatly reduces the time for scans to finish.
This is very useful as you will not be burdened with following enemies for a long time with your reticle and you will make faster progress by completing scans quickly.
How To Use The Synthesis Scanner?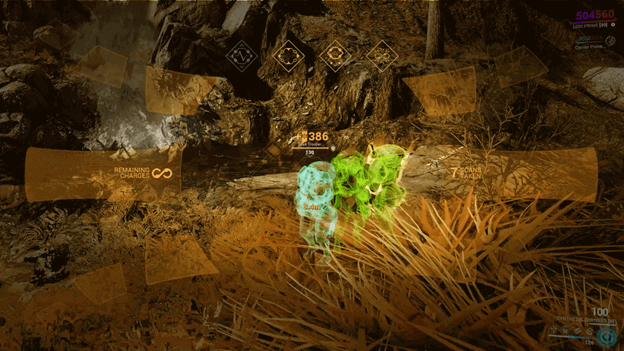
Once you have a Synthesis Scanner, you will need to open your Arsenal Menu and equip it into one of your gear slots. (All stacks will be equipped)
This will allow you to select the Synthesis Scanner when you are on a mission, which will unequip your weapon and allow you to view enemies through the scanner when aiming.
Point your reticle at an enemy and hold the fire button to scan an enemy, which will result in you gaining Cephalon Simaris Standing.
Once an enemy is scanned, they will not provide you with any more standing as you can only scan an enemy once per mission. (You can scan the same type of enemy but different units)
How To Earn Cephalon Simaris Standing?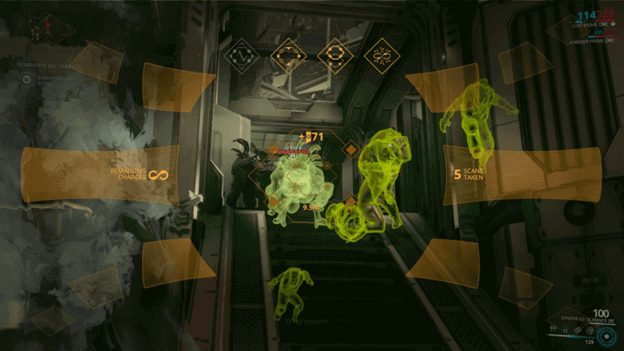
There are different ways to earn Cephalon Simaris such as canning enemies or synthesis targets which you are free to do whenever you want.
The following will give you more information on such activities that grant you Cephalon Simaris standing.
1) Scanning Enemies and Objects
During any mission you are undergoing, you may simply equip your Synthesis Scanner and scan any enemies or objects that are highlighted.
Scanning these will give you standing depending on the enemy level and if enemies are scanned in an undetected manner such as being invisible while they are not alerted will yield more standing.
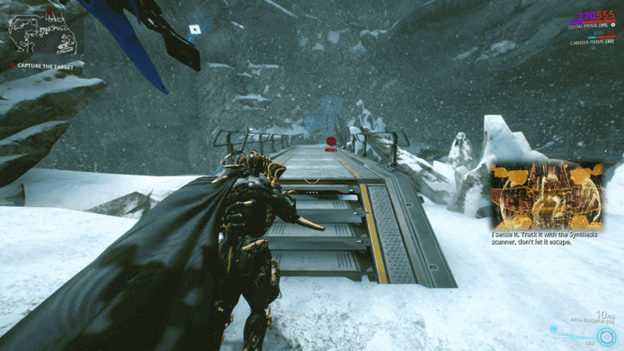
2) Scanning Synthesis Targets
You can get Synthesis Targets from Cephalon Simaris by speaking to him and this will give you a specific enemy that you need to scan.
This will allow you to track down a certain enemy during a mission, which will be activated once Cephalon Simaris alerts you of their presence.
It is important to know where the enemy spawns so that you can ensure the alert will trigger at the start of the mission.
Begin the mission as you normally would, and you may either complete the mission first or hunt the target right away.
We suggest you finish the mission first before searching for the target to keep things orderly and progress faster.
When the target is in range, it will be marked to make it easier to track and you should be careful not to kill the target or you will have to start a new mission.

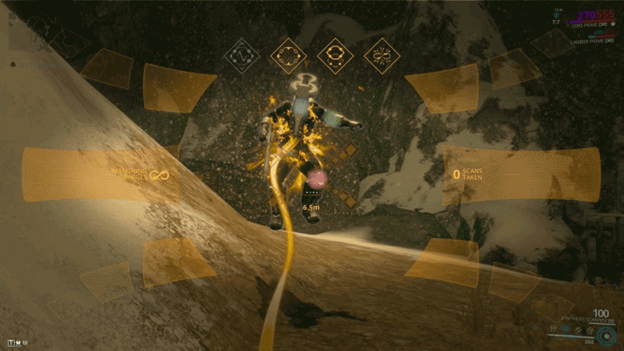
You may search for the synthesis target during the mission by either roaming the map, searching for them, or following a trail that shows up when you are looking through your scanner.
When holding down the aim button, the scanner will reveal what appears to be a trail that resembles data as shown in most of the sanctuary and the way it looks.
You may follow this trail to find the synthesis target or simply run around looking for it during or after completing the mission objectives.
Synthesis Targets will often run away, which makes it necessary to have a Kinetic Syphon Trap to deploy from your gear.
This will suspend the target, allowing you to scan multiple points on its body to complete the scan, which will reward you with standing.
Once you have scanned the target across 3 different missions, you may head back to Cephalon Simaris to turn in the task.
Fastest Way To Get Cephalon Simaris Standing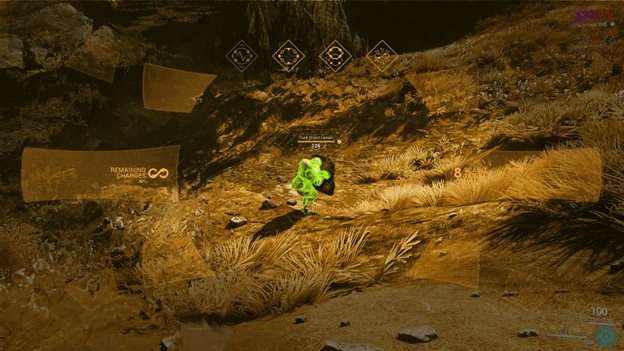
One of the fastest ways to get a lot of Cephalon Simaris Standing after you have completed the daily tasks that he provides would be to perform Stealth Scans.
Stealth Scan can be done anywhere as long as enemies have not detected you, which provides standing based on the level of the enemies.
To get the best rewards, it is ideal to do this when on the Steel Path difficulty to get over 300 or more standing per scan.
Heading to the Plains of Eidolon and scanning enemies with a Stealth Warframe or while flying around in Archwing Mode is one of the best options.
Verdict
Farming Cephalon Simaris standing can be challenging for some players, but following this guide makes it straightforward and helps save significant time while progressing efficiently.
You can use whichever method feels easier, but consistently hitting your daily standing is the most important factor for unlocking rewards from the offerings.
Stealth Scans are highly effective for filling daily standing quickly, allowing you to maximize your rewards without repeating missions or scanning excessive targets unnecessarily.