When it comes to dishing out massive damage and keeping a good distance, the Heavy Bowgun makes quite the name for itself.
The Heavy Bowgun is the strongest damage dealer of the ranged category which trades up a bit of mobility for dominance over the battlefield with its high damage and destructive Firepower.
In this guide, you’ll find a few good builds that may be utilized or as an endgame build or even for making your own so that you can easily blow monsters to smithereens while keeping out of harm’s way.
Also Read Below The Other Heavy Bowgun Guides
Note: If you are on Mobile device swipe table to the left to see the below full table information completely.
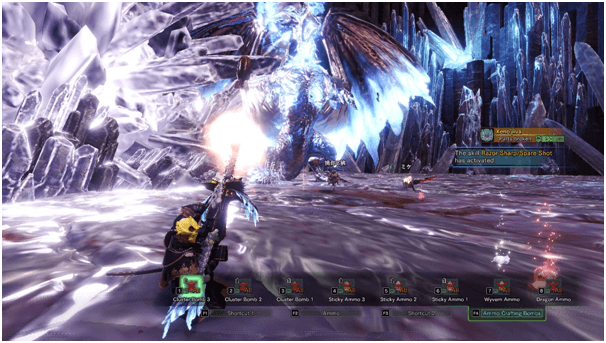
1) Cluster Bomb Heavy Bowgun Build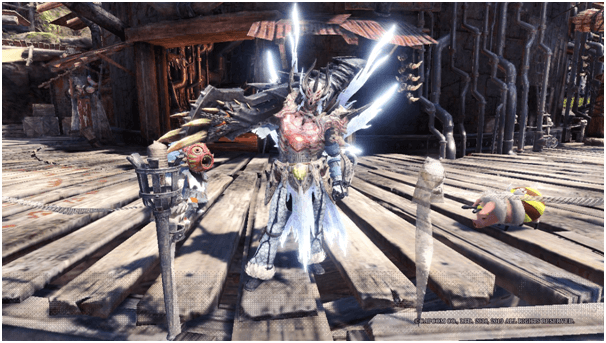

This build is designed for the use of Cluster Bomb 3 and Sticky Bomb 3 ammunition and maximizing their damage and adding a bit of survivability with the build.
Armor Set
| Info | Head | Torso | Arms | Waist | Legs |
|---|---|---|---|---|---|
| Name | Xeno’Jiiva Headgear Y | Xeno’Jiiva Hide Y | Kirin Long Arms Y | Xeno’Jiiva Spine Y | Kirin Leg Guards B |
| Jewel Slot | 2-1-1 | 1-1-0 | 2-2-0 | 3-1-0 | 1-1-0 |
| Vs. Fire | -3 | -3 | -3 | -3 | -3 |
| Vs. Water | 2 | 2 | -2 | 2 | -2 |
| Vs. Thunder | 2 | 2 | 4 | 2 | 4 |
| Vs. Ice | 2 | 2 | -2 | 2 | -2 |
| Vs. Dragon | -4 | -4 | 2 | -4 | 2 |
| Base Defense | 72 | 72 | 64 | 72 | 64 |
| Skills | Blight Resistance 2, Power Prolonger 1, Xeno’Jiiva Divinity 1/3 | Flinch Free 2, Xeno’Jiiva Divinity 1/3 | Blight Resistance 1, Free/Ammo Up 1, Capture Monster 1/3 | Critical Boost 1, Xeno’Jiiva Divinity 1/3 | Free Elem/Ammo Up 2, Kirin Favor 1/3 |
Charms
Defensive Charms
- Blessing Charm III – Primary
- Resistance III Charms
- Bulwark Charm
Attack Charms
- KO Charm III
- Artillery Charm III
- Critical Charm II
Decorations
- 7x Attack Jewel
- 1x Brace Jewel 3
- 3x Flawless Jewel 2
Skills
- Blight Resistance 3/3 – Armor
Skill Effect: Grants protection against all elemental blights
There will be a certain risk in using this build against monsters that have elemental blights due to most of the time when getting the right shot you can be in the line of fire of monsters elemental attacks.
- Flinch Free 3/3 – Armor/Jewels
Skill Effect: Prevents knockbacks and other reactions to small damage
To reduce down times of attacks, getting tripped and knocked back by simple monster attacks or carless friendly fire can make you lose on great opportunities to attack with your bombs.
This skill can be a slight improvement to mitigate those issues while waiting for your Rocksteady or Temporal Mantels to Replenish.
- Free Elem/Ammo Up 3/3 – Armor
Skill Effect: Level 3: Draws out 100% of hidden element and expands magazine size for most ammo
This skill synergizes with Spare Shot having an extra bullet in your loaded magazine increases fire rate with cluster bombs reducing reload times, while having a chance to instantly have a replenished bullet in your magazine to continue raining down cluster bombs.
- Razor Sharp/Spare Shot 1/1 – Xeno’Jiiva Divinity 3/3 – Armor Skill
Skill Effect: Halves sharpness loss. Bows and Bowguns have a chance not to expend coatings or ammo
With the chance of not consuming ammo this can improve the overall damage output of the clip while saving you the trouble for crafting and reloading while fighting reducing down times.
- Attack Boost 7/7 – Decoration
Skill Effect: Level 7: Attack +21 Affinity +5%
Pretty straight forward this ability increases your attack by a flat amount improving the damage of your Cluster Bombs and Sticky Bombs.
- Divine Blessing 3/3 – Charm
Skill Effect: Level 3:Has a 25% chance to reduces damage taken by 50%
In solo play this charm can improve survivability to reduce incoming damage taken when taking advantage of the Flinch Free skill and your Rocksteady Mantle when getting attacked.
- Peak Performance 3/3 – Armor/Decoration
Skill Effect: While health is at full Level 3:grants attack +20%
Just an additional damage skill that is usually active in the start of battle and after topping yourself off with a potion to make sure that your bombs are doing the best damage they can do in fights.
Stat Stick Skills
These skills are innate skills of the armor pieces required to make the build but unfortunately they have no real use in the Heavy Bomber Build.
- Power Prolonger 1 / 3 – Armor
Skill Effect: Allows long swords, dual blades, insect glaives, switch axes and charge blades to stay powered up longer Level 1: Bonus duration +10%
This skill only affects melee weapons
- Critical Boost 1 / 3 – Armor
Skill Effect: Level 1: Increases damage dealt by critical hits to 130%
Unfortunately heavy ammunition like Cluster Bombs or Sticky Bombs are not affected by affinity but your standard and element ammo can take advantage of this if you use them in the fight.
Suggested Weapon Options
Dark Devourer (Deviljho Tree)
This heavy bowgun can produce the highest damage with the Cluster Bombs and carries the highest tier of ammo types, even though it has negative affinity the main ammo type which is the Cluster and Sticky bomb damage will not be affected by it.
Teostra’s Flames (Black Steel Tree)
This heavy bowgun can use a lot of ammo types to provide enough damage to compete with the Darkdevourer with overall dps, although it provides less damage with the Cluster and Sticky Bombs since these ammo types are only affected by the raw damage scaling of the weapon.
Pros & Cons
Pros
- Can deal heavy amounts of damage in little time good for speed runs or multiple farming runs.
- Continuous DPS due to multiple ammo types you can bring with you.
- Flexible build and can adapt to multiple scenarios with just replacing charms with no need to change armor.
- Large AOE for damaging multiple enemies or while hitting 2 monsters in a turf war.
Cons
- Cluster Bombs have friendly fire that can blow out of position melee allies.
- Vulnerability to Fire & Dragon Element.
- Slow firing arcing shots.
How to Use The Cluster Bomb Heavy Bowgun Build

In fights you would want to position yourself at the maximum range of your cluster bombs to give yourself enough time to fire off your next shot in your clip or from a Spare Shot before dawning your Rocksteady Mantle.
With limited Cluster ammo and Sticky Bombs, it would be better to craft your III ammo rather than switching to weaker ones instead to maximize damage output.
It is highly suggested that you put your ammo crafting in your radial menu for quicker access when in tougher fights.
Always remember to fire your Cluster Bomb after they move to increase the chances of it hitting your target, especially when it comes to fighting quick moving enemies like the Nergigante.
2) Tank Heavy Bowgun Build

This build focuses on Health and Defense with sustainability, taking advantage of the Heavy Bowguns Shield Mod and its Auto-Guard feature when maxed out which can deflect even the strongest attacks with little to no effect on the wielder.
Armor Set
| Info | Head | Torso | Arms | Waist | Legs |
|---|---|---|---|---|---|
| Name | Damascus Helm A | Nergigante Mail Y | Nergigante Vambraces Y | Nergigante Coil Y | Empress Greaves A |
| Jewel Slot | 1-0-0 | 3-2-1 | 2-1-1 | 3-1-0 | 2-1-0 |
| Vs. Fire | 4 | 1 | 1 | 1 | 3 |
| Vs. Water | -2 | 1 | 1 | 1 | 1 |
| Vs. Thunder | 0 | -3 | -3 | -3 | 1 |
| Vs. Ice | 0 | 1 | 1 | 1 | -3 |
| Vs. Dragon | 0 | -3 | -3 | -3 | -2 |
| Base Defense | 60 | 72 | 72 | 72 | 70 |
| Skills | Defense Boost 2, Speed Sharpening 1 | Maximum Might 1, Nergigante Hunger 1 | Pathbreaker 1, Attack Boost 1, Nergigante Hunger 1 | Maximum Might 1, Agitator 1, Nergigante Hunger 1 | Health Boost 2, Wide-Range 2, Lunastra Favor 1 |
Charms
Defensive Charms
- Recovery Charm III – Primary
- Bulwark Charm
- Friendship Charm III
- Blight Resistance III
Offensive Charms
- Part Breaker III
- Offensive Guard III
- Special Ammo Boost II
Decorations
- 5x Defense Jewel 1
- 5x Ironwall Jewel 1
- 1x Shield Jewel 2
- 1x Vitality Jewel 1
Note: You would need a weapon that has at least 2-0-0 to fit all the decorations preferable the weapon will hold the Shield Jewel 2.
Skills
- Defense Boost 7/7 – Decorations/Armor
Skill Effect: Level 7: +10% Defense, Bonus +35 and +5 to All Elemental Resistances
This ensures that even though you are unable to block attacks with your shield you can definitely tank and take damage when you are vulnerable, when reloading or getting attacked while on the offensive with your Heavy Bowgun.
- Hasten Recovery 1/1 – Nergigante Hunger 3/3 – Armor
Skill Effect: The skill regenerates a set amount of health if you hit the monster at least 5 times within 5 seconds
Objectively better on the Heavy Bowgun or from ranged attacks in general since they can trigger the skill from a safe distance, this also affects multiple instances damage from piercing ammo, that works in conjunction with the weapon augment health regen.
- Health Boost 3/3 – Decorations/Armor
Skill Effect: Level 3: Health +50%
A standard for all tanks, bigger health, better insurance for enduring heavy hits since you will be drawing eneminity and all of the aoe attacks from monsters.
- Recovery Up 3/3 – Decorations – Charm
Skill Effect: Level 3: Health Restoring effects are 30% more effective
This boosts all available healing methods even from hasten recovery.
- Guard 5/5 – Decorations
Skill Effect: Level 5: Massively decreases the impact of attacks and reduces stamina depletion by 50%
This reduces heavy attacks and synergizes with guard up to reduce the incoming damage from even unblockable attacks with little to almost no damage.
- Guard Up 1/1 – Decorations
Skill Effect: Level 1: Allows you to guard against ordinarily unblockable attacks
This skill allows the user to block all attacks except the Behemoth’s Cataclysmic Meteor which makes this skill a staple for all tank builds with a shield.
Stat Stick Skills
- Agitator 1/5
Skill Effect: Level 1: While active, grants Attack +4 and increases Affinity by 5%
Effective at very aggressive monsters like the Deviljho or Nergigante since they trigger this skill often.
- Speed Sharpening 1/3
Skill Effect: Level 1: Removes one cycle from the sharpening process
Useless in this build since the focus is on Heavy Bowguns but may have a use in future updates.
- Maximum Might 2/3
Skill Effect: Level 2: While active, increases Affinity by 20%
Since you will not be using stamina often and only a little will be used up when deflecting attacks you will have this up often to help deal more damage to make sure the focus of the monster is on you as in the fight letting your team attack.
- Wide-Range 2/5
Skill Effect: Level 2: Items affect nearby allies in a wider radius with 33% of their efficacy
This skill can be improved further with a charm to provide support, if your team does not have one.
- Partbreaker 1/3
Skill Effect: Level 1: Part damage +10%
Adds a bit more of usefulness when on the offensive or when you are trying to draw eneminity from monsters.
- Attack Boost 1/7
Skill Effect:Level 1: Attack +3
Can be small as it is but is open to be modified with Attack Charm III to make it into level 4 attack boost with +12 and +5% affinity.
Suggested Weapon Options
Empress Cannon “Ruin” (Lunastra Tree)
This is a perfect match for this build due its high damage and its innate Hasten Recovery skill that synergizes well with the build, including the standard ammunition it carries has +2 with its recoil allowing the heavy bowgun to be equipped with 3 shield mods without worrying about fire-rate.
Chrome Assault II (Iron Ore Tree)
This is also a good option for this build if you want more flexibility, augmenting this weapon 2x with a gem slot produces 1-1-2 allowing it to carry the Shield Decoration and 2 other Decorations for more flexibility, if you would like to modify this build.
Pros & Cons
Pros
- Very High Survivability.
- High Self Sustainability in fight with little downtime from attacking.
- Can Block Super Attacks that are usually unblockable.
- Auto-Guard feature letting you block and move regardless of the angle of the attack.
- Reduces incoming damage to almost nothing, that usually can kill with 1 hit.
Cons
- Slow moving and slow to sheath the Heavy Bowgun that leaves the user vulnerable.
- Weak to Dragon Damage.
- No Blight Defense.
- Moderate Damage.
How to Use Tank Heavy Bowgun Build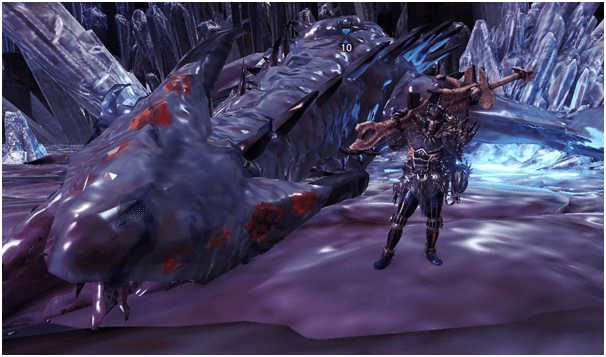

You would want to position yourself in between the monster and your allies when attacking to gain eneminity from the monster.
Make sure to time your reloads and attack patterns, only reload if the monster finishes its combo attacks to make full use of your shield and always remember if you are on the offensive or reloading, your shield cannot block.
Better use healing items or consumable buffs near allies for them to benefit from Widerange to improve the chances of the missions success and as an added benefit in solo missions, your palico also gains from this as well.
Always take note of enemy and ally positions so if you want to support them you can use your attacks to remove them from a stun or shoot them with Recovery, Demon and Armor ammo to act as a support tank.
3) Wyvernheart/Wyvernsnipe Heavy Bowgun Build
This build maximizes the effectiveness of the Wyvernsnipe and the Wyvernheart special ammo of the Heavy Bowguns to improve their Recharge rate and overall Damage and effectiveness in battle.
Armor Set
| Info | Head | Torso | Arms | Waist | Legs |
|---|---|---|---|---|---|
| Name | Diablos Nero Helm a | Rathalos Mail B | Nergigante Vambrace Y | Xeno’Jiiva Spine Y | Nergigante Grieves Y |
| Jewel Slot | 1-0-0 | 1-0-0 | 2-1-1 | 3-1-0 | 2-2-0 |
| Vs. Fire | 3 | 3 | 1 | -3 | 1 |
| Vs. Water | -3 | 1 | 1 | 2 | 1 |
| Vs. Thunder | 0 | -2 | -3 | 2 | -3 |
| Vs. Ice | -4 | 1 | 1 | 2 | 1 |
| Vs. Dragon | 2 | -3 | -3 | -4 | -3 |
| Base Defense | 56 | 64 | 72 | 72 | 72 |
| Skills | Focus x2 | Weakness Exploit 2 | Partbreaker 1, Attack Boost 1 | Critical Boost 1 | Attack Boost 3 |
Charms
Offensive
- Breaker Charm II – Primary
- Unscathed Charm III
- Master’s Charm III
Defensive
- Any Resistance Charm III
- Blight Resistance III
- Health Boost III
Decorations
- 3x Attack Jewel 1
- 2x Critical Jewel 2
- 1x Charger Jewel 2
- 2x Trueshot Jewel 1
- 1x Tenderizer Jewel 2
Skills
- Attack Boost 7/7 – Decoration/Armor
Skill Effect: Level 7: Attack +21 Affinity +5%
Increases damage by a flat rate and adds affinity chance to improve overall damage increasing the offensive capability of the Special Ammo Types.
- Partbreaker 3/3 – Decoration/Charm
Skill Effect: Level 3: Part damage +30%
Adds a bit of synergy with the weakness exploit skill, although not necessarily needed to be maxed out this can be replaced with any other charm to improve defense or offense leaving the Partbreaker at 10% which is still effective as it is.
- Weakness Exploit 3/3 – Armor/Decoration
Skill Effect: Level 3: Attacks that hit weak spots have 30% increased Affinity, with an extra 20% on wounded parts.
This skill works extremely well with any other weapon but is very useful in increasing the overall damage potential of the special ammo types’ damage potential.
- Critical Boost 3/3 – Armor/Decoration
Skill Effect: Level 3: Increases damage dealt by critical hits to 140%
Increases damage output of critical hits and works well with Weakness Exploit.
- Special Ammo Boost 2/2 – Armor/Decoration
Skill Effect: Level 2: Increases the power of bowgun special ammo and Dragon Piercer by 20%.
The only skill that directly improves the damage of Wyvernheart Barrage and the Wyvernsnipe’s Piercing and Explosive damage.
- Focus 3/3 – Armor/Decoration
Skill Effect: Level 3: Increases gauge fill rate by 20% and reduces charge times by 15%.
Reduces Downtime of the special ammo type to be more usable in fights.
Suggested Weapon Options
Wyvernheart
Destruction’s Fusillade (Nergigante Tree)
This is a good weapon for the purposes of Wyvernheart due to its low deviation and high damage that can use Spread III when your Wyvernheart is recharging.
Xeno Jiiqa (Xeno’Jiiva Tree)
Also a good option for this build is the Xeno Jiiqa if you want your builds to have a bit more flexibility with 3-3-0 decoration slot, that can fit 2 of the ammo improving jewels like Normal and Piercing shot up.
Wyvernsnipe
Empress Cannon “Styx” (Lunastra Tree)
This weapon is a perfect fit for this build with its positive affinity rating and low recoil for piercing ammo 3 that works like a weaker version of the Wyvernsnipe.
Griffon Blazooka (Diablos Tree)
This weapon deals the highest damage of all wyvernsnipe weapons although it has low affinity this weapon can be augmented to lower that negative affinity to be viable for the critical damage.
Pros & Cons
Pros
- High DPS.
- The special ammo types never run out and only recharges.
- Can brake parts easily to weaken monster attacks or abilities.
- Can synergize with any ammo you will be using aside from the Special Ammo.
Cons
- The Wyvernheart has slow spool up time before attacking.
- Wyvernheart is not as efficient when attacking small monsters.
- Attacking may leave you open for monster attacks.
How to Use Wyvernheart/Wyvernsnipe Heavy Bowgun Build

When going into fights it would be best to load in the special ammo and use it to start off your attacks to maximize on the quick recharge time of the build.
Remember to position yourself, when using the Wyvernheart get an open vantage point on large areas like the wings or body.
If you can try to focus all of your shots on the weak spots, when using the Wyvernsnipe always shoot from Head to Tail or vice versa to maximize damage.
Never forget to use your Standard ammo, better to use them in rotation with your rather than relying on Wyverntype ammo as the only source of damage.
Verdict
These builds were all tried and tested and have proven to be very effective in combat regardless of being with allies or fighting solo.
The builds in this guide focus on the uniqueness and potential of the Heavy Bowgun that maximizes those features to the best of what they can do or how to make them better.
Any build is great if it works with the playstyle of the user, and with that said, feel free to try any of these builds out and see how they workout for you.
To provide flexibility, these builds were specifically designed with customizability in mind, so there are many options for you to mix and match to fit your playstyle.