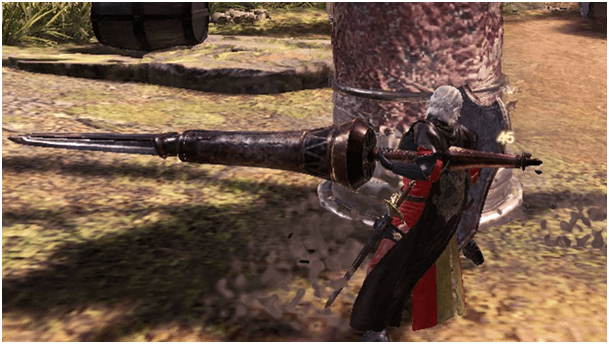
The Lance is designed to pierce and stab at monster’s weak points while all in the safety of your sturdy shield that can deflect heavy attacks from your enemies.
Bulky yet maneuverable, the Lance lets its wielder attack with 3 forward moving stabs followed by a simple hop backwards that lets them easily reposition and continue concentrating attacks on a specific spot on the monster’s body.
The Lance is quite tricky to understand and master but this guide will provide all of the strongest craftable Lances with their resource trees and materials required along with an attack guide to serve as reference for your use of the Lance.
Lance Trees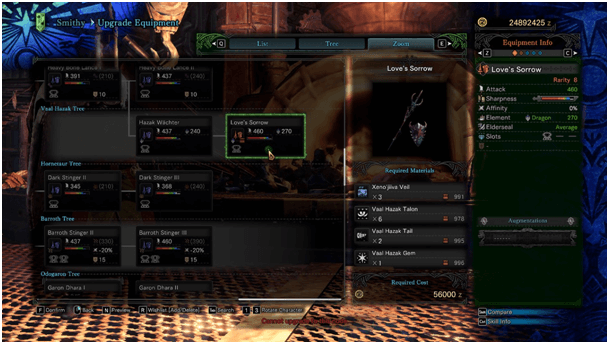

Defender
Weapon Name | Attack | Materials Required | Affinity | Element | Elemental Damage | Slot |
Defender Lance V | 506 | Immortal Dragon Scale x1 | 0% | Blast | 300 | 0 |
Ore
Weapon Name | Attack | Materials Required | Affinity | Element | Elemental Damage | Slot |
Iron Lance III | 230 | Earth Crystal x2, Machalite Ore x2, Iron Ore x 5 | 0% | None | 0 | 0 |
| Iron Lance III | 322 | Carbalite Ore x8, Dragonite Ore x5, Dragonvein Crystal x2 | 0% | Paralysis | (210) | 1 |
Chrome Lance II | 414 | Elder Dragon Blood x2, Fucium Ore x13, Carbalite Ore x20, Firecell Stone x1 | 0% | Paralysis | (270) | 2 |
Nergigante
Weapon Name | Attack | Materials Required | Affinity | Element | Elemental Damage | Slot |
Presition’s Hand | 483 | Xeno’jiiva Horn x2, Nergigante Horn+ x5, Nergigante Talon x5, Nergigante Gem x1 | 0% | Dragon | 150 | 1 |
Legiana
Weapon Name | Attack | Materials Required | Affinity | Element | Elemental Damage | Slot |
Glacial Lance II | 322 | Paolumu Wing x4, Legiana Claw x4, Legiana Tail Webbing x3, Legiana Plate x1 | 0% | Ice | 300 | 0 |
| Legiana Halberd | 368 | Daora Claw+ x2, Legiana Claw+ x5, Legiana Hide+ x3, Legiana Gem x1 | 0% | Ice | 360 | 0 |
Kulu-Ya-Ku
Weapon Name | Attack | Materials Required | Affinity | Element | Elemental Damage | Slot |
Kulu Lance III | 299 | Odogaron Claw x2, Kulu-Ya-Ku Beak x2, Kulu-Ya-Ku Plume x4, Warped Bone x3 | 15% | None | 0 | 0 |
| Kulu Hasta III | 391 | Nergigante Talon x2 Kulu-Ya-Ku Plume+ x4, Kulu-Ya-Ku Beak+ x5, Bird Wyvern Gem x1 | 25% | Sleep | (360) | 0 |
Dodogama
Weapon Name | Attack | Materials Required | Affinity | Element | Elemental Damage | Slot |
Gama Pilebunker | 391 | Fire Dragon Scale+ x4, Dodogama Jaw x4, Dodogama Tail x3, Wyvern Gem x1 | 0% | Blast | 210 | 1 |
Thunder Element
Weapon Name | Attack | Materials Required | Affinity | Element | Elemental Damage | Slot |
Thunder Lance II | 322 | Monster Bone+ x2, Tobi-Kadachi Electrode x2, Tobi-Kadachi Membrane x2, Coral Crystal x3 | 0% | Thunder | 150 | 0 |
| Lightning Spire III | 414 | Elder Dragon x3, Tobi-Kadachi Electrode+ x4 Tobi-Kadachi Claw+ x6, Wyvern Gem x1 | 0% | Thunder | 240 | 1 |
Pukei-Pukei
Weapon Name | Attack | Materials Required | Affinity | Element | Elemental Damage | Slot |
Blooming Lance III | 299 | Monster Bone+ x2, Pukei-Pukei Quill x4, Pukei-Pukei Sac x2, Poison Sac x2 | 0% | Poison | 360 | 0 |
| Datura Pike | 391 | Vaal Hazak Wing x2, Pukei-Pukei Sac+ x4, Pukei-Pukei Wing x6, Bird Wyvern Gem x1 | 0% | Poison | 540 | 2 |
Tzitzi-Ya-Ku
Weapon Name | Attack | Materials Required | Affinity | Element | Elemental Damage | Slot |
Flickering Glow II | 462 | Legiana Tail Webbing x2, Tzitzi-Ya-Ku Claw x3, Tzitzi-Ya-Ku Photosphore x2, Tzitzi-Ya-Ku Claw x3, Sharp Claw x3, | 0% | None | 0 | 0 |
| Dazzling Flash III | 594 | Daora Webbing x2, Tzitzi-Ya-Ku Claw+ x5, Bird Wyvern Gem x1, Tzitzi-Ya-Ku Photosphore+ x3 | 0% | Thunder | (360) | 1 |
Uragaan
Weapon Name | Attack | Materials Required | Affinity | Element | Elemental Damage | Slot |
Brazenridge II | 660 | Teostra Carapace x4, Uragaan Jaw x2, Uragaan Scute x4, Uragaan Ruby | 0% | Fire | 120 | 2 |
Rathalos
Weapon Name | Attack | Materials Required | Affinity | Element | Elemental Damage | Slot |
Flame Lance II | 322 | Rathalos Scale x6, Rathalos Tail x2, Rathalos Plate x1, Inferno Sac x3 | 10% | Fire | 210 | 1 |
| Blue Prominence | 437 | Teostra Horn+ x2, Azure Rathalos Scale+ x6, Azure Rathalos Tail x3, Rathalos Ruby x1 | 20% | Fire | 300 | 1 |
Bone
Weapon Name | Attack | Materials Required | Affinity | Element | Elemental Damage | Slot |
Bone Lance III | 253 | Monster Bone M x2, Ancient Bone x1 | 0% | None | 0 | 0 |
| Hard Bone Lance III | 368 | Monster Keenbone x2, Monster Bone+ x2, Quality Bone x2 | 0% | Poison | (180) | 1 |
Heavy Bone Lance II | 437 | Elder Dragon Bone x4, Monster Hardbone x6, Quality Bone x20, Dragonbone Relic x1 | 0% | Poison | (240) | 1 |
Vaal Hazak
Weapon Name | Attack | Materials Required | Affinity | Element | Elemental Damage | Slot |
Love’s Sorrow | 460 | Xeno’Jiiva Veil x3, Vaal Hazak Talon x6, Vaal Hazak Tail x2, Vaal Hazak Gem x1 | 0% | Dragon | 270 | 1 |
Hornetaur
Weapon Name | Attack | Materials Required | Affinity | Element | Elemental Damage | Slot |
Taurus Lancel II | 299 | Odogaron Fang x2, Hornetaur Shell x5, Hornetaur Wing x4, Hornetaur Head x2 | 0% | None | 0 | 0 |
| Drak Stinger | 368 | Vaal Hazak Fang+ x3, Hornetaur Carapace x8, Hornetaur Innerwing x6, Wyvern Gem x1 | 0% | Paralysis | (240) | 1 |
Barroth Tree
Weapon Name | Attack | Materials Required | Affinity | Element | Elemental Damage | Slot |
Carapace Lance III | 345 | Diablos Shell x3, Barroth Claw x4, Barroth Scalp x2, Monster Bone+ x3 | -20% | None | 0 | 0 |
| Barroth Stinger III | 460 | Nergigante Horn+ x1, Barroth Claw+ x5, Barroth Ridge+ x5, Wyvern Gem x1 | -20% | Paralysis | (390) | 2 |
Odogaron
Weapon Name | Attack | Materials Required | Affinity | Element | Elemental Damage | Slot |
Garon Lance II | 322 | Quality Bone x5, Odogaron Claw x2, Odogaron Tail x2, Odogaron Plate x1 | 15% | Fire | (150) | 0 |
Garon Dhra | 391 | Teostra Claw+ x2, Odogaron Claw+ x6, Odogaron Fang+ x5, Odogaron Gem x1 | 30% | Fire | (210) | 0 |
Water Element
Weapon Name | Attack | Materials Required | Affinity | Element | Elemental Damage | Slot |
Aqua Horn III | 322 | Monster Bone+ x2, Jyuratodus Fang x4, Coral Bone x3, Gaju Whisker x3 | 0% | Water | 210 | 0 |
Water Spike III | 437 | Elder Dragon Bone x3, Jyuratodus Fin+ x6, Jyuratodus Fang+ x5 Wyvern Gem x1 | 0% | Water | 300 | 1 |
Dragonbone
Weapon Name | Attack | Materials Required | Affinity | Element | Elemental Damage | Slot |
Dragonbone Lance III | 368 | Elder Dragon Bone x10, Brutal Bone x4, Dragonbone Relic x2, Wyvern Gem x1 | 0% | Dragon | 420 | 1 |
Bazelgeuse
Weapon Name | Attack | Materials Required | Affinity | Element | Elemental Damage | Slot |
Bazel Myniad Rookslayer | 460 | Xeno’Jiiva Wing x3, Bazelgeuse Wing x4, Bazel Geuse Talon x4, Bazelgeuse Gem | -10% | Blast | 210 | 2 |
Kirin
Weapon Name | Attack | Materials Required | Affinity | Element | Elemental Damage | Slot |
Thunderpiercer | 368 | Xeno’Jiiva Shell x4, Kirin Azure Horn x6, Kirin Thundertail x3, Novacrystal x2 | 10% | Thunder | 540 | 0 |
Black Steel
Weapon Name | Attack | Materials Required | Affinity | Element | Elemental Damage | Slot |
Blacksteel Lance II | 253 | Firecell Stone x1, Fucium Ore x5, Carbalite Ore x10, Wyvern Gem x1 | 0% | Dragon | 150 | 0 |
| Daora’s Fang | 414 | Xeno’Jiiva Wing x2, Daora Horn+ x5, Daora Claw+ x4, Daora Gem x1 | 10% | Ice | 240 | 1 |
Xeno’Jiiva
Weapon Name | Attack | Materials Required | Affinity | Element | Elemental Damage | Slot |
Xeno Zauta | 391 | Xeno’jiiva Claw x4, Xeno’jiiva Shell x6, Xeno’jiiva Tail x2, Xeno’jiiva Gem x1 | 15% | Dragon | 180 | 2 |
Workshop Weapon
Weapon Name | Attack | Materials Required | Affinity | Element | Elemental Damage | Slot |
Elder Babel Spear | 460 | Ace Hunter Coin x5, Brute Coin x4, Flying Coin x4, Wyvern Gem x2 | 0% | Fire | (330) | 1 |
| Sapphire Star Lance | 437 | First Fleet Ticket x2, Rathalos Wing x2, Omniplegia Sac x3, High Commendation x1 | 0% | Paralysis | 180 | 0 |
Deviljho
Weapon Name | Attack | Materials Required | Affinity | Element | Elemental Damage | Slot |
Fiendish Tower | 529 | Elder Dragon Blood x5, Deviljho Scalp x2, Deviljho Tallfang x5, Deviljho Gem x1 | -25% | Dragon | 210 | 0 |
Lunastra
Weapon Name | Attack | Materials Required | Affinity | Element | Elemental Damage | Slot |
Empress Lance “Blaze” | 414 | Research Commission Ticket x1, Lunastra Horn x2, Teostra Horn+ x3, Bazelgeuse Gem x1 | 20% | Blast | 180 | 2 |
Lunastra/Nergigante
Weapon Name | Attack | Materials Required | Affinity | Element | Elemental Daamge | Slot |
Empress Lance “Ruin” | 437 | Research Commission Ticket x1, Lunastra Wing x3, Nergigante Horn+ x3 Nergigante Gem x1 | 0% | Blast | 150 | 2 |
Lunastra/Xeno’Jiiva
Weapon Name | Attack | Materials Required | Affinity | Element | Elemental Damage | Slot |
Empress Lance “Styx” | 414 | Research Commission Ticket x1, Lunastra Tail x2, Xeno’jiiva Horn x3, Xeno’jiiva Gem x1 | 10% | Blast | 240 | 2 |
Attacks
Guard
This is the guard position of the Lance where it can block most attacks without issues and little to no knockback along with the starting position of special attacks like the Dash Attack and Counter Thrust.
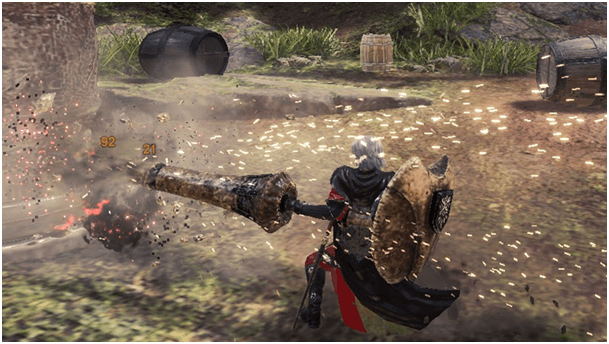
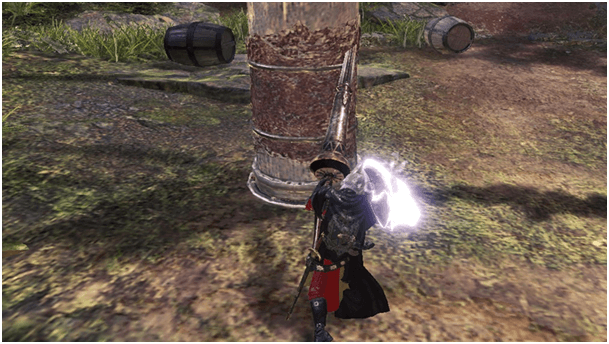
Dash Attack

While in your Guard Stance, you will be able to charge at your enemies which lets you do multiple instances of damage as your Lance strikes them continuously until you run out of stamina or end your attack with a Finishing Twin Thrust.
As you move with your charge, you can slide from side to side and even hop or face the opposite direction you are facing with the evade button.
Finishing Twin Thrust
This forward thrust can be initiated from your Dash Attack which allows you to strike twice with a weak first hit and a heavier second hit.
Counter Thrust
As a defensive counter attack, your shield will glow allowing you to block from a wider blocking angle then after you will hold the Counter Thrust for a brief moment then attack with your Lance.
If you get attacked while in this stance, there will be a significant reduction to damage received and the stamina drained while in this stance will stop and automatically attack with your Lance.
Mid Thrust
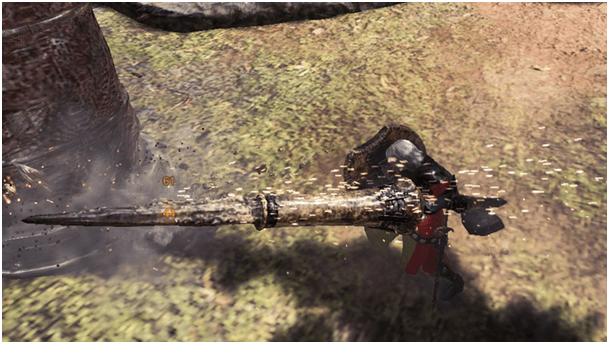
This is your forward facing move that can hit the legs or a ground target 3x then you will pause for a moment then continue again..
To lessen the pause time, you may hop back to reposition so that you can immediately continue attacking.
High Thrust
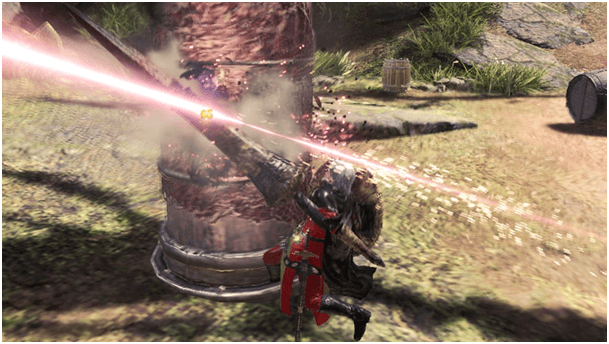
With the same mechanics of the Mid Thrust, the High Thrust hits a higher position like the chest, head or tails of your target.
Jumping Thrust
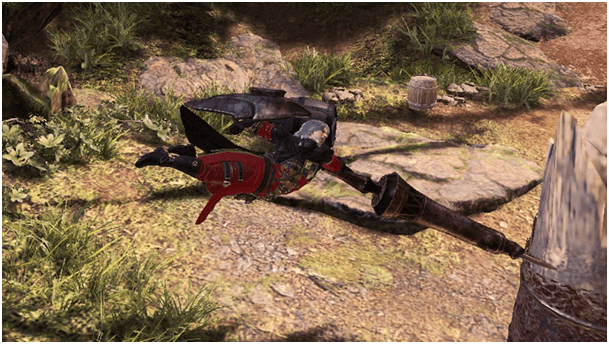
This attack is similar to the Falling Slash but does not initiate mounting but can deal multiple strikes if timed correctly.
Wide Sweep
Basically it uses your lance to swat away smaller monsters or if the monster repositions out of your line of attack.
Pros and Cons
Pros
- Mobile weapon when attacking.
- Moderate focused damage.
- Easy to learn combo attacks.
Cons
- High Stamina required for mobility.
- Slow walk speed.
Overview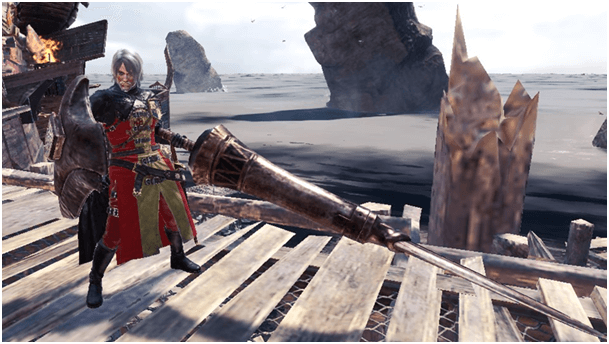
The Lance is preferred by tank type hunters that focus on defense while being able to attack and gain aggro from monsters while hunting alone or in a party.
Fearless and charging head on into battle with your Lance facing your enemy and focusing your attacks on weak spots with your Lance thrusts and blocking with your shield while waiting for your next opening is the way to fight with this weapon.
The Lance is very straightforward and has simple moves although is difficult to get used to its slow positioning movement but once you do, it feels fast and nimble as it is able to focus on certain spots of monsters, breaking them and overall weakening them.