An extensive guide on everything Due Process; loadouts, map awareness, hidden strategies, etc. Including images! Good for both new and veteran players.
Foreword
“DUE PROCESS is a tactical FPS where tactics finally matter. Planning & teamwork are essential for victory because every map is procedurally generated. You’ll be faced with a new challenge every time you play.” – store page
Due Process abandons other mechanics such as multiple classes or hyper-realistic gameplay in favor of tactics-based gameplay. It strips down a shooter to its basic components and focuses heavily on plans made on the fly. Due Process is a strategy game first, and a shooter second.
We’ll be going over how to play this game, since a lot of people treat it as a shooter first or have misconceptions about the game.
How To Communicate:
The Map
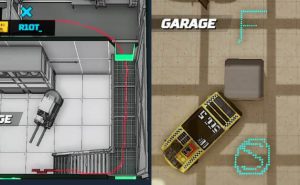
When you’re dead (or alive) you can use the map (default is M) and draw on it! Drawings are available visually to teammates both on the map and in-game. You can use it to path friendlies to enemies, mark where you want to smoke/flash, or play Tic Tac Toe.
There are many ways to communicate using the map. Play plenty of casual and you will learn other’s techniques through osmosis. Drawing on the map is a great tool to communicate, especially during the planning phase. Draw out what you’re saying in order for your teammates to properly understand what you’re talking about.
If someone is in a clutch situation, be sure to erase any unnecessary lines in other rooms so to not distract your teammate (eg drawings from when you initially planned stuff out).
Voice Chat
In the preplanning phase, communicate a lot; speak any strategies that come to mind and have a healthy discussion/debate with your teammates. The more minds that come together to create a strategy, the better.
In gameplay, call out what you’re doing as it applies to your teammates. If you stop watching a flank to push a door, let your teammates know. If you want to push another route, tell your teammates you’re pushing that. If they molotov (aka molly) you off, let your teammates know (so they know the utility status of the opposing team). Most information is not unnecessary; just be sure to be concise with your words. Your aim is to communicate as much as possible with as few words as possible.
When you die, call out what player you died to, his health (viewable under their profile picture at the top), where he was, his weapon, what direction he was going, where he is after he killed you, the name of the location he was in, etc. Do NOT choose to say nothing when you die.
Text Chat
Use it to type “gg” at the end of games and communicate with enemies (“nice shot”, “nice push”, etc). Nothing else.
Weapons for Attackers:
SAB-R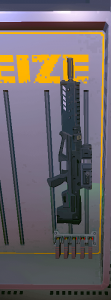

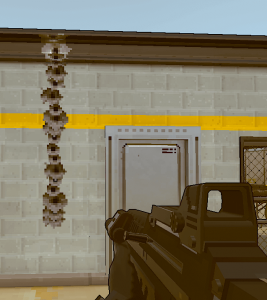
“The SAB-R is an Attacker only weapon that thrives on headshots. It does 45 damage but always kills on a headshot. Semi-automatic with relatively high recoil, but decent firerate cap. Comes equipped with always-on night vision. Using brace fire forces the player to use its canted ironsights. Best used in a support role where return fire is unlikely. Fairly niche usage overall.
The above is a solid description of the SAB-R. This is mostly used for assisting in a push, especially under the cover of darkness. I suggest using this weapon only when backing up a push for the power. You should not take the front lines with this weapon unless necessary. Communicate with your team to ensure they create good sightlines for you, or try and bait enemies out for you to kill. There is only ONE SAB-R. Bring full mags and don’t die.
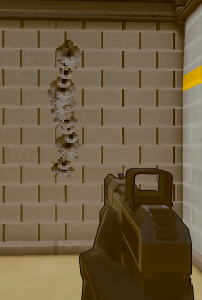
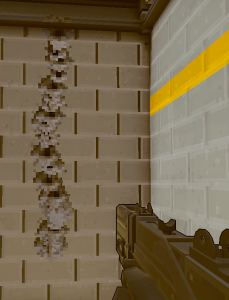
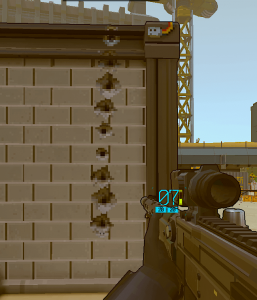
Spray Patterns (ADS w/ Scope)
Alternate Sight; Iron Sights
Alternate sight modes occur on every weapon! Be sure to hold middle mouse button to test out any alternate sights (or hold right mouse button and shift)!
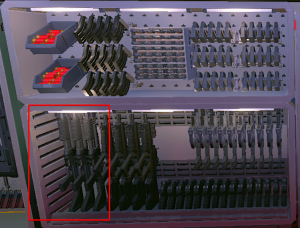
BLK-TAR (aka the AR)

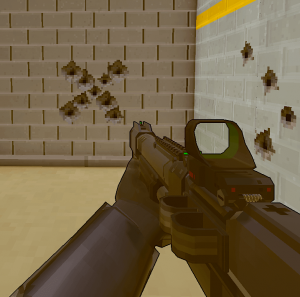
The BLK-TAR is a great weapon for medium to long-range encounters. It has a great sight picture with a 20 round mag, but is countered by a slow reload time. You can counter the defender’s long range rifles with this. It is semi-auto, and has an emphasis on precision shots. It takes one headshot and a body shot to kill. For this weapon, take your fights at a distance. It is in short supply at 4 weapons, so only use it when you need it. Bring 2 mags on a normal round.
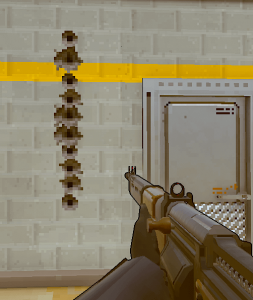
Spray Patterns (ADS w/ Sight)
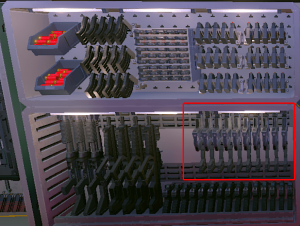
Assault Shotgun
The assault shotgun is an excellent choice for close-range encounters (of the worst kind!). It has a clear sight picture and you can load a total of 6 rounds, with plenty in your ammo pouch. It is pump action, so be sure to give your gun time to pump between shots. It can also be used to shoot locks on GREEN doors instead of kicking them down. Use this if you have plenty of close corridors in the map and if you will be leading the breach. Compared to the defender’s shotgun, it is quite similar, but the defender’s shotgun does not have a sight. There are only 3 of this weapon, so use it only when you know you have an advantage. Bring full ammo, as it is usually the last thing attackers choose to pickup.
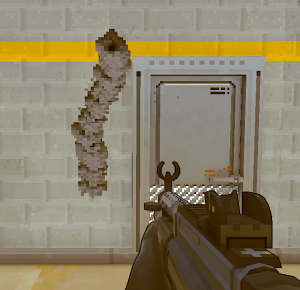
Spray Pattern (No ADS)
AP-25 (aka the SMG)
The Vector-inspired AP-25 is great at close to medium-range engagements. It has that clear sight picture consistent with attacker weapons, and has a mag of 25. It has a high rate of fire with low recoil, and is good for moving while shooting. Use this if your map does not have plenty of long sightlines. There are 10 AP-25’s, so feel free to use them. Bring two mags, as usually that’s the most you’ll need.
Spray Pattern (ADS w/ Sight)

PK-57 (aka the Backup/Pistol)
The PK-57 is a mediocre firearm, designed to be used strictly as a backup. It has a good sight and a mag of 20. Ammo is in high supply, so bring 2 mags. If you’re running the SAB-R, bring 3.
Spray Pattern (ADS w/ Sight)
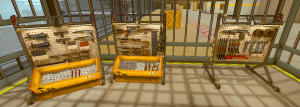
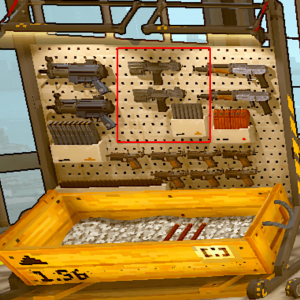
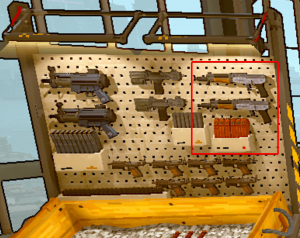
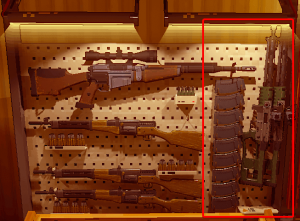
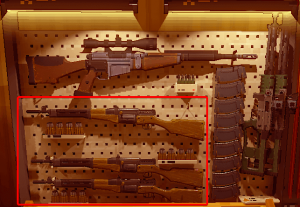
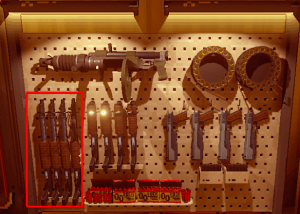
Weapons for Defenders:
Starting from the left
Gruber-5 (aka the MP5)
The Gruber-5 is a good close to medium-range general-use submachine gun. The Gruber has pretty weak body shot damage, but has low initial recoil, making for a good headshot machine. I suggest playing passive with this weapon, being sure to let them come to you. There are two total Grubers but plenty of other attacker weapons that are more powerful. Feel free to pick it up as a first round primary weapon, and bring full mags. 30 rounds per mag. Attackers usually don’t pick this weapon up.
Spray Pattern (ADS w/ Sight)
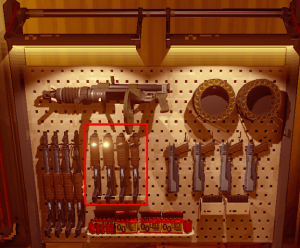
Nack-11 (aka the Bullet Hose)
The Nack-11 is a great ambush weapon as an alternative to a shotgun. It is only viable at close ranges. It has an extremely high rate of fire with insane recoil, making it hard to control. Aiming down sights is somewhat worth it, but if you’re close enough to an enemy (like in his face), you don’t need to. Go for body shots for this one, or aim at the chest and hope the recoil carries to the head. If you can grab a smoke off of an attacker, this is a perfect choice. There are two total Nack-11’s; grab them if the situation calls for it. Coordinate with your teammates to bait enemies into your line of sight, then gun em down. 31 rounds per mag. Bring full mags.
Spray Pattern (ADS w/ Sight)
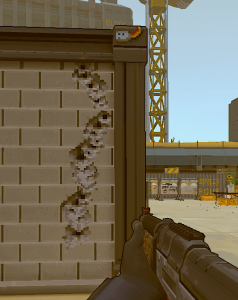
KR82U (aka the AK47U)
One of the best guns in the game. Highly sought after and very deadly. Excellent close to medium range, but terrible sights. Aim for the head and pull down. 30 rounds per mag, bring 2 mags. Try not to die.
Spray Pattern (ADS w/ Sight)
GAT 5
The GAT 5 is a solid pistol with low recoil. It’s an excellent backup when you need to keep on shooting in a gunfight, and does okay damage too. With its 20 round mag, you’ll always be firing. Keep it close to medium range. Aim for the head, and pump em full of lead. Bring 2 mags UNLESS you use a MAWP. Then bring full.
Spray Pattern (ADS w/ Sight)
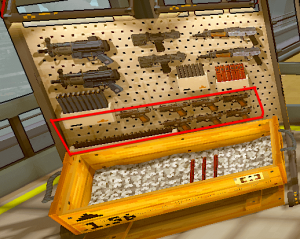
MAWP (aka the AWP)
The MAWP is the AWP. Highest zoom setting in the game, with deadly damage. One shot in the body brings the attackers very low, and a headshot is an instant kill. Only viable at long ranges (unless you’re just nutty). Try to use it as a support to a hold rather than you being the only defender there. Try and peek a window with it at a weird angle at the start of the round. There is only ONE MAWP, and just enough ammo to fill up your pouch. If you’re gonna grab this, hit your shots, don’t die, and bring full ammo. Bolt action, so you gotta load each round manually (takes about 1-2) seconds. Really amazing if you know the opposing team is only gonna come through one way.
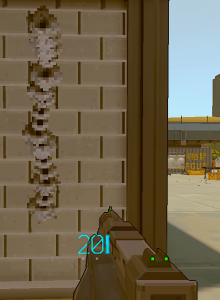
Spray Pattern (ADS w/ Sight) (lol)
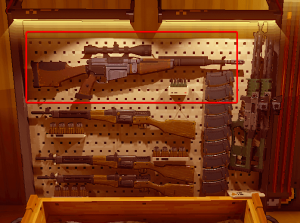
INGMAR 57 (aka the Automatic DMR)
The INGMAR 57 is an excellent counter to the BLK-TAR. It is an automatic DMR with a good rate of fire and 20 round mag. It’s good for medium to long-range. It has a medium rate of recoil. Strong emphasis on precision; two headshots to kill. There are two INGMAR’s, so bring it and use with a decent amount of caution. Bring full ammo.
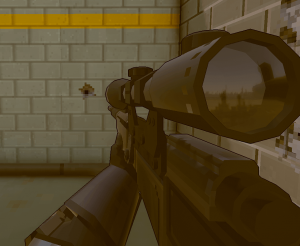
Spray Pattern (ADS w/ Sight)
F1-Legros (aka the DMR)
The F1-Legros is an excellent DMR with iron sights; high emphasis on accuracy with a low-medium rate of fire. Semi-auto with a 10 round mag; medium recoil. There are three of these, so bring it if you think you can aim decently. Try and go for head and you’ll get some easy kills. I recommend bringing full mags, as ammo is plentiful. However, if you think you have a good chance of dying before using it all, bring two mags.
Spray Pattern (ADS w/ Sight)
Auto Shotgun (aka Your Doom)

The Auto Shotgun is superb at area denial and destruction with its fast rate of fire. Lots of room for mistakes, and it’s almost too easy to get multiple kills. Do fast peeks and let the enemy come to you. Automatic fire mode (obviously) with decent recoil. Do NOT let the enemies get this; it’s too good and they will go out of their way to eliminate you. 20 round mag. Bring full ammo.
Spray Pattern (No ADS on left, ADS on right)
TUB 12 Shotgun (aka the Home Defender)
The TUB 12 is a great budget choice for someone being mindful of team resources. It’s great at holding tight angles and getting the first frag. It’s mainly good as an ambush weapon. One good meatshot will be an instant kill. Try and disguise yourself, peek aggressively, and confuse the enemy. Get up in people’s faces and blow them to hell. Bring it when you want and when the situation works for it. Bring full ammo (cuz why not).
Spray Pattern (No ADS)
Super Shotty (aka the Sawed Off)
The Super Shotty is a good secondary weapon for most SMGs. It provides much needed close-range damage if you can use it. Of course, it’s very situational. I find it very difficult to include this weapon in my roster over a pistol. Decent with the MAWP if you hit them with a body shot and they get close enough, but eh. Could not recommend, but feel free to experiment with it. Bring full ammo (you have plenty).
Spray Pattern (No ADS)
LS45 (aka the Worse Deagle)
The LS45 is a mediocre secondary weapon which prioritizes accuracy. It has slightly higher damage in exchange for a much smaller mag size of only 7. I wouldn’t recommend bringing this pistol unless you can hit your shots. Then it’s no problem. It has a medium amount of recoil and is semi-auto. Use it if you are accurate with it. Bring two mags.
Spray Pattern (ADS)
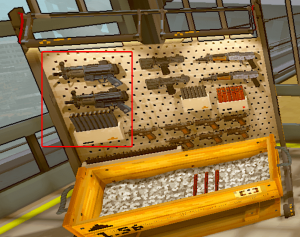
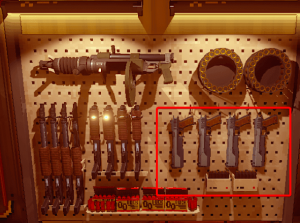
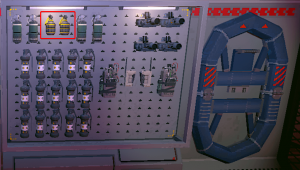
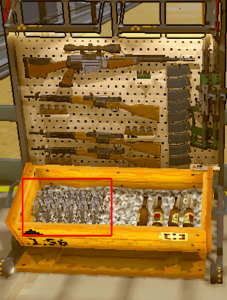
Equipment for Attackers: From Left to Right
Smokes
You have 4. They cover a decently wide area (view image below for an estimation; i eventually want to replace this with an actual smoke in gameplay for more accurate viewing).
They’re great at covering a push, but are clear enough inside to allow both you and enemies to see inside. (put visual here soon)
Use them wisely; also, you throw them a lot shorter than you think. Be sure to throw it plenty far.
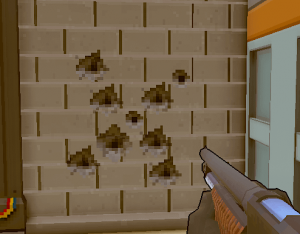
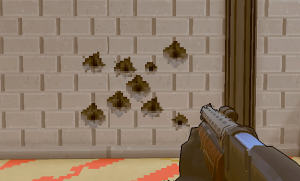
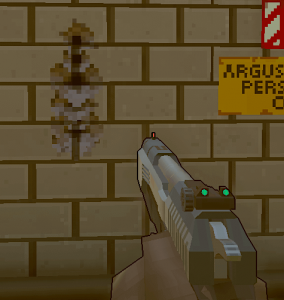
Grenades
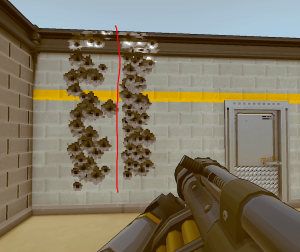
You have 2. They do a ton of damage and can one hit kill enemies if close enough. They’re also kind of hard to spot. If you know an enemy is going to be in a room, chuck one of these in there and they’ll be badly hurt or dead. If you think an enemy is going to put barbed wire on a certain area, consider bringing it to destroy the wire. The nade must detonate the center of the barbed wire (where it was deployed first). Use very wisely.
Flashes
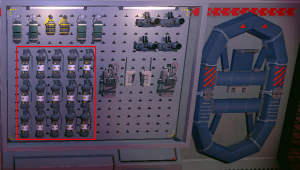
You have 15. They are amazing. As attackers, you take less flash effect vs defenders. Use this mechanic to your advantage and push while they are fully blind. Your flash supply should be empty by the end of halftime (in casual). Try to carry one and use it. Be sure to wait for any molotovs if the enemies try and stop your push with it. Remember: bang before you clear.
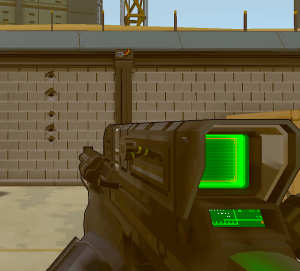
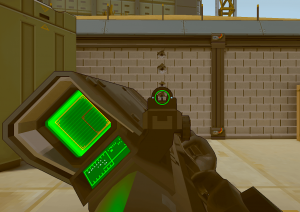
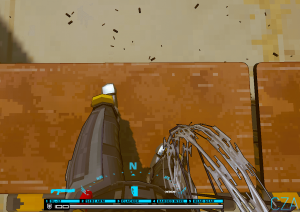
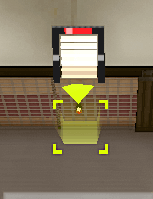
Night Vision Goggles
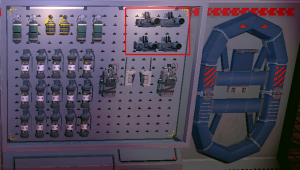
You have 4. If you want to turn off the power, grab one of these. Let the last person use SAB-R, and that sniper support your push as you go further into the building. Use N to toggle the Night Vision on or off, and try not to let the enemies get it, as they can turn off the power as well. Note that anyone can use flashlights as an alternative, but it makes you more visible in the dark and has a shorter range (“T” to turn on your flashlight). Long range is great for attackers using night vision.
Nightvision Effect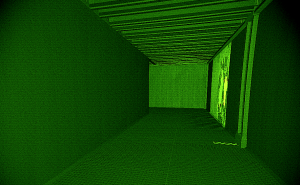
Door Charge and Clackers
Door Charge
Apply it to a RED door. Hit clacker 3 times. Profit.
If you do it on larger openings, like Docks, it’ll open a small crouch-only hole. This can create unfavorable situations for attackers.
Clacker
Works for Door Charges/Wall Charges. Stay within a short range (not too close though, it will hurt.) Click THREE times and it’ll blow up.
Wall Charges
You have 1. Use it only on interior soft walls or specific colored walls (like Docks). For Docks, it creates a hole in the wall you can easily stand up in. It can also be used on regular RED doors if you are out of Door Charges.
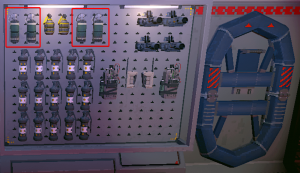
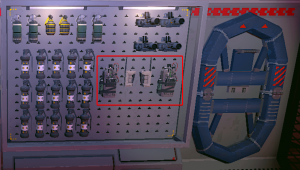
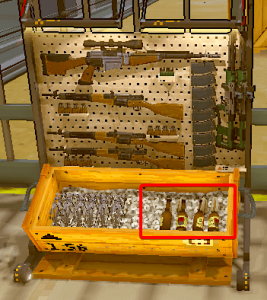
Equipment for Defenders:
Road Flares
You have 3. Use them to illuminate enemies and provide light in darkness. Can be surprisingly good in the right situation.
Barbed Wire
You have 6. Use them wisely. Slows down attackers AND defenders a lot, and is only able to be destroyed by grenades exploding in the center of the barbed wire (where the wire is originally placed). Your aim is to put them in spots that catches attackers in the open, or makes it really not wanna push a certain way. Barbed wire deploys on your FEET, horizontal with whatever you’re looking. If that confuses you, view the images below.
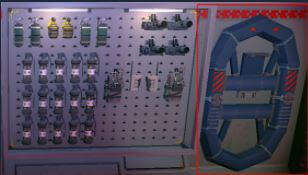
Molotovs
You have 4. Use them even wiser. They can completely stop the momentum of a push or stop a defuse if used correctly. You can also make attackers waste utility. Molotovs are not extinguished by smoke.
Loadouts:
Attackers
Your main weapons should really be the AP 25 and the BLK-TAR. Any long-range fights should focus around the TAR; but budget it wisely amongst your team so you don’t use it all in one round. Assault shotguns apply in really close quarters, or if you are leading a breach in tight situations.
Your equipment should consist of a flash bang. If someone wants to breach a red door, you want to separate the door charge and clacker between people. Therefore, those people will be able to carry a flash if things go bad. Smokes, nades, and nightvision really only apply to specific starts that utilize them.
Defenders
You have a wide variety of weapons to choose from, so try to use the weapon guide for defenders I have given above in order to make the right choice. For a general sense of direction, you only want to use AK (usually) second round or third round. The less chance of attackers getting the AK, the better. MAWP is a third round pick, and I’ll often go for the INGMAR on second round. This all differs on what maps you’re playing on though. My best advice? Experiment. Listen to your teammates, and try to fill roles they need filled.
Equipment varies a lot on the position you’re holding. If you’re holding a long angle with a DMR/Sniper, you may want to put barbed wire on the entrance for whatever room you’re trying to hold. That’ll give you more time for a good shot. For molotovs, as I mentioned before, they are good for wasting utility of defenders (if deployed properly) or allowing teammates to rotate towards you to get ready for the push.
Global Equipment
All players have a flashlight; you can use “T” to toggle it on or off. A warning though, if you are a defender using a flashlight and the attackers have turned off the lights and have night vision, the attackers can easily pinpoint you by the source of your light. They will always be able to see more clearly than you, so be careful where you use it. On the other side, attackers with night vision, once you turn off the lights, do not have anyone on your team use a flashlight, this way you can easily take down attackers just by aiming at the sources of any lights, without the need of checking if they are a teammate.
Match Format and Item Permanence:
Casual Matches
Casual matches are 6 rounds in total, no matter what. Three rounds are spent on defender, three rounds are spent on attacker. There are three maps in rotation, and they are played in the same order for each half. Three rounds makes up a half, and every half items reset. In this game, items are used up, and once they are used up, they aren’t available to your team anymore. You can carry items from round to round, but not across a half. You can pick up any weapon or any equipment you want, provided you have the space for it.
Since items are used up and are not available again (until the teams switch sides), you can make strategies based off of known information. A common situation is if the enemy team has wasted their door charges. If they have, you can avoid watching certain entrances since they cannot go in through that route.
Ranked Matches
To do. If anyone wants to draft up a section for this, if I approve it, I’ll add you as a creator. Until then, this section will stay lackluster, as I haven’t played any ranked.
Ranked matches are based around 9 rounds. There is also a ranking system with ELO, but it is currently unknown how this system properly works. Having 4 skilled players predetermined to queue with is very important for this mode.
Maps:
While all maps are procedurally generated, they do follow specific tilesets. When I say tilesets, I mean a group of tiles that only go on that map. The arrangement and positioning of these tiles are completely random. You can see more details on this in the Areas in Maps section.
I plan on doing this later in the week, as I work on the weekends. For now, I will recommend the official Due Process Wiki: Maps for any of those that are curious. The information there may be outdated, but it gives you a general idea of what to expect on these maps.
Areas in Maps:
This section will be in constant flux. Maps are constantly evolving and changing.
I’m going to try and address themes of certain areas in this section. If you have any suggestions, please comment them down below. While each new map is procedurally generated, you may be able to carry some of these lessons from map to map.
Generator
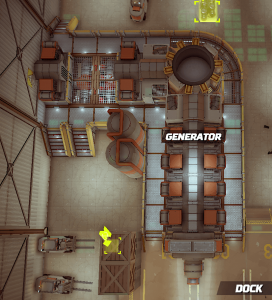
This area is often dominated by long sightlines and catwalks. If you play here, you want to go for a longer ranged weapon.
Second Floor Office
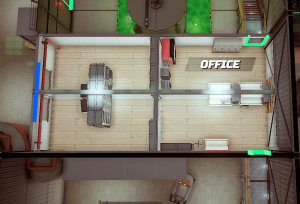
This area only occurs (so far) on maps with Generator on them. You have stairs leading up to this room, and full body windows going out onto the floor. Bring a medium-range weapon to take this, or a shotgun if you plan to avoid the windows entirely. Flash between areas (see the divider? the office is split into two “areas”) in office in case of any campers using a shotgun.
Docks
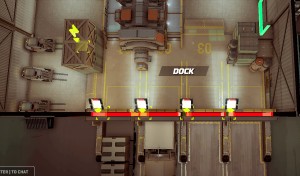
This area only occurs (so far) on maps with Generator on them. You have 2-4 shuttered doors, which can be blown up by wall or door charges. Trucks may block some of the shutters. There are buttons on the other side to open them. If you wish to surprise the attackers, you may want to try opening the shutters yourself. However, this strat is incredibly risky. Otherwise, consider watching from long angles with snipers to pick off the attackers. Additionally, you usually want to have 1-2 people watching this area for a push, as 1 person can be picked off easier by a BLK-TAR.
Toxic
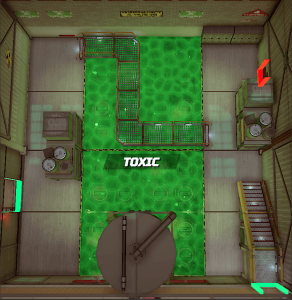
This area only occurs (so far) on maps with Generator on them. Toxic usually contains a red door or fan, and is a very popular breaching site. Often, it is used in occurrence with a storage push. Toxic is very difficult to hold. I suggest placing barbed wire on the catwalk to prevent pushing or to bring a molly instead so you can allow your teammates time to rotate to you.
For attackers, speed is key here. Get across the catwalk as fast as possible and gain control over the room. Toxic also usually has an open green gate (which cannot be closed), so you may wish to smoke that off.
Perch
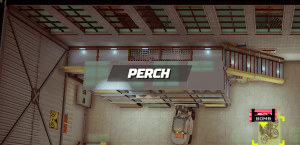
This area only occurs (so far) on maps with Generator on them. Perch is a wet dream for snipers; be ready for a sniper to be there or near there. Attackers, I suggest using smokes to cover your attack on the building from this sniper, and then do a pincer attack to attempt to corner him.
Storage (Generator)
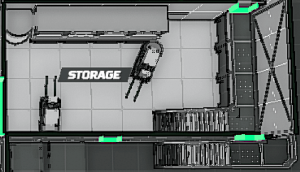
This area only occurs (so far) on maps with Generator on them. Storage is a bad place for defense, with usually two green doors accessible from the outside, resulting in a split push from Attackers. Attackers may push this area in conjunction with another nearby area, such as Toxic. There is not much cover either, usually only a forklift and a corner to hide in. I advise holding this area long-range with a sniper.
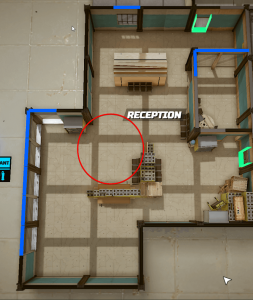
Reception
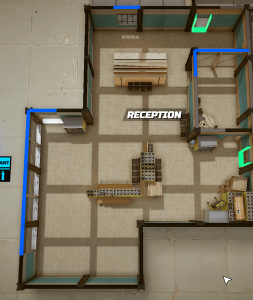
This area only occurs (so far) on maps with Vault on them. Reception is a terrible place to defend, as many windows are easily broken, providing easy entrance to attackers. If you are going to play here, I suggest getting a pick and rotating back to somewhere with more cover.
Kitchen
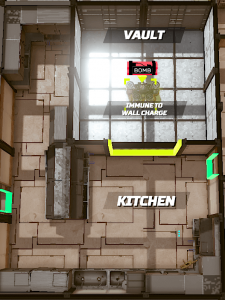
This area only occurs (so far) on maps with Vault on them. Kitchen contains solid cover that is great for defending a push. However, cover is not plenty, so lots of aggressive peeks and movement is encouraged to make the attackers lives more difficult. You may want to put barbed wire on a door here to get some easier frags.
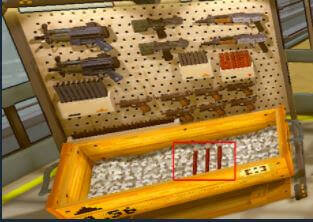
Vault
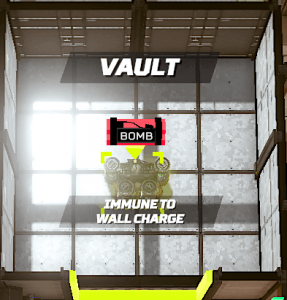
Vault is a site that is immune to wall charges. It is not great to hold in here, as if you don’t hit your shots immediately you will be punished. Common starts including pressing the shutter button (located somewhere on the map, as seen below:)
and letting someone just chill in there until enemies gain control of the rest of the map. Sort of a last stand type of deal. Otherwise, I would recommend just protecting the button and pathways to the button. Waste their time as much as possible, since they HAVE to press the button.
Office (Storefront)
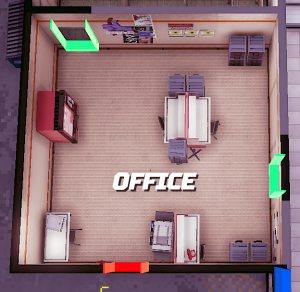
This area only occurs (so far) on maps with Storefront on them. Office contains little cover. If you want to hold here, shotguns and jumpshots are your best friend. You can stand on top of the desks, but it may rarely pay off for you. You will be flashed.
Bathroom
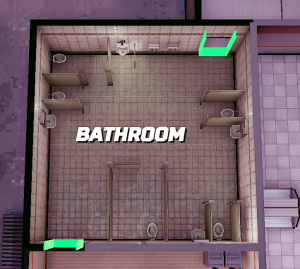
This area only occurs (so far) on maps with Storefront on them. Bathroom’s stalls are openable, and it is common to stand on the toilet for a nasty angle. Don’t be afraid to shoot through these doors, as they are easily penetrable. Be ready for those heads peeking up above the stalls.
Lockers (Vault)
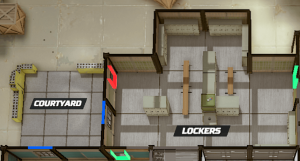
You can stand on the benches of Lockers in order to peek above them (I think). This room is usually located next to Courtyard, so don’t be afraid to play more passively here. SMGs recommended.
Freezer
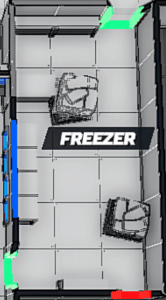
This area only occurs (so far) on maps with Storefront on them. Freezer is an area that has a cold particle effect on it, decreasing visibility. One room it is connected to (usually Storefront) will have freezer doors facing it. You can shoot through these freezer doors to frag enemies, and even clear out the shelves to walk through them, resulting in alternate pathways. While inside Freezer, it is easier to see out the Freezer doors rather than in them. This isn’t a for sure fact though, but I have an easier time when I’m in Freezer looking out.
Teller
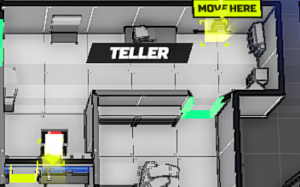
This area only occurs (so far) on maps with Storefront on them. Teller contains the button for the shutters for Storefront, which can result in interesting mixups depending on how you use it. Teller’s glass facing Storefront is bulletproof, including the door. The door cannot be kicked in. It is great for intel gathering on enemies if they push through Storefront.
Storefront
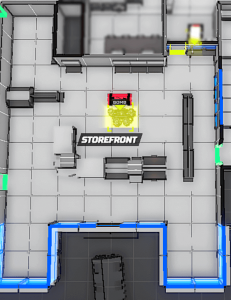
Storefront has windows on the front of it with openable shutters. The button for shutters is always located in Teller. You can breach Storefront with a wall charge by breaching the front doors. You can note the position of the front doors by looking for where the blue line is very thin on Storefront. (It’s in the middle directly under the bomb for this site). Sometimes, Storefront will have a skylight accessible by stairs. The skylight is almost always on the center of Storefront. This skylight is notated by blue color, the same as other glass.
Miscellaneous
These are some important tips and tricks that don’t fit anywhere else in this guide.
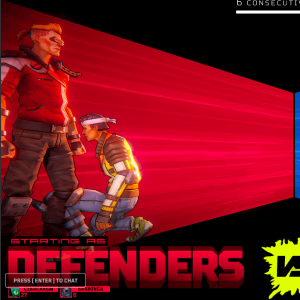
Intimidate your opponents in the loading screen.

As a Defender, the UAV actually encompasses the map, and can fire upon you from anywhere. You can die while in Storefront if you stand too close to the windows (if they are broken and shutters are open). Pretend it’s like the Sun and you’re a vampire, but the Sun that comes through the ceiling doesn’t actually count.
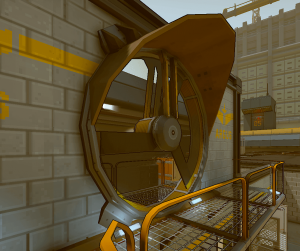
Spinning fans can and will hurt you (it’s currently disabled right now but it won’t be in the future).
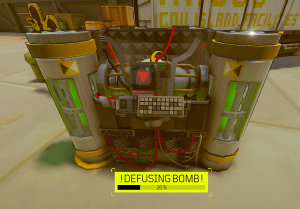
The bomb saves your progress on the defuse. You can stop it, and resume it at any time. If you want to scavenge for supplies, get the bomb to around 95%, and then scavenge. The bomb also takes 10 seconds to defuse.
Additionally, even if the bomb explodes, you will still keep your weapons, no matter what side you are on.
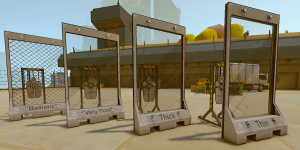
There are multiple different thicknesses of glass.
Apart from this guide, if you want us to cover any other guide related to the game “Due Process” do let us know in the comment section. We’re happy to do that for our readers. We’ve also covered few more guides related to this game, kindly check the related posts section below.
Written by: czarchasm