This weapon is considered by many as the beginner’s weapon and some also say that it can only be properly handled by a veteran but both opinions are correct as the weapon’s potential comes from the wielder’s flexibility in battle.
The Sword and Shield allows you to access an arsenal of tools while slashing and defending against monsters which controls the flow of battle to your favor without worrying to sheath your weapon, preventing you from being more vulnerable.
This guide will list down all the strongest weapons of every weapon tree has to offer, then provide the multiple attacks you can do while wielding the Sword and Shield with some pro’s and con’s of how effective the Sword and Shield is in your hunts.
Also Read Below The Other Sword & Shield Guides
Note: If you are on Mobile device swipe table to the left to see the below full table information completely.
Sword and Shield Trees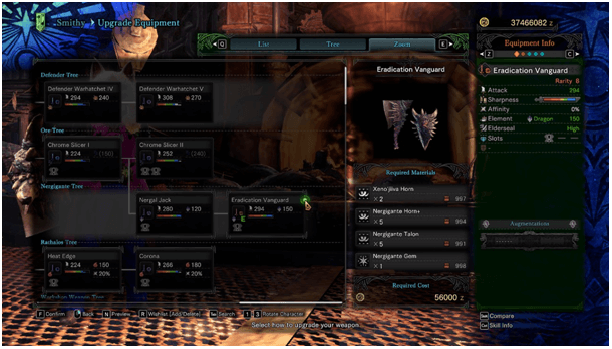

Defender
Weapon Name | Attack | Materials Required | Affinity | Element | Elemental Damage | Slot |
Defender Warhatchet V | 308 | Immortal Dragon Scale x1 | 0% | Blast | 270 | 0 |
Ore
Weapon Name | Attack | Materials Required | Affinity | Element | Elemental Damage | Slot |
Hunter’s Knife III | 140 | Earth Crystal x2, Machalite Ore x2, Iron Ore x 5 | 0% | None | 0 | 0 |
| Steel Knife III | 196 | Carbalite Ore x8, Dragonite Ore x5, Dragonvein Crystal x2 | 0% | Sleep | (120) | 1 |
Chrome Slicer II | 252 | Elder Dragon Blood x2, Fucium Ore x13, Carbalite Ore x20, Firecell Stone x1 | 0% | Sleep | (240) | 2 |
Nergigante
Weapon Name | Attack | Materials Required | Affinity | Element | Elemental Damage | Slot |
Eradication Vanguard | 294 | Xeno’jiiva Horn x2, Nergigante Horn+ x5, Nergigante Talon x5, Nergigante Gem x1 | 0% | Dragon | 150 | 0 |
Rathalos
Weapon Name | Attack | Materials Required | Affinity | Element | Elemental Damage | Slot |
Flame Knife II | 196 | Rathalos Scale x6, Rathalos Tail x2, Rathalos Plate x1, Inferno Sac x3 | 10% | Fire | 120 | 1 |
Corona | 266 | Azure Rathalos Scale+ x6, Azure Rathalos Carapace x4, Azure Rathalos Wing x3, Rathalos Ruby x1 | 20% | Fire | 180 | 1 |
Workshop Weapon
Weapon Name | Attack | Materials Required | Affinity | Element | Elemental Damage | Slot |
Master Bang | 280 | High Commendation x1, Daora Claw+ x3, Bazelgeuse Talon x3, Wyvern Gem x1 | 0% | Thunder | (330) | 1 |
Water Element
Weapon Name | Attack | Materials Required | Affinity | Element | Elemental Damage | Slot |
Aqua Messer III | 196 | Monster Bone+ x2, Jyuratodus Fang x4, Jyuratodus Shell x3, Gaju Whisker x3 | 0% | Water | 150 | 0 |
Rogue Wave III | 252 | Elder Dragon Blood x3, Jyuratodus Fin+ x6, Jyuratodus Fang+ x5 Wyvern Gem x1 | 0% | Water | 240 | 1 |
Legiana
Weapon Name | Attack | Materials Required | Affinity | Element | Elemental Damage | Slot |
GlacialGrace II | 196 | Paolumu Wing x4, Legiana Claw x4, Legiana Tail Webbing x3, Legiana Plate x1 | 0% | Ice | 240 | 1 |
Legia Rimespire | 224 | Daora Claw+ x2, Legiana Claw+ x5, Legiana Hide+ x3, Legiana Gem x1 | 0% | Ice | 330 | 1 |
Rathian
Weapon Name | Attack | Materials Required | Affinity | Element | Elemental Damage | Slot |
Queen Rapier | 210 | Elder Dragon Blood x3, Rathian Spike+ x5 Pink Rathian Scale x6, Rathian Ruby x1 | 10% | Poison | 180 | 1 |
Royal Rose | 266 | Elder Dragon Blood x3, Rathian Spike+ x5 Pink Rathian Scale x6, Rathian Ruby x1 | 10% | Poison | 240 | 1 |
Paolumu
Weapon Name | Attack | Materials Required | Affinity | Element | Elemental Damage | Slot |
Kulu Arrow III | 182 | Diablos Shell x3, Paolumu Shell x3, Paolumu Webbing x2, Shamos Scale x5 | 0% | None | 0 | 0 |
Lumu Tabar | 238 | Elder Dragon Blood x3, Paolumu Carapace+ x5, Paolumu Scale+ x5 Wyvern Gem x1 | 0% | Blast | (300) | 2 |
Pukei-Pukei
Weapon Name | Attack | Materials Required | Affinity | Element | Elemental Damage | Slot |
Blooming Knife III | 196 | Monster Bone+ x2, Pukei-Pukei Quill x4, Pukei-Pukei Sac x2, Poison Sac x2 | 0% | Poison | 270 | 0 |
Datura Blossom III | 238 | Vaal Hazak Wing x2, Pukei-Pukei Sac+ x4, Pukei-Pukei Wing x6, Bird Wyvern Gem x1 | 0% | Poison | 390 | 2 |
Great Girros
Weapon Name | Attack | Materials Required | Affinity | Element | Elemental Damage | Slot |
Girros Knife | 182 | Diablos Fang x2, Great Girros Fang x3, Great Girros Hood x2, Paralysis Sac x2 | 10% | Paralysis | 150 | 0 |
| Malady’s Tabar III | 224 | Vaal Hazak Fang+ x2, Great Girros Fang+ x5, Great Girros Hood+ x3, Bird Wyvern Gem x1 | 20% | Paralysis | 240 | 0 |
Bone
Weapon Name | Attack | Materials Required | Affinity | Element | Elemental Damage | Slot |
Bone Kukuri III | 168 | Monster Bone M x2, Ancient Bone x1 | 0% | None | 0 | 0 |
| Chief Kukri III | 224 | Monster Keenbone x2, Monster Bone+ x2, Quality Bone x2 | 0% | Paralysis | (180) | 1 |
Grand Barong | 266 | Elder Dragon Bone x4, Monster Hardbone x6, Quality Bone x20, Dragonbone Relic x1 | 0% | Paralysis | (300) | 1 |
Radobaan
Weapon Name | Attack | Materials Required | Affinity | Element | Elemental Damage | Slot |
Spiked Edge II | 196 | Monster Bone+ x3, Wyvern Bonemass x3, Radobaan Oilshell x2, Radobaan Marrow x1 | 0% | Sleep | 120 | 0 |
| Baan Claw III | 266 | Elder Dragon Bone x5, Radobaan Carapace x6, Coma Sac x4, Wyvern Gem x1 | 0% | Sleep | 210 | 0 |
Great Jagras
Weapon Name | Attack | Materials Required | Affinity | Element | Elemental Damage | Slot |
Jagras Edge III | 168 | Monster Bone+ x3, Great Jagras Scale x5, Great Jagras Claw x3, Great Jagras Mane x3 | 0% | None | 0 | 0 |
| Jagras Garotte III | 266 | Vaal Hazak Talon x2, Great Jagras Claw+ x8, Great Jagras Hide+ x6, Nova Crystal x1 | 0% | Water | (360) | 2 |
Thunder Element
Weapon Name | Attack | Materials Required | Affinity | Element | Elemental Damage | Slot |
Thunder Edge II | 210 | Monster Bone+ x2, Tobi-Kadachi Electrode x2, Tobi-Kadachi Membrane x2, Warped Bone x2 | 0% | Thunder | 120 | 0 |
| Lightning Nemesis III | 266 | Elder Dragon x3, Tobi-Kadachi Electrode+ x4 Tobi-Kadachi Claw+ x6, Wyvern Gem x1 | 0% | Thunder | 210 | 1 |
Barroth Tree
Weapon Name | Attack | Materials Required | Affinity | Element | Elemental Damage | Slot |
Carapace Edge III | 224 | Diablos Shell x3, Barroth Claw x4, Barroth Scalp x2, Monster Bone+ x3 | -10% | None | 0 | 0 |
| Barroth Club | 294 | Nergigante Horn+ x1, Barroth Claw+ x5, Barroth Ridge+ x5, Wyvern Gem x1 | -10% | Paralysis | (180) | 2 |
Anjanath
Weapon Name | Attack | Materials Required | Affinity | Element | Elemental Damage | Slot |
Blazing Edge II | 224 | Rathalos Marrow x1, Anjanath Fang x4, Anjanath Nose Bone x1, Anjanath Tail x1 | -20% | Fire | 180 | 0 |
| Gnashing Flammensucher | 294 | Teostra Mane x2, Anjanath Fang+ x6, Anjanath Nosebone+ x2, Anjanath Gem x1 | -20% | Fire | 240 | 0 |
Dragonbone
Weapon Name | Attack | Materials Required | Affinity | Element | Elemental Damage | Slot |
Dragonbone Sword III | 196 | Elder Dragon Bone x10, Brutal Bone x4, Dragonbone Relic x2, Wyvern Gem x1 | 0% | Dragon | 450 | 1 |
Kirin
Weapon Name | Attack | Materials Required | Affinity | Element | Elemental Damage | Slot |
Fulminator | 154 | Kirin Thunderhorn x3, Kirin Hide x3, Kirin Tail x1, Light Crystal x1 | 0% | Thunder | 270 | 0 |
| Thunderbolt Sword II | 224 | Xeno’Jiiva Shell x4, Kirin Azure Horn x6, Kirin Thundertail x3, Novacrystal x2 | 0% | Thunder | 360 | 0 |
Black Steel
Weapon Name | Attack | Materials Required | Affinity | Element | Elemental Damage | Slot |
Blacksteel Sword II | 154 | Firecell Stone x1, Fucium Ore x5, Carbalite Ore x10, Wyvern Gem x1 | 0% | Dragon | 150 | 0 |
| Teostra’s Emblem | 266 | Xeno’Jiiva Soulscale x5, Teostra Horn+ x5 Teostra Claw+ x2, Teostra Gem x1 | 0% | Blast | 240 | 0 |
Xeno’Jiiva
Weapon Name | Attack | Materials Required | Affinity | Element | Elemental Damage | Slot |
Xeno Mabura | 238 | Xeno’jiiva Claw x4, Xeno’jiiva Shell x6, Xeno’jiiva Tail x2, Xeno’jiiva Gem x1 | 15% | Dragon | 270 | 2 |
Deviljho
Weapon Name | Attack | Materials Required | Affinity | Element | Elemental Damage | Slot |
Fatal Bite | 308 | Elder Dragon Blood x5, Deviljho Scalp x2, Deviljho Tallfang x5, Deviljho Gem x1 | -20% | Dragon | 210 | 0 |
Lunastra
| Weapon Name | Attack | Materials Required | Affinity | Element | Elemental Damage | Slot |
Empress Edge “Blaze” | 266 | Research Commission Ticket x1, Lunastra Horn x2, Teostra Horn+ x3, Bazelgeuse Gem x1 | 20% | Blast | 150 | 1 |
Lunastra/Nergigante
Weapon Name | Attack | Materials Required | Affinity | Element | Elemental Damage | Slot |
Empress Edge “Ruin” | 280 | Research Commission Ticket x1, Lunastra Wing x3, Nergigante Horn+ x3 Nergigante Gem x1 | 0% | Blast | 120 | 1 |
Lunastra/Xeno’Jiiva
Weapon Name | Attack | Materials Required | Affinity | Element | Elemental Damage | Slot |
Empress Edge “Styx” | 266 | Research Commission Ticket x1, Lunastra Tail x2, Xeno’jiiva Horn x3, Xeno’jiiva Gem x1 | 10% | Blast | 210 | 2 |
The Witcher
Weapon Name | Attack | Materials Required | Affinity | Element | Elemental Damage | Slot |
Witcher’s Silver Sword+ | 266 | Ancient Leshen Skull x1, Ancient Cursed Bone x4, Ancient Leshen Antlers x2, Leshen Resin x5 | 0% | Dragon | 330 | 1 |
Attacks
Melee attacks can perform combos that do not necessarily improve damage but makes attacks link-up so as to not give monsters openings for counter attacks while building up your damage or status effects while in combat.
Advancing Slash
This can be performed whether your weapon is sheathed or not, this will initiate a forward lunge drawing the Sword from your side while leaping forward making an upper cut slash attack.
Slash Combo
This attack can chain up to 5 attacks and can either go to a Shield Bash or Step Back and Charge Slash then Aerial Slash Leading to a Mount Attack.
Shield Bash Combo
With this attack, you can chain it up to 3 times dealing blunt damage that can KO a monster if you hit them enough times on the head for a KO build-up.
This can also be used in combination with Falling Shield Bash after you hit the ground.
Rising Slash
This attack can be incorporated in many combo patterns which ends the combo with a high arching slash that can reach higher spots like the head, chest or tail areas of monsters.
Draw Item/Slinger
The wielder of the Sword and Shield can reverse their grip with their sword to either use their slinger or consume an item while either their Sword or Shield to be used to react to incoming threats.
Guard

The Blocking stance of the Sword And Shield can deflect monster attacks like the Heavy Shields of the Lances but not as effective on standing ground since hits on the small shield can significantly push back the user, making this shield more of a last resort rather than solid defensive option.
Back Step
This is a Step Back move that can either prepare a Rising Slash or a Charged Slash after gaining a bit of distance from your target.
Round Slash
This attack can loop and chain attacks as a starter or finishing move in the combo set that is quite easy to pull off by slashing and adding a directional command.
Charged Slash

The Charged Slash can be triggered after using a shield combo by using your shield attack after a Back Step.
Once the blade hits a target it will launch the user up to perform a Jumping Slash to deal mounting damage or a Falling Bash with your shield to deal KO damage.
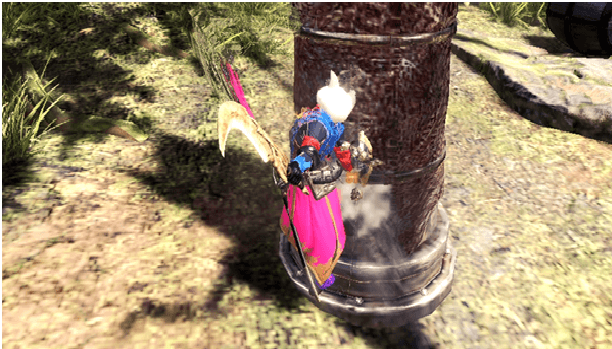
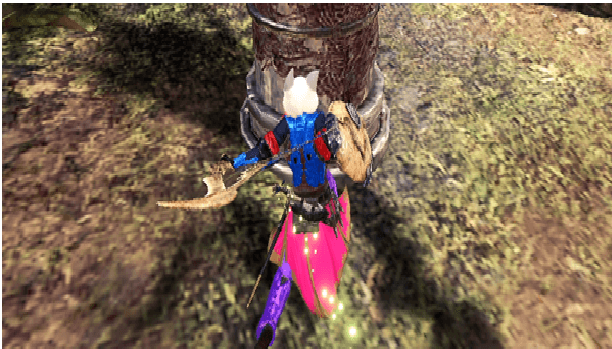
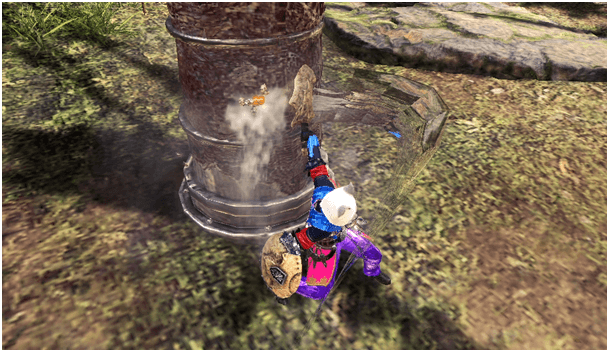
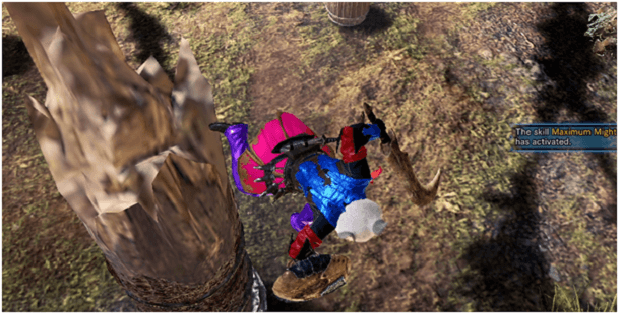
Jumping Slash
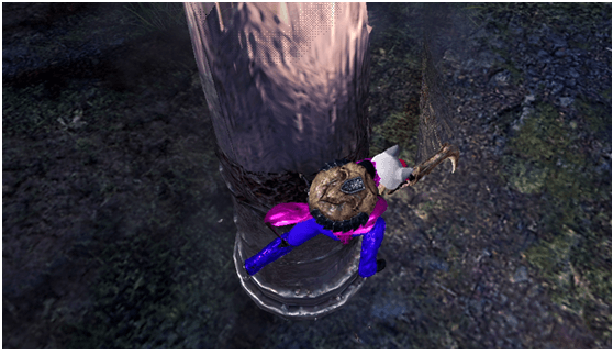
The Jumping Slash can be initiated in 3 ways either from a boost up from the charge slash, jumping off a ledge or from wall-running up the environment, and from slide.
This is also a mounting attack aside from just simply a midair slashing attack that severs tails or to break harder to reach spots.
Falling Bash
This attack can only be done after you are boosted after the Charge Slash combo which allows you to use your shield attack to hit your target with your shield that can deal KO damage but not initiate a mounted attack.
Pros and Cons
Pros
- Fast Movement.
- Able to Block Incoming Attacks.
- Quick to Sheath or Can Use Items while the Weapons is Drawn.
- Can Deal Both Slashing and Blunt KO damage.
- Fast Normal Combo Attacks.
Cons
- Powerful Knock Back after Blocking.
- No High Damage Combos or Heavy Attacks.
- Dependent on Gear and Items to Maximize Effectiveness.
Overview

The Sword and Shield is one of the original weapons of the Monster Hunter franchise which is often overlooked by most due to the different types of weapons to choose from in the game but this carries a lot of the traits which other weapons do not have.
With its standard attack, it can seamlessly combo and chain slashing attacks with the blunt damage of its shield which can be connected to a charged attack that launches the user up to either slash and mount or bash and KO from above.
While wielding the Sword and Shield, the user can reverse the grip of the blade to attack with the slinger, use a potion or set up a trap, while being ready to slash or use the shield to block.
Although not as flashy as other weapons, those that have mastered the Sword and Shield understand that it is “The Jack of All Trades” of weapons, that solely relies on the skills of the wielder in battle to ensure a good hunt.