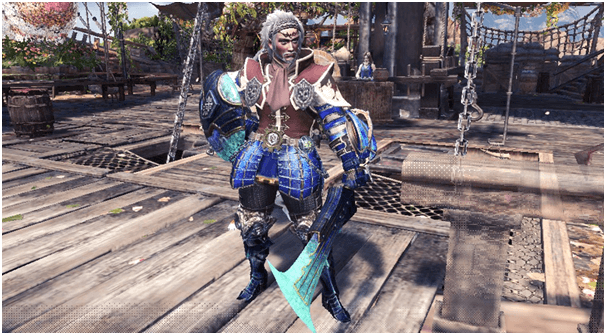
In Monster Hunter World, you will be pitting yourself against ferocious and unforgiving monsters that will bite and claw at anything that disturbs their territory.
A good balance between defense, offense and movement the Sword and Shield sets itself apart from other weapons and wielding this weapon against any monster is a true test of skill and knowledge in battle.
The Sword and Shield provides a wide range of movements while using some of the aspects of other weapons, allowing several actions such as guarding, aerial, slashing and blunt attacks along with simple ranged attacks using the Slinger.
These builds are designed as Gladiators that hunt and fight against powerful beasts, all in the name of sport and survival, the Sword and Shield is certainly a perfect fit for these builds that tests the strength of the weapon along with the skills of the wielder in combat.
Also Read Below The Other Sword & Shield Guides
Note: If you are on Mobile device swipe table to the left to see the below full table information completely.
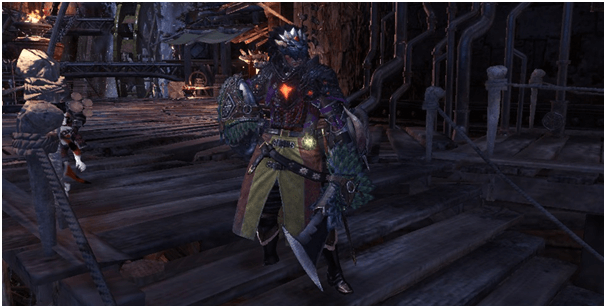
1) Provocatores Sword & Shield Build
A fighter focused on defense the Provocatores build uses multiple skills to maximize defense and also using the shield to block even major attacks, while being fearless against monsters’ roars and keeping balance against tremors that can shake most fighters.
With a focus on high defense and guarding, this build’s offensive capabilities rely on the weapon heavily where there is a need to use the right type of Sword and Shield against your target.
Armor Set
| Info | Head | Torso | Arms | Waist | Legs |
Name | Bazel Helm B | Zorah Hide Y | Zorah Claws Y | Guild Cross Coil B | Ingot Greaves B |
| Jewel Slot | 3-1-0 | 1-1-1 | 3-1-0 | 2-1-1 | 3-0-0 |
Vs. Fire | 3 | 4 | 4 | -4 | 2 |
| Vs. Water | 1 | -3 | -3 | 4 | 3 |
Vs. Thunder | -4 | -1 | -1 | 1 | 0 |
| Vs. Ice | -2 | -2 | -2 | -1 | 1 |
Vs. Dragon | -2 | -3 | -3 | -3 | 0 |
| Base Defense | 58 | 72 | 72 | 64 | 50 |
Skills | Earplugs 2x | Tremor Resistance x2 | Earplugs x2 | Fortify x1 | Defense Boost x2 |
Charms
Defensive Charms
- Stun Charm III – Primary
- Vitality Charm III
- Blessing Charm III
Attack Charms
- Slugger III
- Venom Charm III
- Demolition Charm III
Decorations
- 5x Defense Jewel 1
- 1x Earplug Jewel 3
- 5x Ironwall Jewel 1
- 1x Shield Jewel 2
- 1x Footing Jewel 2
Skills
- Earplugs 5 /5
Skill Effect:Level 5: Nullifies weak and strong monster roars
Blocking off the roars of monsters is more of an offensive skill rather than defensive as monsters roar it can be a great opening to attack monsters.
- Tremor Resistance 3/3
Skill Effect:Level 3: Nullifies minor and major ground tremors
Never getting staggered will keep you on the offensive since it takes a lot of stamina, tiring them out in a futile attempt to try and slam the ground and stagger you.
- Fortify 1/1
Skill Effect:Level 1: Increases attack by 10% and defense by 15% with each use
Being deep into the fight you may get knocked out once or twice in a hunt, actually more of a utility and efficiency skill that makes fainting and restocking yourself with buffs and health again a positive thing.
- Defense Boost 7/7
Skill Effect:Level 7: +10% Defense, Bonus +35 and +5 to All Elemental Resistances
Taking hits is your tactic in combat so you would need to be very tanky in this sense.
- Stun Resistance 3/3
Skill Effect:Level 3: Prevents Stun
Getting ragdolled and kicked around when you don’t expect it can mean death to any hunter so better have insurance that getting hit and taking hits wont get you stunned and killed.
- Guard Up 1/1
Skill Effect:Level 1: Allows you to guard against ordinarily unblockable attacks
Very important skill to have if you can block since it can save you from being in the epicenter or direct line of monsters’ heavy attacks.
- Guard 5/5
Skill Effect:Level 5: Massively decreases the impact of attacks and reduces stamina depletion by 50%
Taking advantage of the simple ability to block is very useful and can mean life and death in the hunt and this skill improves that blocking stance to be significantly more effective in its job taking the hits and surviving them.
Suggested Weapon Options
Datura Blossom III – (Pukei – Pukei Tree) – Poison
High poison status and High damage with a couple of Decoration slots and 3 augmentation slots which can provide much needed improvements to the damage output of the build itself.
Not only effective due to its high poison status it also provides 2-1-0 slots for decorations that are required to make sure all the decorations for the build are in its place.
Empress Edge “Styx” – (Lunastra Tree) – Blast
For some affinity and blast this weapon is great and has 2 high slots for decorations that cover the slot requirements, although it has an innate skill it’s not as effective for this build.
Pros and Cons
Pros
- Very High Defense.
- Able to block every attack except Cataclysmic Meteor.
- Takes little to no damage from blocked attacks.
Cons
- No attack boosting skills
- Low Health
- Requires a Weapon to have 2-1-0 slots to work with the build.
How to Use The Provocatores Sword & Shield Build?
This build relies on the power of your weapon for damage while being able to survive most incoming attacks.
Focus on being under monsters feet or tails to make sure every swing of your sword connects to flesh to build up damage and status procs.
If the monster is enraged try and connect with a charged slash to initiate an aerial slash to mount them and ground them, then focus on attacking weak spots like the head.
Remember to block incoming attacks, tire your opponent out and stand your ground, when the monster is tired go on the offensive.
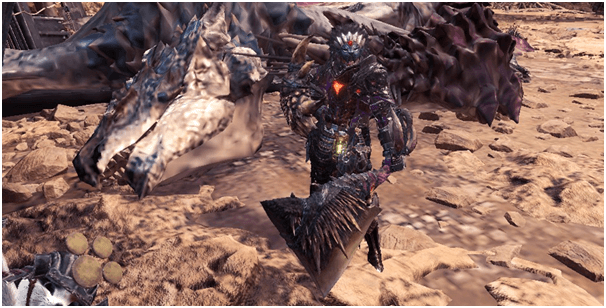
2) Bestiarius Sword & Shield Build
The Bestiarius is focused on offense, much like beast fighters this build lets you be very aggressive against monsters and make them submit to your power.
As a critical build for the Sword and Shield that uses Punishing Draw and Critical Draw skills that provide burst damage along with using status effect weapons to control the battlefield.
Armor Set
Info | Head | Torso | Arms | Waist | Legs |
Name | Odogaron Helm B | Drechen Mail a | Drechen Vambraces a | Odogaron Coil B | Xeno’Jiiva Spurs Y |
| Jewel Slot | 3-0-0 | 3-0-0 | 2-2-0 | 2-0-0 | 1-1-2 |
Vs. Fire | 2 | -2 | -2 | 2 | -3 |
| Vs. Water | 2 | -2 | -2 | 2 | 2 |
Vs. Thunder | -2 | 3 | 3 | -2 | 2 |
| Vs. Ice | -3 | -2 | -2 | -3 | 2 |
Vs. Dragon | 2 | 4 | 4 | 2 | -4 |
| Base Defense | 54 | 72 | 72 | 54 | 72 |
Skills | Bleeding Resistance x2, Odogaron Mastery 1/4 | Soul of the Dragoon 1/4, Critical Eye x2, Critical Boost 1 | Soul of the Dragoon 1/4, Critical Eye x2, Attack Boost x1 | Critical Eye x2, Odogaron Mastery 1/4 | Critical Boost x1 |
Charms
Defensive Charms
- Vitality Charm III
- Blessing Charm III
- Stun Charm III
Attack Charms
- KO charm III – Primary
- Attack Charm III
- Rider’s Charm
Decorations
- 1x Shield Jewel 2
- 3x Draw Jewel 2
- 1x Mind’s Eye Jewel 2
- 1x Critical Jewel 2
- 1x Expert Jewel 1
- 1x Suture Jewel 1
Skills
- Critical Eye 7/7 – Armor/Decoration
Skill Effect:Level 7: +40% Affinity
When it comes to damage builds critical overpowers direct damage increase skills.
- Critical Boost 3/3 – Armor/Decoration
Skill Effect:Level 3: Increases damage dealt by critical hits to 140%
Synergizes well with critical builds increasing damage significantly.
- Critical Draw 3/3 – Decoration
Skill Effect:Level 3: Draw attack affinity +100%
Ensuring a huge burst of damage for drawn attacks.
- Punishing Draw 2/2 – Odogaron Armor
Skill Effect:Level 1: Adds a stun effect to draw attacks and slightly increases attack power
Drawn attacks provide a burst damage mechanic for this build.
- Elemental Airborne 2/2 – Drachen Armor
Skill Effect:Level 1: Elemental damage increased for jumping attacks
Provides a way to deal maximum damage on re-entry from charged slash or from dropping off ledges and sliding down then Making arial slashes as part of your combo sets.
- Slugger 3/3 – Charm
Skill Effect:Level 3: Stun power +40%.
Using your shield to strike your target can stun them and this is a direct improvement to this ability.
- Mind’s Eye/Ballistics 1/1 – Decoration
Skill Effect:Level 1: Prevents attacks from being deflected
Deflected attacks can stagger and won’t deal much damage on monsters with this skill, this can ensure most of your strikes deal maximum damage without the risk of flinching.
- Guard Up 1/1 – Decoration
Skill Effect:Level 1: Allows you to guard against ordinarily unblockable attacks.
Just for a defensive skill to make sure that if you get trapped in the epicenter of powerful attacks you are able to have a chance of surviving them with this skill.
Stat Stick Skills
Effective although can be improved and can’t be removed from the armor set itself this can be tweaked to your personal preference with the build if you wish to modify and incorporate them in it.
- Attack Up 1/7 – Armor
Skill Effect:Level 1: Attack +3
Mostly a stat stick skill that can be improved by replacing the charm on the build to gain level 4 Attack Up: Attack +12 Affinity +5% with the attack charm III
- Bleeding Resistance 3/3 – Armor/Decoration
Skill Effect:Level 3: Prevents Bleeding
Not often used in fight but useful when facing off Monsters that can bleed you out.
Suggested Weapon Options
Malady’s Tabar (Great Girros)
Its passive Affinity and Paralysis works well with damage and control in fights that can improve success and is also great in a team to get in close and apply the status effect.
Eradication Vanguard (Nergigante)
For elder dragon fights with its high damage and some Elderseal this weapon is a good recommendation to use for this build.
Pros and Cons
Pros
- High Affinity for burst damage.
- Control and status effect build.
- Can survive against most attacks.
Cons
- Weakness against Fire and Ice damage.
- Minor Defensive Capabilities.
How to Use The Bestiarious Sword & Shield Build?
With this build you would need to make draw attacks to open your combos, to deal burst damage and gain the advantage in fights.
Your shield is mainly used to inflict KO status or even stagger monsters and although your shield can block all types of attacks, it takes in a lot more damage than other builds that use the shield.
Make passing strikes initiating a drawn slash followed by a short combo, then run and repeat until you can successfully knock them over or lure them into a trap to hack at them.
Use the terrain to your advantage, making drawn slashing attacks after wall running and jumping off short platforms to make full use of your capabilities.
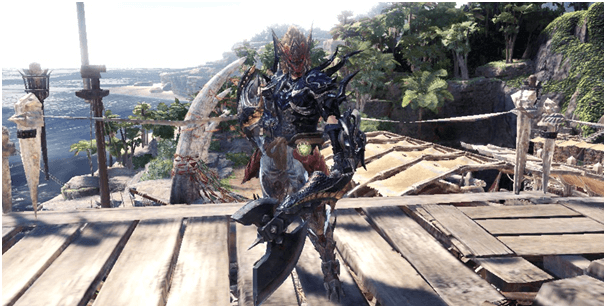
3) Lanista Sword & Shield Build
Designed as a support role, the Lanista is focused on making sure allies are topped off with health and buffs while being able to endure damage like any other fighter on the battlefield that can go on the offensive while monsters are enraged.
High health and stamina to keep yourself alive so that your heals and buffs are provided to your team instead of healing yourself.
Armor Set
Info | Head | Torso | Arms | Waist | Legs |
Name | Guild Cross B | Brigade Suit B | Empress Vambraces Y | Empress Coil Y | Kulve Taroth’s Wrath Y |
| Jewel Slot | 1-1-1 | 2-2-0 | 0-0-0 | 3-0-0 | 3-1-0 |
Vs. Fire | 0 | 1 | 3 | 3 | 4 |
| Vs. Water | 0 | 0 | 1 | 1 | -2 |
Vs. Thunder | 0 | 2 | 1 | 1 | 3 |
| Vs. Ice | 0 | 0 | -3 | -3 | -4 |
Vs. Dragon | 0 | 2 | -2 | -2 | -2 |
| Base Defense | 68 | 52 | 70 | 70 | 72 |
Skills | Divine Blessing x2 | Divine Blessing x1 | Evade Extender 1x, Agitator x2, Lunastras Favor 1/4 | Evade Window x2, Health Boost x2, Lunastras Favor 1/4 | Agitator x2, Heat Guard x1 |
Charms
Defensive Charms
- Glutton Charm III – Primary
- Bulwark Charm
- Evasion Charm III
Attack Charms
- KO Charm III
- Rider’s Charm
- Any Status or Element Up Charm
Decorations
- 1x Challenger Jewel 2
- 5x Friendship Jewel 1
- 1x Vitality Jewel 1
- 1x Protection Jewel 1
- 2x Jumping Jewel 2
Skills
- Agitator 5/5 – Armor/Decoration
Skill Effect:Level 5: While active, grants Attack +20 and increases Affinity by 10%
Your only offensive skill that gives you a chance to deal damage if you don’t need to support.
- Stamina Cap Up 2/2 – Lunastra Armor
Skill Effect:Level 1: Increases stamina cap that allows you to have a maximum of 200 stamina
Dodging and Rolling then running around can be stamina draining in most fights when you need to focus on healing your team rather than healing yourself.
- Wide-Range 5/5 – Decoration
Skill Effect:Level 5: Items affect nearby allies in a much wider radius with full efficacy
Not much to be said with this skill when it comes to support if you play the role wide range is a must have.
- Divine Blessing 3/3 – Armor/Decoration
Skill Effect:Level 3: While active, reduces damage taken by 50%
Survivability is important to this build and this gives you statistically a 50% damage reduction.
- Health Boost 3/3 – Armor/Decoration
Skill Effect:Level 3: Health +50
A higher health pool ensures survivability in fights that deal massive amounts of damage.
- Evade Extender 3/3 – Armor/Decoration
Skill Effect:Level 3: Greatly extends evasion distance
Evading attacks greatly improves your survivability in hunts.
- Speed Eating 3/3 – Charm
Skill Effect:Level 3: Eat food and drink Items 64% faster, and quick use items 38% faster
Healing your team in critical points and ensuring your team’s survival is crucial to the success of the hunt.
- Evade Window 2/5 – Armor
Skill Effect:Level 2: Slightly increases invulnerability window
This works with the back step movement of the Sword and Shield.
- Heat Guard 1/1 – Armor
Skill Effect:Level 1: Nullifies Heat damage.
A few hunters get this skill but when it comes to fights in the elder’s recess or hunting most of the monsters that have fire blight this skill certainly is a must have.
Suggested Weapon Options
Empress Edge “Blaze” (Lunastra)
This weapon is a great support weapon due to its passive skill Guts that prevents you from fainting from an attack that would otherwise kill you.
Baan Claw III – (Radobaan)
When your team needs a breather on the action to sharpen their tools or craft and pick up supplies from base camp this is the tool for the job to knock out monsters for some time.
Pros and Cons
Pros
- High Health
- HIgh Stamina
- Fast Healing
Cons
- Unable to block some attacks
- Low Elemental Defense
How to Use The Lanista Sword & Shield Build?
You would want to focus on your team’s health bars and keep them topped off with health, keeping them alive to ensure that all of you get the maximum offered bounty.
When you don’t need to top off your team’s health, you can engage the monster while they are enraged to take advantage of your Agitator skill.
Use your shield to wait for an attack, then make your counter attack once they are close to you,
Once you get enmity your team can take advantage of this opening to reposition and sharpen or even reload their gear while you keep the monster busy.
Verdict
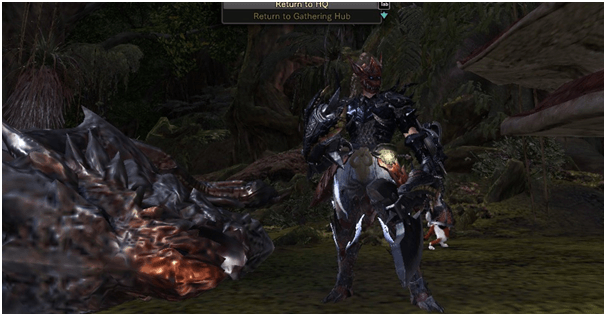
The builds were created to reflect a gladiator theme, since it’s common for gladiators to fight huge beasts while using a Sword and Shield where these builds draw inspiration from.
The Sword and Shield is a great weapon to master, and is a great introduction to melee weapons in general when learning how to position yourself in fights and timing your strikes against your target.
The builds focus on the best types of skills for the Sword and Shield and can be mixed and matched for different play styles or skill levels.
If you have mastered the Sword and Shield or found yourself in a position that you want to feel powerful much like the gladiators that faced monstrous beasts, then may these armaments send you forth to glory in your hunt.
