Often overlooked between the different ranged weapon options, the Bow is quite easy to use but sometimes tricky to master to make use of its full strength.
With the many attacks and different coatings provided along with the Bow, several opportunities reveal themselves depending on the different type of builds.
These builds offer flexibility and focus on certain playstyles which may aid you in your quests which pit you against some of the toughest monsters around.
Also Read Below The Other Bow Guides
Note: If you are on Mobile device swipe table to the left to see the below full table information completely.
1) Armor Piercing Arrows Bow Build

This Build Focuses on piercing tough armor and carapaces of high tier monsters and breaking them off then taking advantage of the weakened areas to maximize damage and effectiveness in combat while staying at a relative distance from your target.
Armor Set
Info | Head | Torso | Arms | Waist | Legs |
Name | Nergigante Helm γ | Nergigante Mail β | Empress Vambraces γ | Kulve Taroth’s Malice γ | Kulve Taroth’s Wrath γ |
| Jewel Slot | 2-2-0 | 2-1-0 | 0-0-0 | 3-0-0 | 3-1-0 |
Vs. Fire | 1 | 1 | 3 | 4 | 4 |
| Vs. Water | 1 | 1 | 1 | -2 | 2 |
Vs. Thunder | -3 | -3 | 1 | 3 | 3 |
| Vs. Ice | 1 | 1 | -3 | -4 | 4 |
Vs. Dragon | -3 | -3 | -2 | -2 | 2 |
| Base Defense | 72 | 64 | 70 | 72 | 72 |
Skills | Stamina Surge x1, Agitator x1 | Satamina Surge x2 | Evade Extender x1, Agitator x2 | Critical Boost x1, Weakness Exploit 1x | Agitator x2, Heat Guard x1 |
Charms
Defensive Charms
- Thunder Charm – III
- Blessing Charm – III
- Ice Charm – III
Attack Charms
- Breaker Charm II – Primary
- Piercing Charm I
Decorations
- 1x Mighty Bow Jewel 2
- 2x Critical Jewel 2
- 1x Destroyer Jewel 2
- 2x Tenderizer Jewel 2
- 3x Slots Lv 1 Empty – Dragon Res Jewel – Optional
Skills
- Agitator 5/5 – Armor
Skill Effect:Level 5: While active, grants Attack +20 and increases Affinity by 10%
One of the most reliable damage increasing skills is the Agitator since more often than not Monsters are angry at you anyway.
- Critical Boost 3/3 – Armor/Decoration
Skill Effect:Level 3: Increases damage dealt by critical hits to 140%
An essential skill for most bow builds to improve the damage output of your weapon.
- Weakness Exploit 3/3 – Armor/Decoration
Skill Effect:Level 3: Attacks that hit weak spots have 30% increased Affinity, with an extra 20% on wounded parts
Synergizes with this build since the focus is breaking and opening up weak spots
- Bow Charge Plus 1/1 – Decoration
Skill Effect:Level 1: Increase max bow charge level by one
Improves directly your damage output by increasing your charge from 3 to 4 charges.
- Part Breaker 3/3 – Charm/Decoration
Skill Effect:Level 3: Part damage +30%
The main part of this build makes monsters more vulnerable to attacks by breaking tougher armored spots exposing weaker areas to your arrows.
- Dragon Res 3/3 – Decoration – Optional Skill
Skill Effect:Level 3: +20 Dragon Resistance and +10 Defense
Directly counteracts the build’s weakness to the Dragon Element.
Stat Stick Skills
Effective although cannot be improved or removed from the armor set itself this can be tweaked to your personal preference with the build if you wish to modify and incorporate them in it.
- Evade Extender 1/3 – Armor.
Skill Effect:Level 1: Slightly extends evasion distance.
A minute improvement to your sliding but still welcome regardless for helping you dodge a wider attack by monsters.
- Heat Guard 1/1 – Armor.
Skill Effect:Level 1: Nullifies Heat damage.
This is Monster and Location specific when it comes to being useful this can negate Lunastra’s area flames as long as they are ignited and Xeno Jiiva’s flames and the lava locations in the Elder’s Recess.
Suggested Weapon Options
Villainous Brace – Deviljho
Simple and effective this weapon is perfect for this build due to its very high damage, dragon element and it’s high Elderseal making it a great tool in synergy with this build against even Arch-tempered Monsters.
Any Other Element Bows
We can’t go on specifics with the other bows that are effective with this build since the design itself works for any Bow like the Flying Kadachi Strike Bow (Thunder) or the Rathslinger III (Fire) and Legia Snow Fletcher (Ice) just to name a few bows that are effective with this build.
Pros and Cons
Pros
- Open build for any Bow to be used.
- Flexible and modifiable build.
- Maximizing the effectiveness of arrows.
Cons
- Non direct skill for improving damage and affinity.
How to Use The Armor Piercing Arrows Build

Going in aggressive is actually the best thing about this build getting in close making quick shots at close range and charged shots at longer ranges.
Remember to dodge and slide when after attacking if they get too close it can sometimes save you from getting trampled by attacks.
This build is good for solo fighters or team hunts, it can rain arrows at monsters breaking away their tougher parts exposing more vulnerable weak spots to make quick work of monsters regardless how many you are hunting in the area.
2) Dragon Piercer Bowman Bow Build

This build focuses on the Dragon Piercer attack that deals massive damage as it passes through monsters accompanied with Dragon Element damage and multiple skills that improve the attack and element damage of the build.
Armor Set
Info | Head | Torso | Arms | Waist | Legs |
Name | Rath Soul Helm β | Rathalos Mail β | Vaal Hazak Braces γ | Xeno’jiiva Spine γ | Xeno’jiiva Spurs γ |
| Jewel Slot | 1-1-0 | 1-0-0 | 2-3-0 | 1-3-0 | 1-1-2 |
Vs. Fire | 3 | 3 | -4 | -3 | -3 |
| Vs. Water | 2 | 1 | 4 | 2 | 2 |
Vs. Thunder | 2 | -2 | 1 | 2 | 2 |
| Vs. Ice | -3 | 1 | -1 | 2 | 2 |
Vs. Dragon | -4 | -3 | -3 | -4 | -4 |
| Base Defense | 56 | 54 | 64 | 72 | 72 |
Skills | Critical Boost x1, Rathalos Power 1/2 | Weakness Exploit x1, Rathalos Power 1/2 | Dragon Attack x3 | Critical Boost x1 | Critical Boost x1 |
Charms
Attack Charms
- Special Shot Charm II
Decorations
- 1x Mighty Bow Jewel 2
- 3x Dragon Jewel 1
- 3x Fire Res Jewel 1
- 2x Pierce Jewel 3
- 1x Tenderizer Jewel 2
Skills
- Critical Boost 3/3
Skill Effect:Level 3: Increases damage dealt by critical hits to 140%
This is statistically better at improving damage overall rather than direct damage modifiers.
- Weakness Exploit 3/3
Skill Effect:Level 3: Attacks that hit weak spots have 30% increased Affinity, with an extra 20% on wounded parts
Improves general affinity ratings on attacks with the Bow increasing critical chances.
- Critical Element 1/1
Skill Effect:Level 1: Increases Elemental Damage (Fire, Water, Thunder, Ice, Dragon) when landing critical hits by 1.35x for Bows
This is to maximize the damage output of your very high elemental attacks.
- Dragon Attack 6/6
Skill Effect:Level 6: +20% Dragon Attack and +100 Dragon Attack
Main damage booster of the build to maximize the Dragon element attack.
- Bow Charge Plus 1/1
Skill Effect:Level 1: Increase max bow charge level by one
Adds another level of charge to maximize damage a bit of overkill but is useful due to the build.
- Fire Resistance 3/3
Skill Effect:Level 3: +20 Fire Resistance and +10 Defense
This is a general improvement especially most of the monsters you will be facing uses fire damage.
- Piercing Shot 2/2
Skill Effect:Level 2: Greatly increases the power of piercing ammo and Dragon Piercer
- Special Ammo Boost 2/2
Skill Effect:Level 2: Increases the power of bowgun special ammo and Dragon Piercer by 20%
These 2 skills improver the damage potential of your Dragon Piercer attack
Suggested Weapon Options
Dragonbone Bow (Dragonbone Tree)
Basically the best recomendable weapon due to its very high Dragon Element damage that can be pushed upwards to 600 Dragon Element with the skills in this build.
Pros and Cons
Pros
- Very High Dragon Element Damage
- Good for most monsters
- Great for Solo or Team Hunts
Cons
- Few customizable parts.
- The user is weak against receiving Dragon Element attacks.
- Less effective against smaller monsters.
How to Use The Dragon Piercer Bowman Build

Focus your attacks with quick shots and arc shots to stagger and exhaust your target while making sure to use Dragon Piercer on openings.
Aim for the head running down to the tail to maximize penetration damage of the Dragon Piercer, forcing the shots to go through the whole monster.
Carry the charge to max and use Dragon Piercer for maximum Damage but don’t be greedy with attacks and try to use a second Dragon Piercer since the attack stance leaves you vulnerable.
3) Fearless Bomber Bowman Bow Build FBB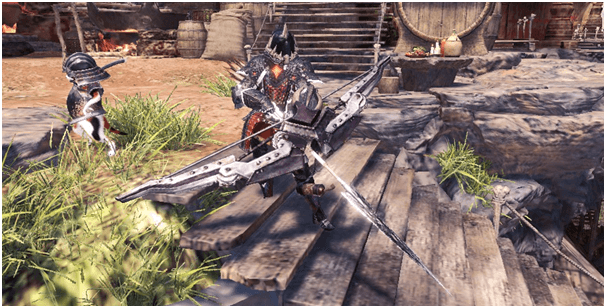

This build will let users do most Bow attacks uninterrupted or using the roars and slams of monsters as openings for attacks that build up Blast Blight on targets, dealing extra damage.
Armor Set
| Info | Head | Torso | Arms | Waist | Legs |
Name | Baan Helm β | Zorah Hide γ | Zorah Claws γ | Kaiser Coil β | Zorah Spurs γ |
| Jewel Slot | 2-0-0 | 1-1-1 | 3-1-0 | 2-0-0 | 3-2-0 |
Vs. Fire | 0 | 4 | 4 | 3 | 4 |
| Vs. Water | 2 | -3 | -3 | -3 | -3 |
Vs. Thunder | 0 | -1 | -1 | 1 | -1 |
| Vs. Ice | 1 | -2 | -2 | -3 | -2 |
Vs. Dragon | 2 | -3 | -3 | 1 | -3 |
| Base Defense | 46 | 72 | 72 | 64 | 72 |
Skills | Tremor Resistance x1 | Tremor Resistance x2, Zorah Magdaros Mastery 1/3 | Earplugs x2, Zorah Magdaros Mastery 1/3 | Blast Attack 2x | Blast Attack x2, Critical Eye x1, Zorah Magdaros Mastery 1/3 |
Charms
Defensive Charms
- Earplugs Charm – Primary
- (Element) Res Charm III
- Blessing Charm III
Attack Charms
- Breaker Charm II
- Exploit Charm II
Decorations
- 3x Critical Jewel 2
- 6x Expert Jewel 1
Skills
- Tremor Resistance 3/3
Skill Effect:Level 3: Nullifies minor and major ground tremors
Most slam attacks offer an opening for attacks since after they slam they stay still for a couple of sec.
- Earplugs 5/5
Skill Effect:Level 5: Nullifies weak and strong monster roars
Much like the tremors Roars are a good opening for attacks.
- Blast Attack 4/4
Skill Effect:Level 4: Blast buildup +30% Bonus: +10
A very favorable status attack when the blast blight takes effect it deals a chunk of damage.
- Critical Eye 7/7
Skill Effect:Level 7: +40% Affinity
Affinity and critical hits that deal damage is higher by a certain percent instead of solid damage.
- Critical Status 1/1
Skill Effect: Level 1: Increases abnormal status effect damage (Paralysis, Poison, Sleep, Blast) when landing critical hits Grants an additional status buildup of 40% on critical hits
Building up Blast Blight faster means dealing huge chunks of blast damage on monsters.
- Mind’s Eye/Ballistics 1/1
Skill Effect:Level 1: Prevents attacks from being deflected. Also shortens the distance before ammo and arrows reach maximum power
Making sure all of your hits builds up the damage is very ideal when fighting monsters.
- Bow Charge Plus
Skill Effect:Level 1: Increase max bow charge level by one.
Improving the charge of your weapons also increases the proc of Blast Blight.
Suggested Weapon Options
Empress Arrow “Blaze” (Lunastra)
With its high Affinity rating and base damage this bow is a great weapon for this build, that also provides a free skill, extra decoration slots and an augment which provides options and customizability to the build.
Defender V (Defender)
A great alternative choice for the build due to its low material cost when crafting and its ok damage and blast element that works with the build even though lacking on affinity and customizability.
Pros and Cons
Pros
- Prevents interruption from most of the monsters disabling attacks.
- Quick and fast attacks
- Improves Weapon Coatings.
Cons
- Low Element Defense
- Ineffective Vs Wind Pressure
How to Use The Fearless Bomber Bowman Build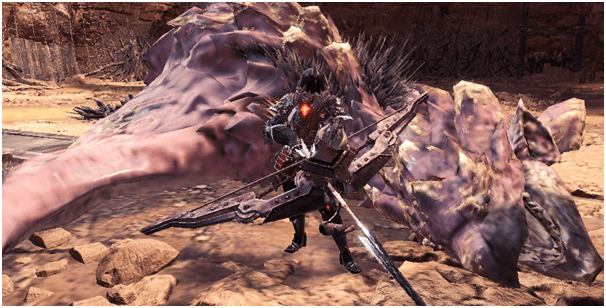

You can be aggressive with this build to make monsters angry, causing them to roar at you and afterwards you may fire your arrows during the time of vulnerability.
Be careful when getting close to winged monsters since they can still apply wind pressure that can make you flinch.
Use the Bow’s slide moves to keep moving even though you are not flinching to compensate for incoming attacks.
Your main source of damage is the blast status effect so make sure you are continuously attacking and building up blast for massive bursts of damage.
Verdict
Overall, the builds make use of all aspects of the Bow from its combos and skills to their carried elemental attacks and status effects.
Each build can improve the effectiveness of a bow and even alter its overall traits to best suit your playstyle and bend fights towards your advantage.
These builds are great for both new and experienced hunters as they can be used on different quests and modified to suit one’s goals during a fight.