- Mission Type: Activity
- Mission Location: Derelict Leviathan
The Nightmare Containment activity is a public event that has players use the Nightmare Harvester to capture the Nightmares aboard the Leviathan.
Being a public event, you will automatically be able to team up with players to complete this if they decide to participate and the other way around.
Completing the Nightmare Containment activity will provide you with several chances at getting different kinds of rewards.
Where is the Nightmare Containment Activity?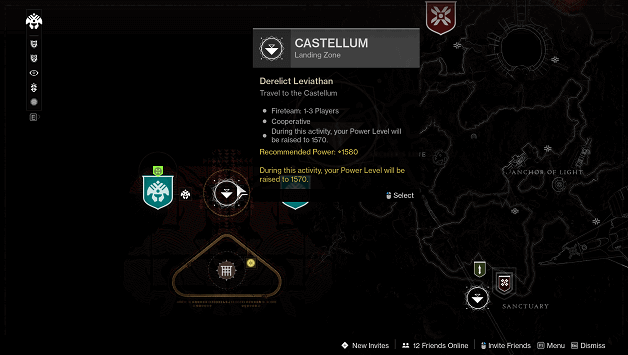

You can find the Nightmare Containment activity in Castellum which is in the Derelict Leviathan, accessible by viewing the Moon in destinations.
Every time you fast travel to Castellum, there will most likely be a different instance where you can start or join the Nightmare Containment Public Event.
Sometimes it is good to fast travel again even if you are already there if there are no players for you to team up with.
How To Start the Nightmare Containment Activity?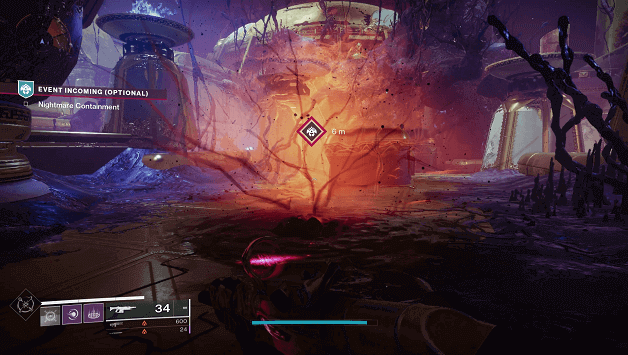
The Nightmare Containment Activity can be started or joined depending on your timing when entering an instance at Castellum.
You will see the Nightmare Containment Icon if the event has not started and may approach it to place a Nightmare Harvester, which will start the event.
If you join a session where the event has already started, simply joining the others will activate the public event for you, even if you just fire a single shot at an enemy involved.
Nightmare Containment Walkthrough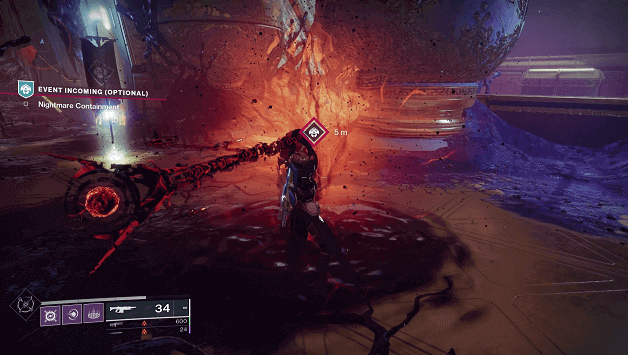
The Nightmare Containment Public Event is broken up into 3 tiers and you must complete these all to get the rewards at the end.
Each of the tiers has objectives which are represented by the diamond shapes under the objectives which fill up as you progress.
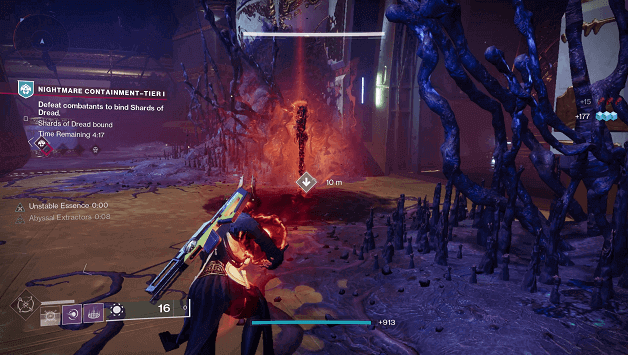
Once the Harvester is placed by either you or another player, the Nightmare Containment will begin, which is done by interacting with the marked location.
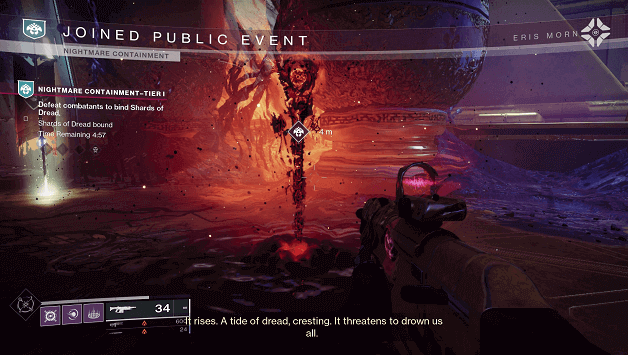
Tier 1
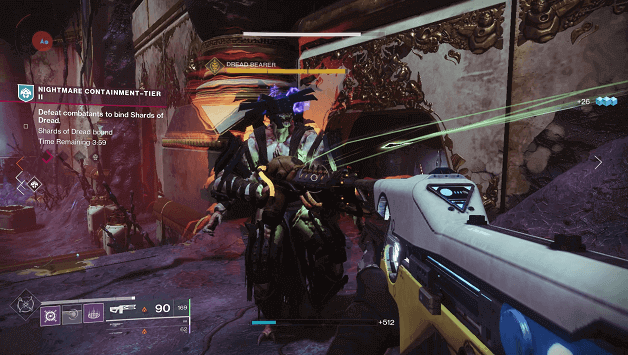
1) Defeat combatants to bind Shards of Dread
After placing down the Nightmare Harvester, enemies will begin to spawn in the area and will make their way toward you.
Defeating the enemies (combatants) will provide you with Shards of Dread which will allow you to progress faster.
You will need to fill each one up to progress to the next Tier and there will be a time limit that needs to be met or else the Nightmare Containment will fail.
Aside from defeating enemies, there will be Dread Bearer enemies that spawn which will drop a Core of dread when defeated. (can be brought to Nightmare Harvester for fast progress)
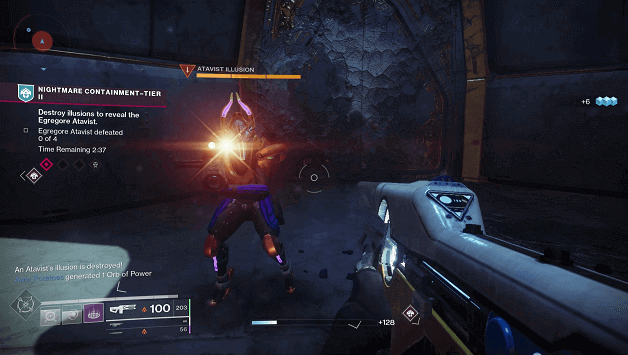
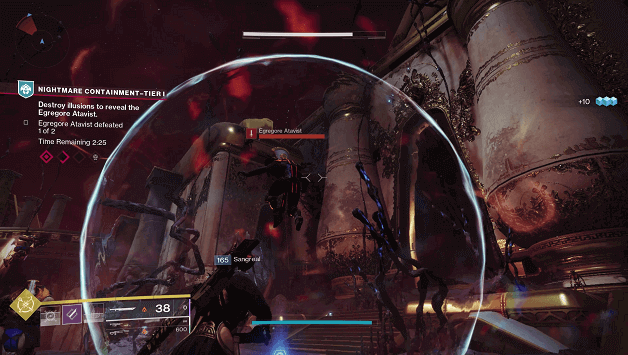
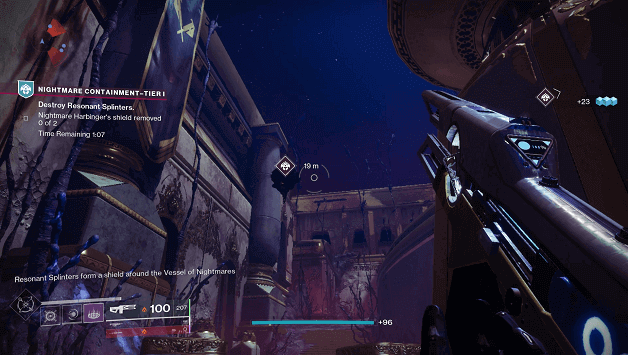
2) Destroy Illusions to Reveal the Egregore Atavist
There will be four marked enemies which are the Atavist Illusions, which you need to defeat to reveal they’re true locations.
You need to defeat 2 Atavist Illusions per Egregore Atavist, and once those illusions are destroyed the real Egregore Atavist will appear nearby.
The Egregore Atavist will be inside a barrier and you will have to go inside to deal damage to it, but they die very quickly.
In total, you will need to defeat 2 Egregore Atavists (not to be confused with the illusions) before you can proceed to the next objective.
3) Defeat combatants to bind Shards of Dread
This is pretty much the same step as the first one, once again you will need to defeat combatants and can also get extra for taking out Dread Bearers and turning in their Dread Cores.
4) A Final Nightmare Rises
The last step puts you up against a boss for Tier 1 and you along with your team will need to focus your firepower to take it down.
Reaching this objective in Tier 1 will add 1 minute to your timer, which should be enough for you and your team if you only had seconds left on the clock.
The boss may become invulnerable after you reduce a portion of its health and you will need to destroy marked shards to remove the invulnerability.
Defeating the boss for Tier 1 will trigger the next Nightmare Containment zone to be detected after around 13 seconds and everyone will need to head there to continue.
Tier 2
Similar to how you would start Tier 1, someone will need to place down a Nightmare Harvester but this time you will only have 1 minute to do so.
1) Defeat combatants to bind Shards of Dread
Once again you will need to defeat combatants but this time it may be a bit tougher and the Dread Bearers now have Ogre Variants.
You still simply need to fill up the progress by getting Shard of Dread as you kill enemies or by turning in the Dread Core from the Dread Bearers.
2) Destroy Illusions to Reveal the Egregore Atavist
Once again you will need to take down the Atavist Illusions to reveal where the Egregore Atavists are but this time you need to defeat 4 Egregore Atavists.
Continue doing the same thing by defeating the Atavist Illusions then enter the Egregore Atavist barrier to damage them.
3) Defeat combatants to bind Shards of Dread
Now if it isn’t pretty obvious what needs to be done by now, that would be weird, so once again you need to kill enemies and turn in Dread Cores to progress with this objective.
4) A Final Nightmare Rises
Once finished with the previous objectives, another boss will spawn in the area again which you and the other will need to defeat.
When the fight with this boss begins, you will once again be given an additional minute of your time to defeat it.
Tier 3
You and the others have another minute to make it to the final containment area which will have objectives different from the previous two.
Tier 3 is different and will be the final encounter during the Nightmare Containment public event, pitting you against a random Nightmare boss.
You will first have to attack the boss to reduce one of its health bars which will cause it to become invulnerable or disappear.
There are two ways to get the boss back to vulnerability or to make it reappear and this also depends on the objectives that come after you deplete a health bar.
Either you will need to destroy Atavist Illusions and the Egregore Atavist once they are revealed or you will need to collect Cores of Dread and deposit them.
Nightmare Containment Boss Rotation Schedule
The Nightmare Containment bosses rotate every week, cycling between one of the three bosses that you may have previously encountered earlier in the game.
The following are the bosses that you may go up against during the Tier 3 part of Nightmare Containment:
- Nightmare of Elykris, The Machinist
- Nightmare of Anaphex, Sworn to Otzot
- Nightmare of Navota, Eir-Spawn
1) Dread Bearers
Dread Bearers are stronger enemies and can be pretty deadly, especially the Ogre variants of them and you will need to deal a lot of damage to take them out.
The good thing about defeating them is they drop Core of Dread, which you can take to the Nightmare Harvester for more progress when you bind Shards of Dread.
Dread Bearers may also spawn during the final boss fight in tier 3 as a side objective to make the boss vulnerable again or to reappear in the area.
2) Core of Dread
The Core of Dread is a pick-up that drops from Dread Bearers and is used to add more progress during the bind Shards of Dread objective.
You will need to collect these during Tier 3 boss fights if the objective requires you to deposit them to make the boss vulnerable or reappear.
Additionally, depositing Core of Dread seems to make the scythe (dreadful blade) weapons appear for you to use during the Nightmare Containment Public Event.
3) Egregore Atavist
The first thing you need to do to make the Egregore Atavists appear is to defeat the Atavist Illusions, which will either be 2 for Tier 1 or 4 for Tier 2.
After you defeat the Atavist Illusions, an Egregore Atavist will appear and you will be able to enter its barrier to take it out.
The Egregore Atavist cannot be damaged from outside of its barrier and you will simply need to walk into it or jump and fire your weapons or do a melee attack.
These enemies die easily and are not much of a pain to deal with, it’s the other enemies around them that are annoying.
Nightmare Containment Tier Bosses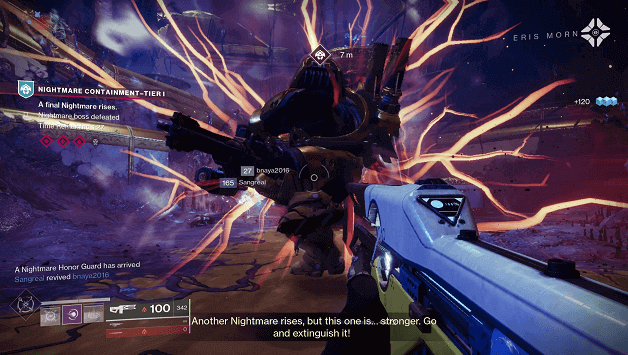
The Tier Bosses that appear will usually have 3 health bars and will fight you for some time while other enemies rush to attack you as well.
As you and the other players continue to fight this boss, it will eventually become invulnerable after part of its health has been depleted.
The shards in the image above will appear and to make the Tier 1 or Tier 2 boss vulnerable again, you will have to destroy them.
Once the shards have been destroyed, you can continue chipping away at the bosses’ health until it is defeated.
Nightmare Containment Rewards
During the Nightmare Containment, you will be able to gather a ton of Vestige of Dread along with random drops from some of the enemies.
At the end of the fight, there will be a Nightmare Containment Chest that contains rewards such as legendary gear, which have a random drop table.
If you have 500 Vestige of Dread, you can bind them at the Nightmare Harvester after the fight for more rewards such as seasonal weapons and armor, Bound Presence, and others.
Bound Presence can later be used during Sever missions to unlock chests for seasonal items.
Tips
- It is best to stick together as a team to easily take out Dread Bearers as splitting up can sometimes waste time if you don’t focus on the same target.
- Keep a look out for the waypoints marking enemies such as the Atavist Illusions or the Shards that need to be destroyed.
- The final boss usually requires you to do an objective every time you reduce a portion of their health, remembering the steps will be a big help.
Summary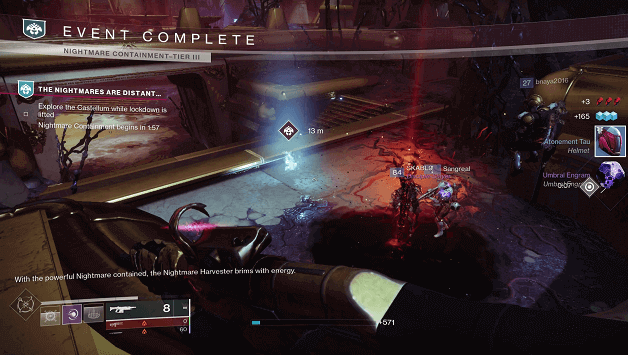
Once you and the others have completed all the tiers, the Nightmare Harvest will be complete and that is one step closer to victory for the Vanguard.
The rewards at the end are worth it, especially if you have Vestige of Dread to bind for goodies along with Bound Presence, which can also be used to redeem rewards.
Nightmare Containment completions are a great way to farm seasonal gear for players who wish to collect Season of the Haunted equipment and other goodies.