- Mission Type: Offensive
- Mission Location: The Reef
- Recommended Power: 1520
The Ketchcrash Offensive mission pits you against enemy pirate captains who are under the command of Eramis and you will need to fight against them while also getting some plunder.
Starting this activity will put you in a fireteam and you will need to work together to complete objectives to fight back against the enemy pirates through different steps.
Ketchcrash Offensive is an excellent way to farm Season of Plunder gear as well as increase your Savvy for rewards later.
How To Unlock Ketchcrash?
The Ketchcrash missions become available once you begin the Ahoy and Aweigh quest, which is the introduction to the activity. Completing the Ahoy and Aweigh quest will allow you to further participate in Ketchcrash missions as much as you like.
Ketchcrash Mission Objectives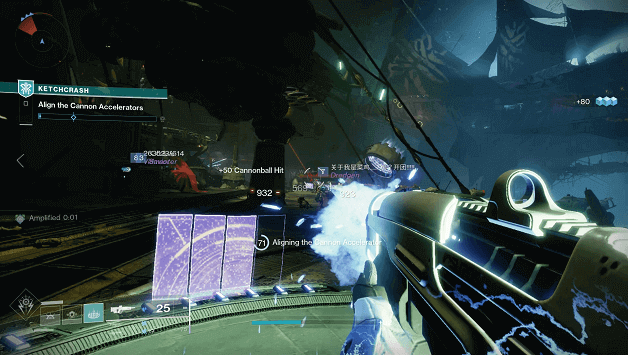

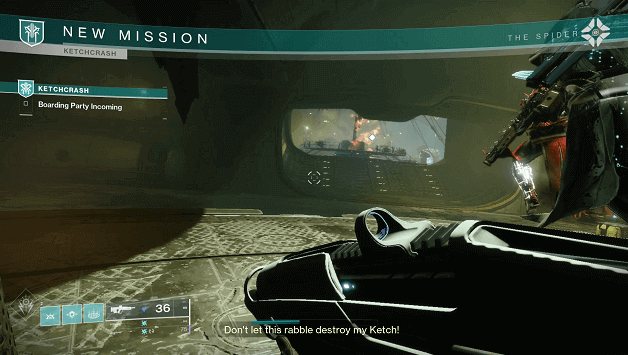
1) Boarding Party Incoming
You will begin from inside the Ketch and will need to head out to the deck where enemy boarding parties will be attacking.
2) Repel the Pirates
As the pirates arrive aboard the deck of your Ketch, you will need to clear them out before progressing to the next phase.
3) Align the Cannon Accelerators
There will be four plates on the deck that will need to be secured to keep your Ketch’s cannons firing and this requires that you stay on them for a short amount of time.
You can either head from one plate to another or split up to cover more in a short amount of time to quickly complete the objective.
Enemies will continue to attack and may even secure plates to stop your cannons from firing, requiring that you defeat them.
A progress bar will be visible showing how much more you need to continue the task to progress to the next phase.
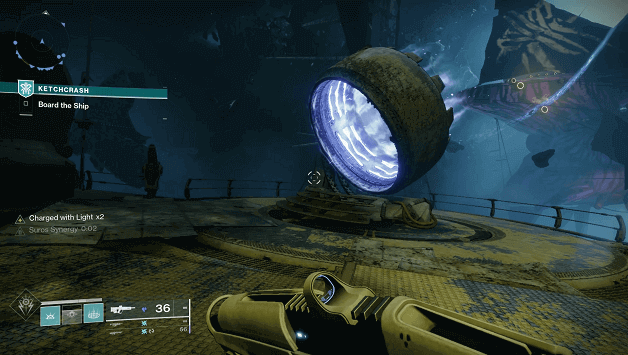
4) Board the Ship
After you have secured the deck of your Ketch, it’s time to head over to the other ship and push your attack against the pirates.
Make your way for the nearby launcher and it will send you flying towards the enemy ship so you can invade them.
Once aboard their ship, push forward making your way towards the waypoint which will lead you to a console that you need to access.
5) Search the Console
As you progress towards the waypoint, you will need to interact with a nearby console that allows you to “Gain Ship Access” to enter the next area.
The next area will be different every time you do a Ketchcrash and each of the objectives will be picked by random.
6) Random Objective 1
The first random objective you encounter will be after you have opened the first console, opening a door that leads to one of the rooms. (See Random Objectives Section below)
7) Head To Captain’s Quarters
After completing the first Random Objective, you will need to make your way towards the Captain’s Quarters, which becomes accessible after a door opens.
8) Clear the Captain’s Quarters
The Privateer of the Ketch you are on will make an escape and you will need to clear out all of the enemies that are in the room to proceed.
9) Search the Console
You will need to interact with the nearby console that becomes marked by a waypoint after all of the enemies have been cleared out.
Another door will open, and this will lead you to the second random objective.
10) Random Objective 2
After leaving the Captain’s Quarters, you will stumble upon another room chosen at random with a specific objective for you to complete. (See Random Objectives Section below)
11) Head to the Bridge
After defeating the Walkers, head to the bridge by making your way to a teleporter which will move you to another area and continue following the waypoint.
12) Use the Console
Reaching the waypoint will put you in front of a console which you will need to interact with to take down a barrier up ahead.
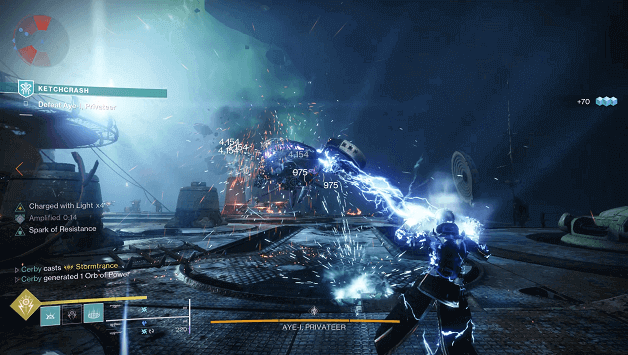
13) Defeat Aye-I, Privateer
Once the barrier is down, you will need to head to the deck and defeat Aye-I Privateer, who will be fighting alongside other pirate enemies.
Every time you take out a part of its health, Aye-I will become invulnerable, and you will need to destroy the Servitors shielding it.
You will need to repeat the process another time after reducing its health again and on its third health bar, you may finally destroy Aye-I.
14) Collect Your Plunder
A chest will appear at the end which you need to open with your Skeleton Key (Season of Plunder artifact), and you can also emote to celebrate with the crew.
Random Objectives
You will encounter two out of three of the Random Objectives that are listed below which may come in a different order.
1) Destroy the Walkers (Maintenance Bay)
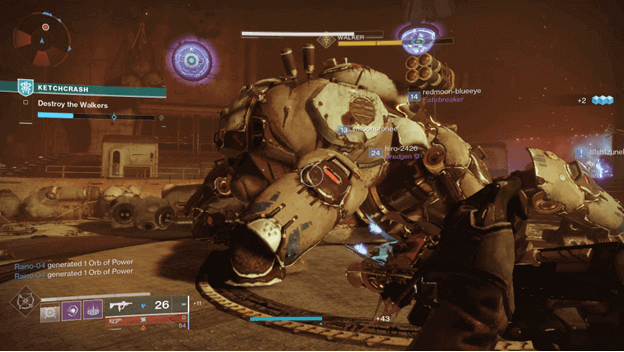
In this objective, you will need to destroy 2 Walkers in the Maintenance Bay but there is a catch, there will be shields that protect them after they take damage.
A Walker will spawn on each side of the Maintenance Bay once you approach the areas, which gives you time to fight them simultaneously or one by one.
To take down the shields, you will need to defeat nearby Scorch Captains to get a Scorch Cannon, which can be used to destroy the Shield Generators.
After taking out all the Shield Generators on one side, the Walker will be vulnerable and may now be destroyed.
2) Destroy the Security Optic (Treasure Hoard)
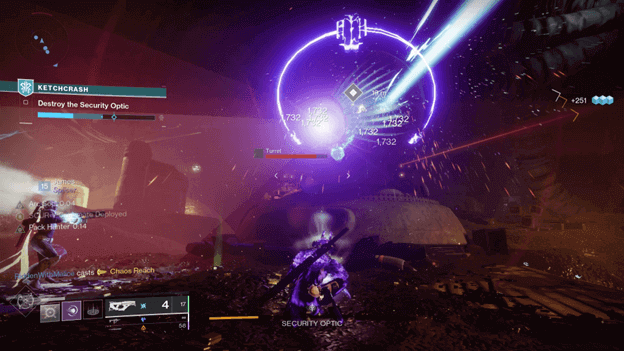
The Treasure Hoard will be guarded by a Security Optic which you will need to destroy but it will be invulnerable until you hack the nearby controls.
There will be multiple controls but only a few need to be hacked (marked by waypoint) and these will have Security Servitors guarding them.
You will need to defeat the Security Servitors to proceed with the hack and afterward, you may damage the Security Optic.
Once the Security Optic has lost half of its health, you will need to hack the controls before being able to fully destroy it.
3) Destroy the Storage Tanks (Ether Storage)
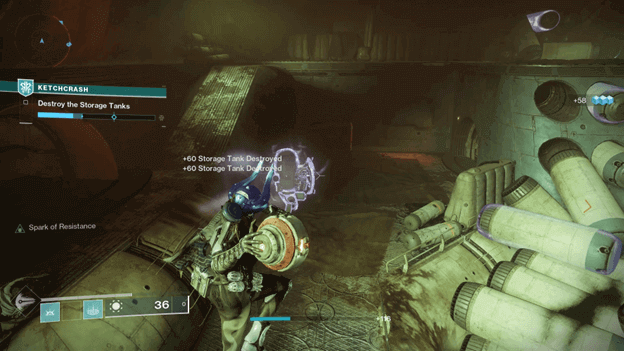
Within the Ether Storage, there will be several Storage Tanks that need to be destroyed but there will also be enemies guarding the area.
You will need to fight the enemies while also destroying the Storage Tanks using Ether Charges that are dropped when you destroy a Gunnery Mate.
Gunnery Mates will spawn from time to time and will drop plenty of Ether Charges for you and your fireteam to pick up.
Once all of the Storage Tanks have been destroyed, all the enemies will stop spawning and you will be able to leave the room.
Ketchcrash Rewards
Completing a Ketchcrash will reward you with Map Fragments, Treasure Coordinates, Glimmer, and a random gear.
Tips
- Avoid letting the enemy pirates take control during the earlier part where you need to align the cannon accelerators to speed things up.
- The faster you can clear enemies, the sooner you can get to the rewards at the end, be sure to bring good gear and focus on the objectives.
- Farming Ketchcrash can earn you Savvy quickly as well as get you the other resources needed for Expeditions.
Summary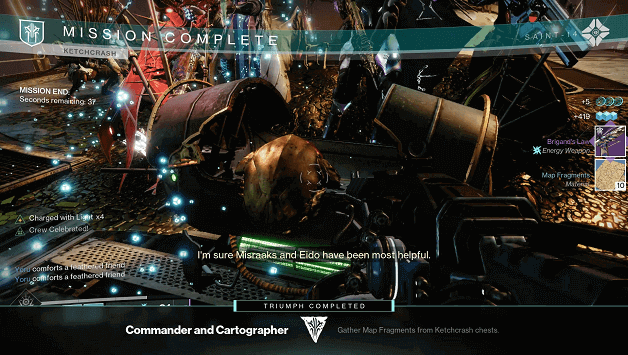
You have not only successfully defended your Ketchcrash against the enemy pirates, but you have also taken out a pirate lord by attacking them back.
With the combined efforts of your fireteam as well as your allies in the crew, another victory is at hand making enemies fear you more.
Continuing to do Ketchcrash missions can get you a lot of gear from Season of Plunder as well as other materials needed for seasonal activities.