Isolation Vault is a type of bounty that allows you to uncover what is hidden below the Isolation Vaults, old ruins beneath the surface of the Cambion Drift which hold secrets hidden for a long time. This bounty is mainly done once you start out on Deimos and allows you to receive several resources along with collecting parts to be used for your Necramech.
Walkthrough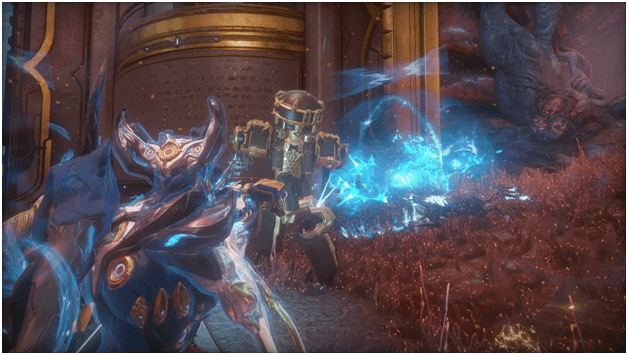

You can start the Isolation Vault bounty by speaking with Mother to initiate the mission once you enter the Cambian Rift. It is also possible to interact with Mother by visiting the spots that she watches over. There are 3 Vaults in total which you may do per cycle.
As you progress, the Isolation Vaults become harder but yield more rewards upon completion of the mission plus the loot you get afterwards. A Vault that has been finished may not be repeated until you exist the Cambrian Rift.
To put it simply, its best to either grind one Isolation Vault, exit and repeat or to do all three Isolation Vaults and extract. Seeking out the different locations Mother is in will allow you to talk to her to start the next Isolation Vault bounty.
Each of the Isolation Bounties has the same process, so picking out a Warframe can handle it is quite easy as you will not need to adjust per run.
Stage 1
You will first need to collect residue which is dropped when cycles occur (Vome and Fass fight, dropping residue) which allow you to collect such residue in certain locations which will be shown on your map. Once you collect enough residue, you will need to take it to the bait station to have it processed.
Vome residue or Fass residue will be acquirable depending on the cycle and will both be usable for the mixing process. You will have to defend the bait station until the process is complete (infested will come attacking you during the process) and afterwards, you may head into the tunnel leading to the vault.
You will need to grab the Concoction created by the bait mixer and bring it along with you, as you will throw it at the sealed section, allowing you to delve into the vault.
Stage 2
Once you go deeper into the infested cave leading to the vault, you will encounter a lot of infested and will need to stabilize the toxicity levels within the area. This is done by killing specific infested that spawn, which will be marked as objectives. You must keep the toxicity from reaching 100% in order to successfully open another closed passage.
Enemies will become stronger as the timer is about to run out, and afterwards, you may proceed further into the next area.
Stage 3
As you approach the area near the inner vault, a Necramech will appear and you will have to destroy it in order to complete the Isolation Bounty, as well as to proceed to enter the vault itself which stores an abundant amount of resources that serves as a great reward aside from the mission completion.
Take note that the more Isolation Vaults you are doing, the more Necramechs will be spawned. This allows players to farm Necramech parts and other valuable resources.
Bonus (Opening Vault)
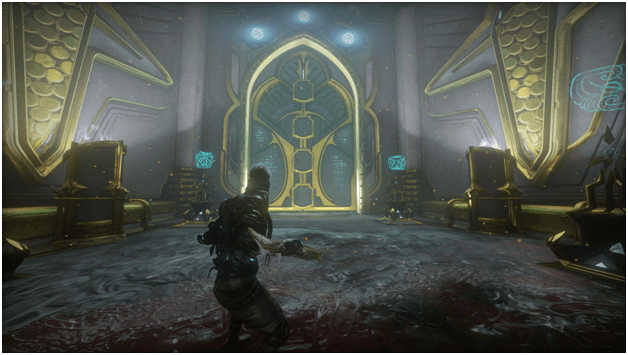
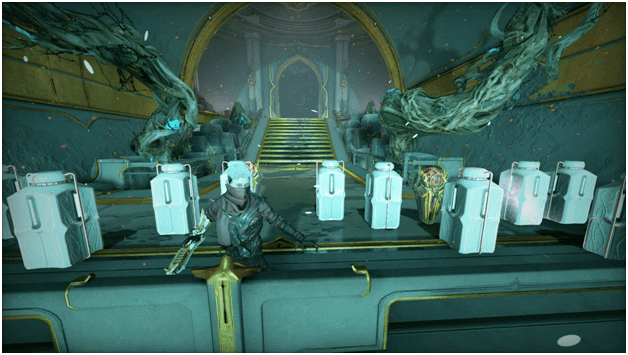
After defeating the Necramech/s, you will be able to leave the area, or you may head deeper inside to look for the Reactive Crystal which opens the inner vault. You usually find this nearby where you have defeated the Necramech, past a long entrance and existing as the only room in an area.
Once you find this vault, Loid will appear and you will need to protect him as he charges up the vault. You will have to defend loid for a short amount of time and afterwards, follow him back to the inner vault.
Once Loid arrives, a memory puzzle will begin, and you will have to memorize the markings on the door and activate them with void damage.
Vault Locations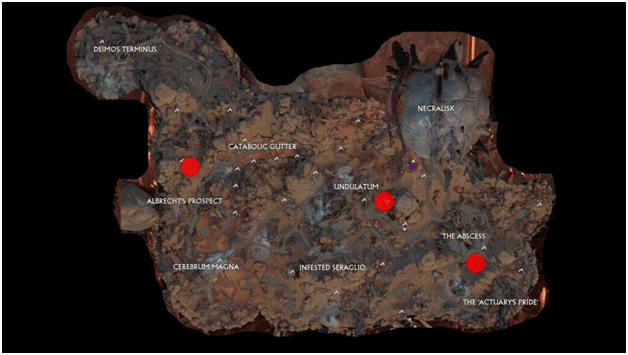
Not all Isolation Vaults are shown unless you are near them. These mark the locations where you can find instances of Mother. Interacting with her will allow you to select missions and the corresponding Isolation Vault for you to complete.
Not all instances of Mother that you find in the Cambian Drift will allow you to do Isolation Bounties and you must interact with the correct ones if you are planning to do all the Isolation Vault bounties. Enemies will become stronger per Isolation Vault.
Current Mother locations for Isolation Vault missions can be found:
- Above “Albrecht’s Prospect”/Left of “Catabolic Gutter”
- To the right of “Undulatum”
- Below “The Abscess”
Vault Rewards
Depending on which Isolation Vault bounty you complete, there will be different rewards (not including the inner vault rewards) and completing each tier will provide the chance to get specific loot. Isolation Vaults will be split into tiers and can be done in any order.
Tier 1 (First Vault)
- Orokin Orientation Matrix x 3 (50%)
- Meso E4 Relic (12.5%)
- Meso N10 Relic (12.5%)
- Meson N9 Relic (12.5%)
- Cabochon Embolos (6.25%)
- Trapezium Xenorhast (6.25%)
Tier 2 (Second Vault)
- Orokin Ballistics Matrix x 3 (50%_
- Neo I2 Relic (12.5%)
- Neo T2 Relic (12.5%)
- Neo T3 Relic (12.5%)
- Neo Z5 Relic (12.5%)
Tier 3 (Third Vault)
- Orokin Animus Matrix x 3 (51.25%)
- Axi B3 Relic (11.25%)
- Axi C5 Relic (11.25%)
- Axi T4 Relic (11.25)
- Damage Necramech Weapon Barrel (5%)
- Damaged Necramech Weapon Receiver (5%)
- Damaged Necramech Weapon Stock (5%)
Vault Storage Rewards
- Ayatan Amber Star
- Ayatan Cyan Star
- Argon Crystal
- Biotic Filter
- Dagonic
- Dendrite Blastoma
- Lucent Teroglobe
- Necrathene
- Orokin Cell
- Pustulent Cognitive Nodule
- Saturated Muscle Mass
- Spinal Core Section
- Sporulate Sac
- Tiametrite
- Void Traces
- Waxen Sebum Deposit
Final Thoughts
Isolation Vaults are great for getting some of the materials that you may need early on when you delve into Deimos and the crafting requirements for the blueprints you get. Some of the rarer items such as Scintillant and Spinal Core Section can easily be obtained to save time farming them.
Those who aim to build their Necramech will need to get used to doing Isolation Vault runs as they will need the parts from the Necramechs or rewards. These bounties also allow you to get Mother tokens, making it a multiple birds one stone scenario.
Using a Warframe that can handle the bounty will allow you to do solo while those who are ill-equipped should probably play with a squad. The average time it takes to do Isolation Vaults is usually around 45 minutes depending on skill, Warframe and squad mates.
Octavia is currently one of the best Warframes to bring as she can stay invisible and use her abilities to damage all the enemies, including the Necramech, which she can kill in seconds with Mallet and Resonator.