- Mission Type: The Witch Queen
- Mission Location: Quagmire, Savathun’s Throne World
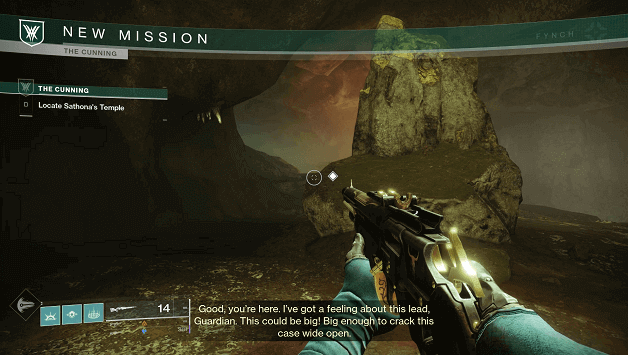
Fynch has a lead and he believes that this hunch will make a huge difference in the battle ahead, leading you to a secret underground temple.
It turns out it was dedicated to Sathona, Savathun’s former self before she was a hive god, which means there could be something of importance.
While Ikora is not convinced due to this being a hunch, you must still venture into the underground temple to see what secrets may exist.
How To Get The Cunning Mission?
You will be able to start The Cunning after speaking with Ikora Rey as you complete Quest Step 9 of The Witch Queen campaign.
The Cunning Mission Objectives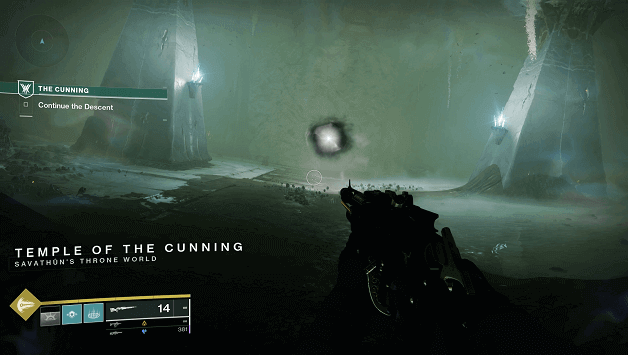

1) Locate Sathona’s Temple
You will be starting in Quagmire and will need to make your way to Sathona’s temple, which is marked by a waypoint.
Continue making your way and you will eventually reach the Temple of the Wrathful, you also need to find your way through a dark area.
Make your way through a dark cave (shoot orange objects to light the area up) and keep going until you enter a room that you need to clear.
Once enemies have been cleared out, you will be able to make your way through an orange portal bringing you deeper into the Temple of the Wrathful.
Keep fighting your way through enemies and make your way towards the next waypoint but be careful because you will be in a no respawn zone.
Once the area is clear, a barrier goes down and you can continue making your way further into the temple while a loot chest also appears.
2) Continue the Descent
Proceed to make your way towards the waypoint and you will find a dead end but an illusion will be nearby and you will need to interact with it.
Glyphs will appear once you interact with the illusion and you will need to shoot all 5 of them to open up a hidden path.
Continue making your way inside the temple and you will encounter another illusion, this time you will need to search for the glyphs scattered and shoot all 5 of them again.
After shooting all glyphs another hidden passage will appear and you will need to continue on your path which leads you to a large hall.
Screebs and other enemies will fill the room so you should stay on high ground and fight your way through the area to jump down to a new path.
3) Forge the Caldera
After jumping down the path, you will need to push on further through more enemies and avoid swinging traps.
There will be more illusions in the area and you will have to interact with them and shoot their glyphs to make a path.
4) Lower the Drawbridge
You will eventually find yourself in an open area and there will be a plate that you need to stand on to lower the drawbridge.
Stay within the area of the plate until the progress reaches 100% while also defending yourself from more Scorn enemies.
5) Reach the Dais
After lowering the drawbridge, make your way towards the statue at the end which is marked by a waypoint.
6) Defeat the Warden
As you reach the statue, a gate will open and Termiks, Invasive Warrant (The Warden Boss) will appear and begin to attack you.
Start fighting the Warden until you have completely depleted all of his health to progress to the next step.
7) Acquire the Worm Familiar
You will need to obtain the Worm Familiar which is being held by the statue but to do so you will have to interact with more illusions.
Fire at the glyphs and continue interacting with the other illusions to form a path that leads you to and unlocks the statue barrier.
Once a path is set and the barrier is down, you can take the Worm Familiar from the statue.
8) Outlast the Illusion
After taking the Worm Familiar, an Ahamkara Illusion will appear (giant monstrous creature) and will begin attacking you.
Use the cover to stay safe from its attacks and aim for the inside of its mouth until you have defeated it but also watch out for enemies it spawns.
When you take out a portion of its health, you will have to fight more enemies before continuing to deal damage to the Ahamkara Illusion.
9) Escape the Caldera
Once you have defeated the Ahamkara Illusion, it will release a suffocating haze in the area which gives you a couple of minutes to escape.
A loot chest will open up nearby and you should grab it before making your escape in the direction of the waypoint.
Follow the waypoint and interact with the illusion to create a path out of the area and you will find Pikes (vehicles) outside.
Hop on a Pike to traverse faster and ride until you reach an elevator at the end, which you will take to reach the surface.
There will be another loot chest once you reach the surface and shortly after some dialogue, the mission will end.
The Cunning Mission Rewards
During the mission, you will be able to collect up to 3 different loot chests which provide Glimmer and some equipment.
Completing the mission will unlock Quest Step 11 of The Witch Queen campaign.
Tips
- You will have enough time to search for the glyphs whenever you activate an illusion but if the time runs out you will have to shoot all of them again.
- The Warden can easily be defeated by using cover and continuously focusing your fire on him as he doesn’t delay much when a portion of his health is reduced.
- Watch out for the Ahamkara Illusion’s attacks as they can be quite deadly, use the cover in the area to stay safe.
- The Ahamkara Illusion attacks in a pattern, allowing you to attack its mouth freely for a short duration after it attacks you.
- Be sure to grab a Pike when you are escaping as it can speed up your pace greatly as you make your way towards the exit.
Summary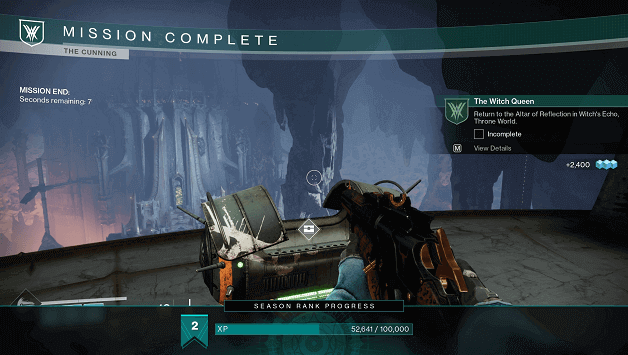
It seems that Fynch was luckily right, even though it was just a hunch and now you will be able to take the Worm Familiar to see what secrets it unfolds.
Although this has been quite the gamble, it seems Fynch has been lucky so far despite Ikora being upset with the huge risk taken.
The Guardian must now use the Worm Familiar and see what secrets lie within by taking it to the Altar of Reflection.