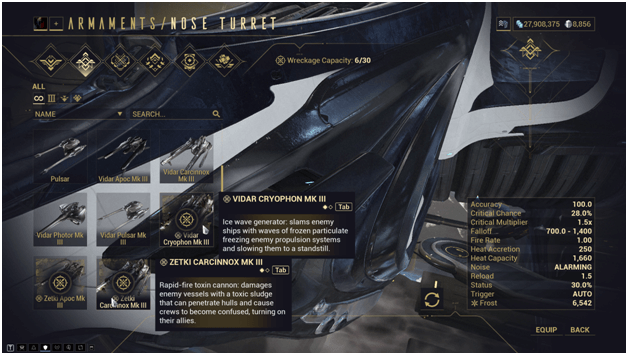
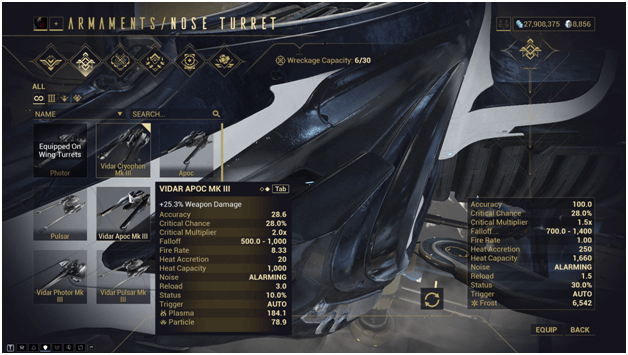
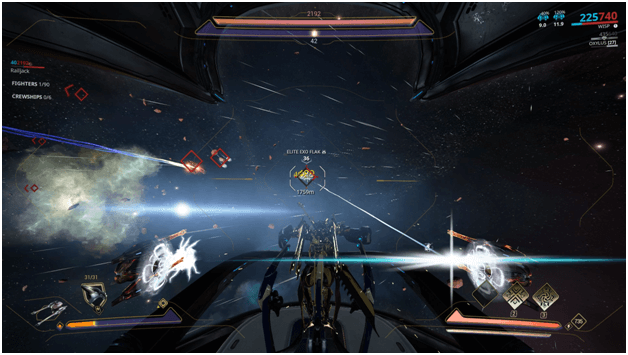
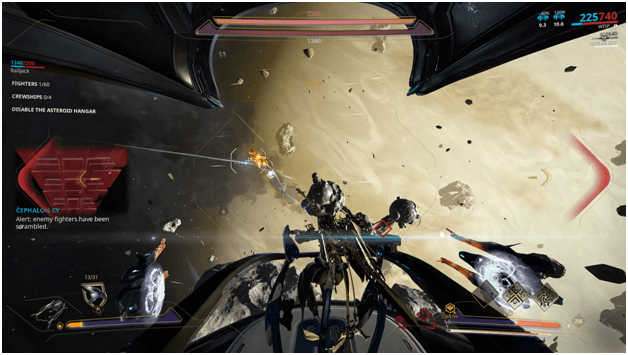
A Railjack would be complete without its Armaments which consist of the Nose Turrets, Wings Turrets and a powerful Ordnance.
You can choose from several weapons and make any combination you want for you and your crew to utilize during battle.
How To get Railjack Armaments?
The only way to obtain the turret Armaments for your Railjack is to either research and craft the basic Sigma variants or to farm for the Lavan, Vidar and Zetki ones.
Crew ships have a chance to drop Lavan and Vidar weapon blueprints while the Elite variants of Outriders have a chance to drop the Zetki variants.
Drops during missions will appear as a purple glowing object which will also be marked on your HUD for you to locate.
Once you have obtained an Armament drop, it will be available for crafting in your Railjack Armaments menu.
Blueprints of MKII and MKIII weapons may vary as there will be an additional fire rate or weapon damage stat as well as the numerical value for whichever stat comes with the blueprint.
Crafting Railjack Weapons
Railjack Armament blueprints that you have will be shown by a covered icon which mean you need to craft them first.
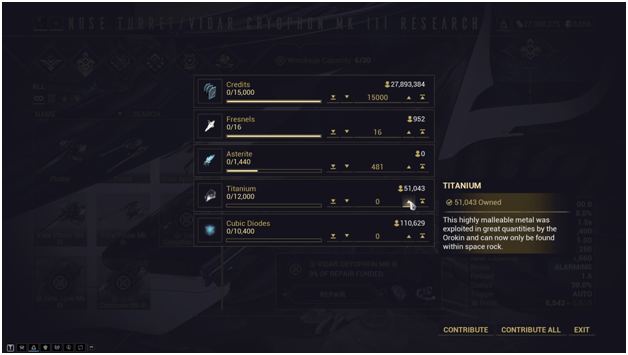
You will need to use resources that are mainly obtainable in the Railjack missions in order to craft each weapon.
Unwanted weapons (except for the default ones) can be scrapped to return half of the resources aside from the rare ones such as Asterite.
Crafting will require 12 hours before the weapon may be equipped but can be sped up by spending 20 platinum.
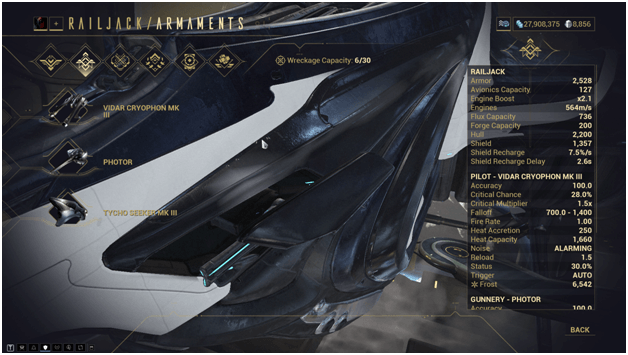
Equipping Railjack Armaments
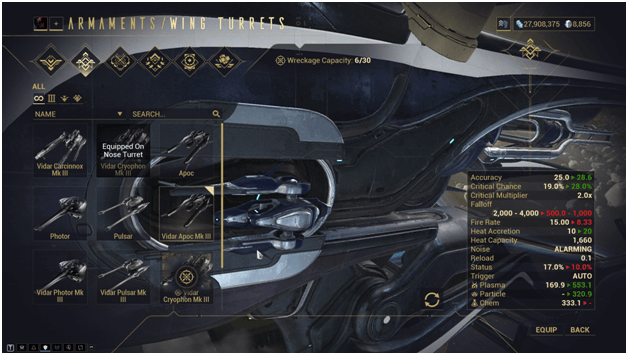
Once you have either researched or built your Armaments, you may equip them in the Armaments menu when accessing the Railjack console in the Drydock.
You can see the weapons stats before and after equipping each weapon and can switch them anytime you want.
Railjack Armament Houses
There are 3 houses aside from the standard Sigma weapons which can be acquired from Railjack missions.
The Lavan, Vidar and Zetki houses have different properties where each one may be better in on area than other and vice versa.
The following are some properties of each house:
- Lavan Weapons– Lower base damage and low heat accretion make the weapons of this house deal low damage but allow successive firing, making it a good choice for status weapons.
- Vidar Weapons– Moderate damage and moderate heat accretion, making it stable among the two houses in terms of damage and the rate of which the weapons heat rises which makes it suitable for both critical and status weapons.
Zetki Weapons– High damage and high heat accretion which are capable of dealing large amounts of damage but shots should be fired accurately and sparingly, making it a better choice for critical weapons.
Railjack Weapon Research
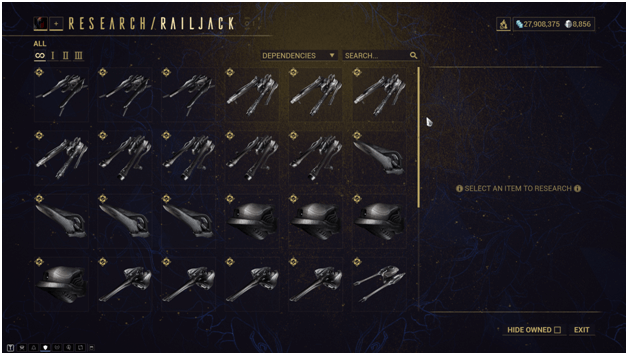
The basic Railjack weapons along with components can be researched at the console in the Drydock which requires an amount of time before each one can be unlocked.
After being researched, you may spend resources to obtain whichever part you want and may immediately equip it on your Railjack afterwards.
Railjack Weapon Status Effects
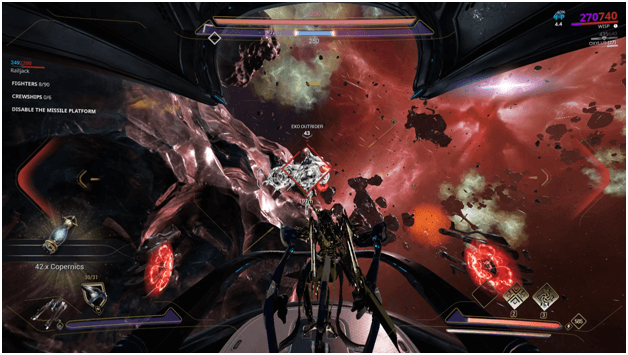
During Railjack missions, the status effects of the different damage types will differ and will either cause enemies to take additional damage, receive additional damage or mess with their functionality.
Archwing weapons will have their damage types converted to the Railjack weapon types during Railjack missions.
- Tear (Particle Damage)
Causes extra damage to be received by affected ship due to holes that have been teared into it.
- Concuss (Ballistic Damage)
Enemy crew becomes concussed, causing their ship/s to have a reduction in both aim and damage.
- Decompress (Plasma Damage)
Excessive damage done to the ship results in hole in shields and armor, reducing the maximum amount.
- Sear (Incendiary Damage)
Projectiles that hit the ship have burned through them, causing them to take damage over time.
- Scramble (Ionic Damage)
Enemies flight controls become scrambled, causing them to lose function and end up flying dead stick.
- Intoxicate (Chemical Damage)
Pilot becomes intoxicated, confusing them which results in targeting and attacking their own allies.
- Immobilize (Frost Damage)
Ship controls become frozen, causing enemies to fly forward until they come to a stop.
Railjack Weapon Stats List
There are 5 different Railjack weapons to choose from which are the Apoc, Carcinnox, Cryophon, Photor and Pulsar.
Each of the weapons have different stats which make them useful depending on your playstyle and the Avionics that your Railjack is equipped with.
All of the weapons have a common reload speed of 3 seconds, a heat capacity of 1,000 and will be alarming whenever fired near enemies.
Apoc
Apoc fires rounds that deal particle and plasma damage with a fire rate of 8.33 and a falloff of 500 – 1,000.
Armament/Tier | Accuracy | Critical Chance | Critical Multiplier | Heat Accretion | Status | Particle | Plasma |
Apoc | 40 | 10% | 2x | 20 | 5% | 15.9 | 37.1 |
| Apoc MK I | 40 | 10% | 2x | 20 | 5% | 28.8 | 67.2 |
Lavan Apoc MK I | 50 | 10% | 2x | 20 | 7% | 28.8 | 67.2 |
| Vidar Apoc MK I | 28.6 | 14% | 2x | 20 | 5% | 28.8 | 67.2 |
Zetki Apoc MK I | 66.7 | 15% | 2x | 80 | 5% | 43.2 | 100.8 |
| Apoc MK II | 40 | 14% | 2x | 20 | 7% | 49.2 | 114.8 |
Lavan Apoc MK II | 50 | 14% | 2x | 20 | 10% | 49.2 | 114.8 |
| Vidar Apoc MK II | 28.6 | 20% | 2x | 20 | 7% | 49.2 | 114.8 |
Zetki Apoc MK II | 66.7 | 21% | 2x | 80 | 7% | 73.8 | 172.2 |
| Apoc MK III | 40 | 20% | 2x | 20 | 10% | 78.9 | 184.1 |
Lavan Apoc MKIII | 50 | 20% | 2x | 20 | 14% | 78.9 | 184.1 |
| Vidar Apoc MKIII | 28.6 | 28% | 2x | 20 | 10% | 78.9 | 184.1 |
Zetki Apoc MKIII | 66.7 | 30% | 2x | 40 | 10% | 118.5 | 276.5 |
Carcinnox
Carcinnox rapidly shoots rounds that deal chemical and plasma rounds which has a fire rate of 15 and a falloff of 2,000 – 4.000.
Armament/Tier | Accuracy | Critical Chance | Critical Multiplier | Heat Accretion | Status | Plasma Damage | Chem Damage |
Carcinnox | 28.6 | 6% | 2.0x | 10 | 8.% | 14 | 16 |
| Carcinnox MK I | 28.6 | 6% | 2.0x | 10 | 8% | 13 | 41 |
Lavan Carcinnox MK I | 40 | 6% | 2.0x | 10 | 12% | 13 | 41 |
| Vidar Carcinnox MK I | 25 | 9% | 2.0x | 10 | 8% | 13 | 41 |
Zetki Carcinnox MK I | 50 | 6% | 2.0x | 30 | 12% | 20 | 61 |
| Carcinnox MK II | 80 | 9% | 2.0x | 10 | 12% | 23 | 69 |
Lavan Carcinnox MK II | 40 | 9% | 2.0x | 10 | 17% | 23 | 69 |
| Vidar Carcinnox MK II | 25 | 13% | 2.0x | 10 | 12% | 23 | 69 |
Zetki Carcinnox MK II | 50 | 9% | 2.0x | 30 | 18% | 34 | 104 |
| Carcinnox MKIII | 80 | 13% | 2.0x | 10 | 17% | 37 | 111 |
Lavan Carcinnox MKIII | 40 | 13% | 2.0x | 10 | 24% | 37 | 111 |
| Vidar Carcinnox MKIII | 25 | 19% | 2.0x | 10 | 17% | 37 | 111 |
Zetki Carcinnox MKIII | 50 | 13% | 2.0x | 20 | 26% | 55 | 167 |
Cryophon
The Cryphon shoots out a powerful blast that deals frost damage which has a slow fire rate of 1 shot per second along with a falloff of 700 – 1,400.
Armament/Tier | Accuracy | Critical Chance | Critical Multiplier | Heat Accretion | Status | Frost Damage |
Cryophon | 100 | 10% | 1.5x | 250 | 15% | 900 |
| Cryophon MK I | 100 | 10% | 1.5x | 250 | 15% | 1620 |
Lavan Cryophon MK I | 100 | 10% | 1.5x | 250 | 21% | 1620 |
| Vidar Cryophon MK I | 100 | 14% | 1.5x | 250 | 23% | 1620 |
Zetki Cryophon MK I | 100 | 10% | 1.5x | 400 | 23% | 2430 |
| Cryophon MK II | 100 | 14% | 1.5x | 250 | 21% | 2754 |
Lavan Cryophon MK II | 100 | 14% | 1.5x | 250 | 30% | 2754 |
| Vidar Cryophon MK II | 100 | 20% | 1.5x | 250 | 21% | 2754 |
Zetki Cryophon MK II | 100 | 14% | 1.5x | 400 | 32% | 4131 |
| Cryophon MK III | 100 | 20% | 1.5x | 250 | 30% | 1,959 |
Lavan Cryophon MKIII | 100 | 20% | 1.5x | 250 | 42% | 1,959 |
| Vidar Cryophon MKIII | 100 | 28% | 1.5x | 250 | 30% | 1,959 |
Zetki Cryophon MKIII | 100 | 20% | 2.0x | 400 | 45% | 2,939 |
Photor
The Photor shoots out a continuous laser that deals incendiary and plasma damage to enemies with a fire rate of 12 and a falloff of 2,500 to 5,000.
Armament/Tier | Accuracy | Critical Chance | Critical Multiplier | Heat Accretion | Status | Incendiary | Plasma |
Photor | 100 | 7% | 2.0x | 10 | 7% | 22 | 8 |
| Photor MK I | 100 | 7% | 2.0x | 10 | 7% | 40 | 14 |
Lavan Photor MK I | 100 | 7% | 1.5x | 10 | 10% | 40 | 14 |
| Vidar Photor MK I | 100 | 10% | 2.0x | 10 | 7% | 40 | 14 |
Zetki Photor MK I | 100 | 11% | 2.0x | 40 | 11% | 62 | 20 |
| Photor MK II | 100 | 9% | 2.0x | 10 | 9% | 70 | 22 |
Lavan Photor MK II | 100 | 9% | 1.5x | 10 | 13% | 70 | 22 |
| Vidar Photor MK II | 100 | 13% | 2.0x | 10 | 9% | 70 | 22 |
Zetki Photor MK II | 100 | 14% | 2.0x | 40 | 14% | 104 | 34 |
| Photor MK III | 100 | 12% | 2.0x | 10 | 12% | 112 | 36 |
Lavan Photor MKIII | 100 | 12% | 2.0x | 10 | 12% | 166 | 36 |
| Vidar Photor MKIII | 100 | 17% | 2.0x | 10 | 12% | 166 | 36 |
Zetki Photor MKIII | 100 | 18% | 2.0x | 40 | 18% | 166 | 56 |
Pulsar
The Pulsar fires extremely accurate bursts which immediately hit their targets, dealing plasma and ionic damage and has a fire rate of 7.41 along with a falloff of 3,000 – 6,000.
Armament/Tier | Accuracy | Critical Chance | Critical Multiplier | Heat Accretion | Status | Plasma | Ionic |
Pulsar | 100 | 6% | 2.0x | 10 | 9% | 10 | 30 |
| Pulsar MK I | 100 | 6% | 2.0x | 10 | 9% | 18 | 54 |
Lavan Pulsar MK I | 100 | 6% | 2.0x | 10 | 13% | 18 | 54 |
| Vidar Pulsar MK I | 100 | 8% | 2.0x | 10 | 9% | 18 | 54 |
Zetki Pulsar MK I | 100 | 6% | 2.0x | 40 | 14% | 27 | 81 |
| Pulsar MK II | 100 | 9% | 2.0x | 10 | 13% | 31 | 92 |
Lavan Pulsar MK II | 100 | 9% | 2.0x | 10 | 19% | 31 | 92 |
| Vidar Pulsar MK II | 100 | 13% | 2.0x | 10 | 13% | 31 | 92 |
Zetki Pulsar MK II | 100 | 9% | 2.0x | 40 | 20% | 46 | 139 |
| Pulsar MK III | 100 | 13% | 2.0x | 10 | 19% | 81 | 132 |
Lavan Pulsar MKIII | 100 | 17% | 2.0x | 10 | 27% | 81 | 132 |
| Vidar Pulsar MKIII | 100 | 24% | 2.0x | 10 | 19% | 81 | 132 |
Zetki Pulsar MKIII | 100 | 17% | 2.0x | 20 | 29% | 100 | 220 |
Railjack Ordnance Stats List
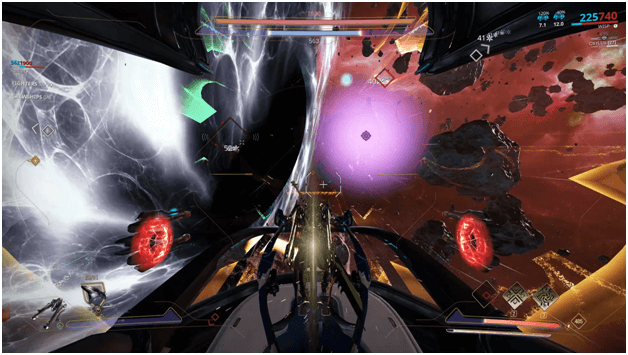
The Railjack Ordnance is a powerful weapon which requires munitions to fire but in return the damage deal is capable of clearing out several enemies or even taking out crew ships.
There are 3 different Ordnances to choose from which are the Galvarc, Milati and Tycho Seeker.
Galvarc
The Galvarc fires out an incendiary beamthat latches on to 3 enemies in front of the Railjack, dealing continuous incendiary damage to all of them.
Has a fire rate of 12 and reload speed of 5 seconds.
Ordnance/Tier | Accuracy | Critical Chance | Critical Multiplier | Status Chance | Incendiary |
Galvarc | 100 | 0% | 2.0x | 10% | 375 |
| Galvarc MK I | 100 | 0% | 2.0x | 20% | 675 |
Galvarc MK II | 100 | 0% | 2.0x | 26% | 1188 |
| Galvarc MK III | 100 | 0% | 2.0x | 30% | 1901 |
Milati

The Milati lets loose a barrage of rockets to where the Railjack is targeting, hitting any unfortunate enemies that are locked on or in the trajectory of the miniature rockets, dealing blast damage to enemies that are hit.
Has a fire rate of 1 and reload speed of 5 seconds.
Ordnance/Tier | Accuracy | Critical Chance | Critical Multiplier | Status Chance | Blast |
Milati | 10 | 10% | 2.0x | 0% | 10800 |
| Milati MK I | 10 | 20% | 2.0x | 0% | 19440 |
Milati MK II | 10 | 26% | 2.0x | 0% | 33048 |
| Milati MK III | 10 | 30% | 2.0x | 0% | 52884 |
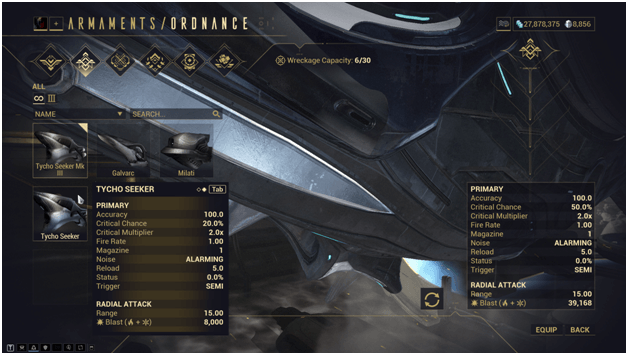
Tycho Seeker
Fires a large rocket to where the Railjack is facing and will home in on an enemy if locked on before fired, dealing a large amount of blast damage to the target and an area around it.
Ordnance/Tier | Accuracy | Critical Chance | Critical Multiplier | Status Chance | Range | Blast Damage |
Tycho Seeker | 100 | 20% | 2.0x | 0% | 15 | 8000 |
| Tycho Seeker MK I | 100 | 30% | 2.0x | 0% | 15 | 14400 |
Tycho Seeker MK II | 100 | 40% | 2.0x | 0% | 15 | 24480 |
| Tycho Seeker MK III | 100 | 50% | 2.0x | 0% | 15 | 39168 |
Tips
- Test the basic weapons to get a feel for which weapons best suits you before purchasing/repairing the higher tier Armaments that you get from missions.
- Reaching MKIII is the key to being able to take on higher enemies and farm in the Veil Proxima so it is important to save up for the weapon you want that is in that tier.
- Be sure to check the bonus stats of weapons to make sure it will go with your playstyle and will benefit your weapon.